
I absolutely adore making this Pull-Apart Garlic Bread Recipe because it delivers the perfect combination of rich, buttery garlic flavor and soft, pillowy bread that practically melts in your mouth. From the moment you start slicing into these golden, cheese-studded loaves, you’re met with an irresistible aroma that promises comfort and deliciousness in every bite. This recipe isn’t just garlic bread; it’s an experience that’s perfect for sharing and elevates any meal.
Why You’ll Love This Pull-Apart Garlic Bread Recipe
What really makes this Pull-Apart Garlic Bread Recipe stand out to me is the incredible balance of flavors woven through the bread. The blend of fresh garlic, fragrant rosemary, and bright parsley in a generous amount of melted butter creates a savory explosion that’s complemented by the subtle nuttiness of parmesan cheese. Every pull-apart piece is coated with just the right amount of garlic butter that adds richness without being overwhelming. It’s a flavor profile that’s both comforting and sophisticated, perfect for garlic lovers like me.
Aside from the taste, I love how straightforward this recipe is despite sounding fancy. You don’t need to be a bread-baking pro to succeed here. The dough is forgiving and rewarding—a beautiful soft bread that bakes up golden and perfectly textured. Plus, assembling the dough balls in layers with garlic butter and parmesan feels genuinely fun and satisfying. I find myself making this bread for family dinners, weekend gatherings, and even casual weeknight meals when I want something special without fuss. It’s truly a crowd-pleaser every time.
Ingredients You’ll Need
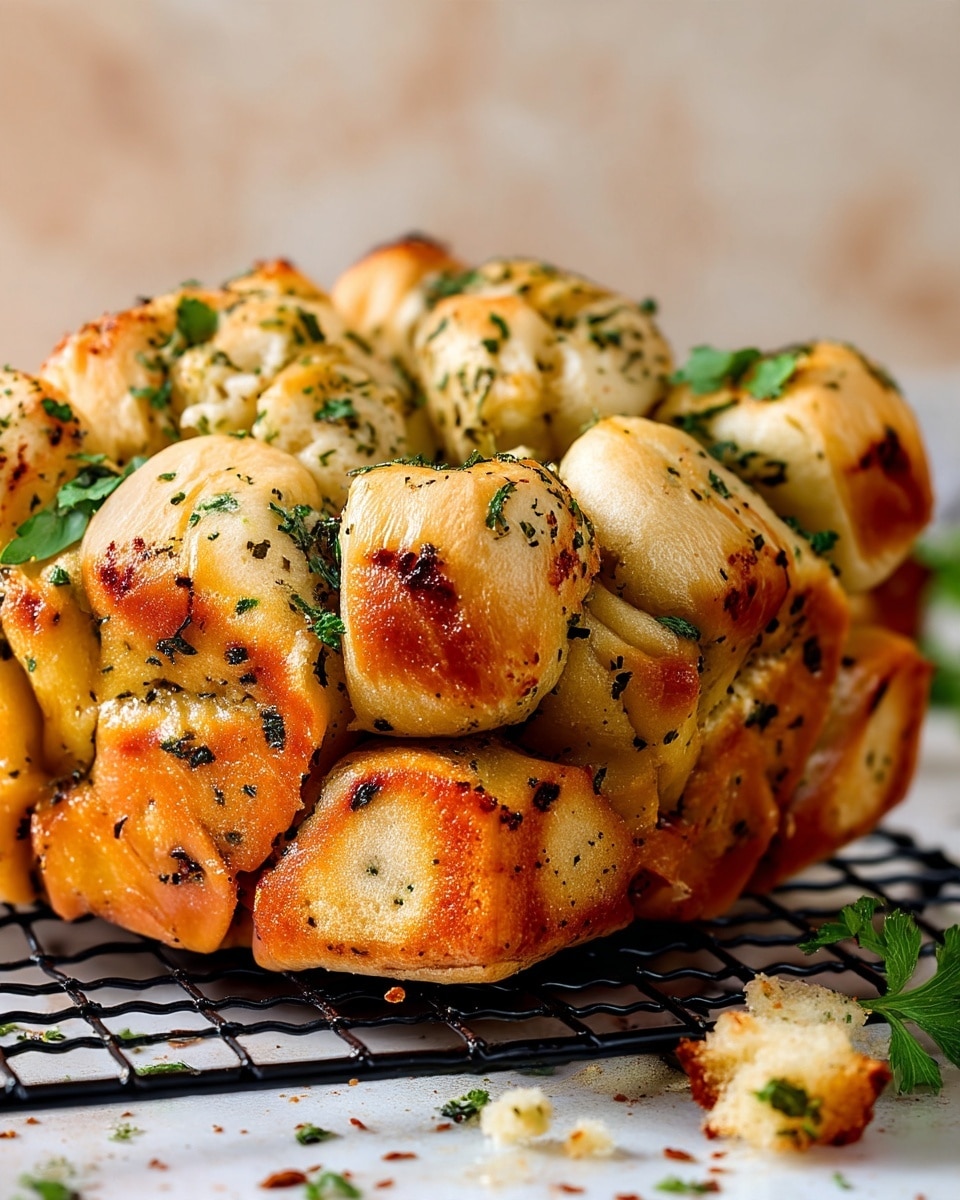
The magic of this Pull-Apart Garlic Bread Recipe comes together from simple ingredients that each play a vital role in the texture and flavor. From the warm milk and yeast that get the dough perfectly risen, to the fresh garlic and herbs that infuse buttery goodness, every ingredient works in harmony to create this masterpiece.
- Warm water: Activates the yeast for the dough to rise beautifully.
- Active dry yeast: Ensures the bread becomes light and fluffy.
- Granulated sugar: Feeds the yeast and adds a hint of sweetness to balance the garlic.
- Whole milk, warm: Adds richness and tenderness to the dough.
- Large eggs, beaten: Helps give structure and moisture to the bread.
- Kosher salt: Enhances all the savory flavors without overpowering.
- Unsalted butter, melted: For a luscious dough and the garlic butter topping.
- Bread flour: Creates the perfect chewy texture with just the right crust.
- Nonstick cooking spray: Prevents sticking and helps with easy removal from pans.
- Garlic cloves, grated: Provides that signature garlicky punch that everyone loves.
- Fresh parsley and rosemary, chopped: Adds color, freshness, and herbal notes.
- Shredded parmesan cheese: Offers a sharp, salty contrast that melts into the bread.
Directions
Step 1: Begin by whisking together the warm water, yeast, and half a tablespoon of sugar in a small bowl. Let this mixture stand for about 5 minutes until it becomes foamy. This step is crucial as it activates the yeast and sets the stage for a fluffy dough.
Step 2: In the bowl of your stand mixer fitted with a dough hook, combine the warm milk, beaten eggs, salt, melted butter, yeast mixture, and the remaining sugar. Mix on medium-low speed about 10 seconds to blend everything smoothly.
Step 3: Gradually add the bread flour to the mixture while the mixer runs on medium-low. Once all the flour is incorporated, increase the speed to medium and continue mixing 6 to 8 minutes until the dough feels smooth and elastic. This kneading develops the gluten for that perfect chew.
Step 4: Transfer the dough to a lightly greased bowl, cover it tightly with plastic wrap, and allow it to rise in a warm spot until doubled in size, which should take about 1 to 1 1/2 hours. Watching it puff up is always so satisfying.
Step 5: While the dough rises, prepare the garlic butter by combining butter, grated garlic, and salt in a small saucepan over medium-low heat. Stir occasionally until the butter melts completely, about 5 minutes. Remove from heat and stir in the chopped parsley and rosemary. Set aside 1 tablespoon of this butter mixture to brush on the bread once it’s baked.
Step 6: Grease two 9-by-5-inch loaf pans with nonstick spray. Turn out the dough onto a lightly floured surface and divide it into 40 equal pieces, each about 1 ounce. Shape each piece into a small ball.
Step 7: Roll 20 dough balls in the garlic butter mixture and arrange them evenly in the bottom of each prepared pan. Sprinkle half of the parmesan cheese over the dough balls. Repeat layering with the remaining dough balls, garlic butter, and parmesan. Drizzle any leftover garlic butter evenly on top.
Step 8: Cover the loaf pans loosely with plastic wrap and let the dough rise again until doubled, approximately 45 minutes to 1 hour. Meanwhile, preheat your oven to 350°F during the last 20 minutes of this rise.
Step 9: Remove plastic wrap and bake the loaves for 35 to 40 minutes until golden brown and the internal temperature reaches 200°F. Once baked, brush the tops generously with the reserved garlic butter, reheating it briefly if necessary to melt again.
Step 10: Allow the loaves to cool in the pans on a wire rack for 5 minutes before carefully removing them. Serve warm and watch everyone delight in pulling apart those buttery, garlicky pieces!
Servings and Timing
This recipe yields 8 generous servings, perfect for sharing with family and friends. Prep time is about 25 minutes, but the dough requires 1 to 1 1/2 hours for the first rise and up to an hour for the second rise, so factor in approximately 2 hours total rise time. The bake time is 35 to 40 minutes, and you’ll want to allow a few minutes cooling before serving. Altogether, I plan for just under 3 hours from start to finish, making it a great recipe to prepare casually and enjoy at your leisure.
How to Serve This Pull-Apart Garlic Bread Recipe
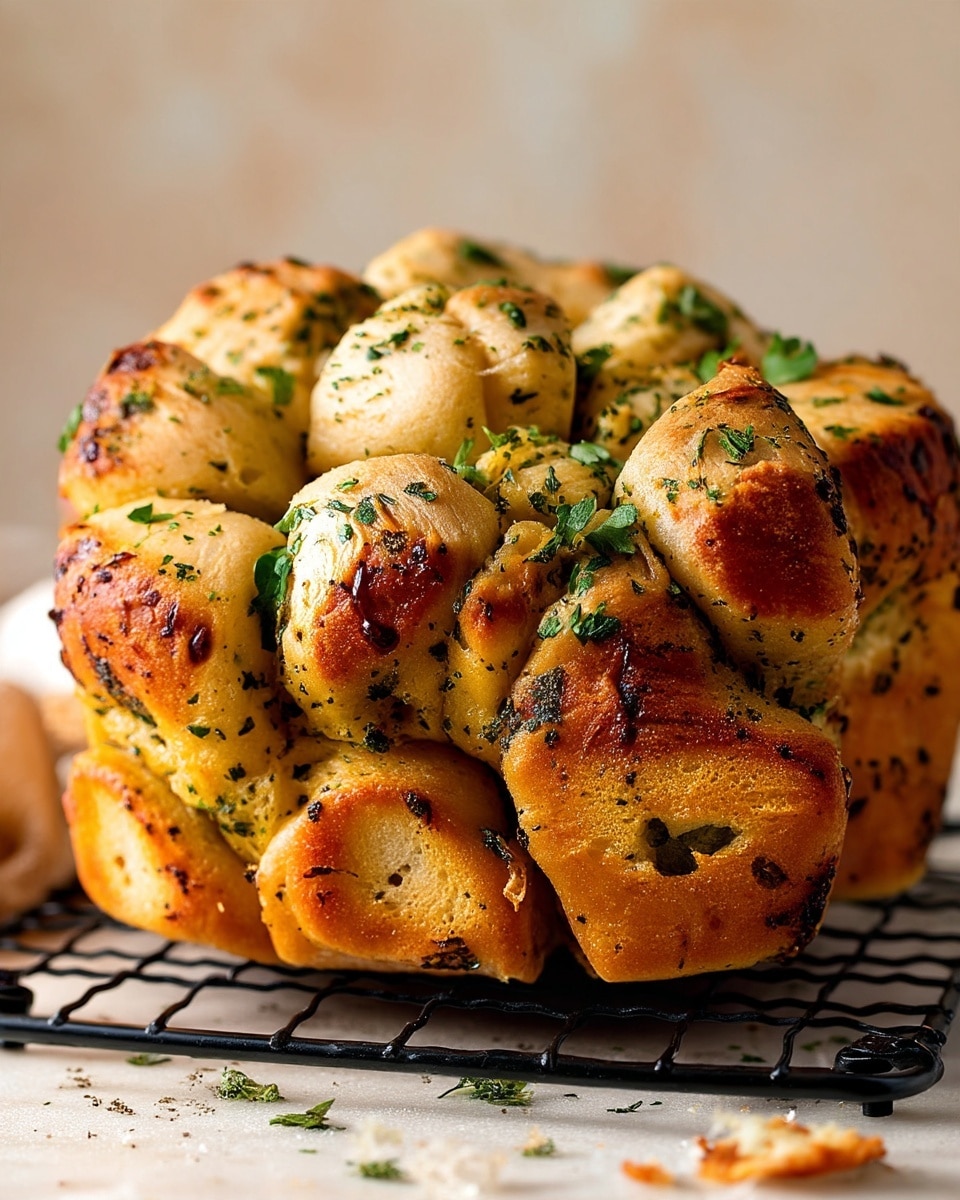
Serving this Pull-Apart Garlic Bread Recipe warm is an absolute must in my book—it’s when all the buttery, garlicky flavors shine brightest and the bread is at its softest. I love pairing it alongside classic pasta dishes like spaghetti Bolognese, creamy Alfredo, or a robust lasagna. It makes the perfect vehicle for soaking up delicious sauces, turning any simple dinner into a satisfying feast.
For presentation, I recommend serving the bread whole in its loaf pan or on a rustic wooden board, encouraging guests to pull apart pieces themselves. Garnishing with an extra sprinkle of chopped parsley or freshly grated parmesan just before serving adds a lovely pop of color and flavor. If you want to go a step further, a small bowl of marinara or herb-infused olive oil on the side makes for a fantastic dipping option.
When it comes to beverages, this garlic bread is a fantastic companion for a crisp white wine like Sauvignon Blanc, a light red such as Pinot Noir, or even a refreshing iced tea for a non-alcoholic pairing. I find that these drinks complement the richness and herbal notes perfectly. Whether you’re serving this at a family dinner, holiday gathering, or casual get-together, it always livens up the table and brings everyone closer with its warm, inviting flavors.
Variations
One of the reasons I keep going back to this Pull-Apart Garlic Bread Recipe is how adaptable it is. If you want to switch things up, try experimenting with different herbs like thyme or basil instead of rosemary for a fresh twist. You can also swap parmesan with shredded mozzarella or cheddar for a gooey, melty variation that changes the flavor profile delightfully.
If you’re catering to dietary needs, this recipe can be adjusted to be dairy-free by using vegan butter and skipping the cheese or using a plant-based alternative. For a gluten-free version, I recommend using a gluten-free bread flour blend and adding a little xanthan gum to maintain the dough’s elasticity. These changes might affect the texture slightly, but the core garlic buttery flavor remains wonderfully intact.
I also sometimes bake this pull-apart bread in a circular bundt pan to get a different shape that’s perfect for parties. While baking times might vary a bit, the result is just as delicious and makes a beautiful centerpiece. No matter how you customize it, this recipe offers plenty of room for creativity while keeping the heart of that irresistible garlic bread experience.
Storage and Reheating
Storing Leftovers
Leftover pull-apart garlic bread is best stored in an airtight container or wrapped tightly in plastic wrap or foil at room temperature for up to 2 days. I find that keeping it well-covered helps the bread retain moisture and flavors without becoming too dry. If your kitchen is warm, storing it in the refrigerator can extend its life to about 4 days, though the texture might firm up slightly.
Freezing
This bread freezes beautifully. To freeze, let it cool completely, then wrap each loaf tightly in plastic wrap followed by a layer of aluminum foil or place it in a heavy-duty freezer bag. It can keep in the freezer for up to 2 months without losing flavor or texture. When you’re ready to enjoy it, thaw overnight in the refrigerator for best results before reheating.
Reheating
To reheat, I preheat the oven to 350°F and warm the bread wrapped in foil for about 10 to 15 minutes. Wrapping it helps keep the bread soft and prevents the crust from drying out. Avoid microwaving if possible, as it can make the bread rubbery and chewy. If you want a crispier crust, unwrap the bread for the last few minutes of reheating. I also like brushing a little bit of leftover garlic butter on the bread before warming it to refresh that delicious garlic aroma and buttery taste.
FAQs
Can I make this Pull-Apart Garlic Bread Recipe ahead of time?
Absolutely! You can prepare the dough and assemble the bread the day before, then let it rise in the fridge overnight. Bring it to room temperature and let it finish rising before baking. This makes it perfect for busy days or entertaining when you want to prep ahead.
What type of bread flour should I use?
I recommend using a high-protein bread flour for the best chewy texture and strong gluten development. This helps the dough rise well and hold together as you pull it apart. All-purpose flour can work in a pinch but might make the bread less sturdy.
Can I add cheese inside the dough balls instead of just on top?
Definitely! For a gooey surprise, tuck a small piece of mozzarella or your favorite cheese inside each dough ball before rolling it in garlic butter. This creates cheesy pockets throughout and takes this bread to the next level.
Is this recipe suitable for beginners?
Yes! While it requires a few steps and some patience with rising times, the process is straightforward. I find that anyone willing to follow instructions carefully will succeed and feel proud of the results.
What should I do if the bread isn’t rising properly?
Make sure your water and milk are warm but not hot, as too much heat can kill the yeast. Also, check your yeast’s expiration date. If dough isn’t rising, try placing it in a slightly warmer spot, like inside an oven with just the light on, to encourage fermentation.
Conclusion
If you’re looking for a way to add warmth, flavor, and a touch of magic to your meals, I wholeheartedly encourage you to try this Pull-Apart Garlic Bread Recipe. It’s one of those dishes that brings smiles, invites sharing, and fills your kitchen with the most comforting aroma imaginable. Whether you’re a garlic enthusiast or simply want to elevate your bread game, this recipe will quickly become a treasured favorite in your home, just like it is in mine.
Print
Pull-Apart Garlic Bread Recipe
- Prep Time: 1 hour 15 minutes
- Cook Time: 35 minutes
- Total Time: 1 hour 50 minutes
- Yield: 8 servings
- Category: Bread
- Method: Baking
- Cuisine: American
Description
Pull-Apart Garlic Bread is a soft, fluffy bread made from yeast dough, infused with a flavorful garlic butter mixture and herbs, perfect for sharing. This recipe involves making a yeast dough, shaping it into small balls coated with garlic butter and parmesan, then baking until golden and aromatic. Ideal as a savory side or appetizer, it offers a delightful combination of garlicky, buttery richness with a tender crumb.
Ingredients
Dough Ingredients
- 1/4 cup warm water (about 110ºF)
- 1 tbsp active dry yeast
- 1 1/2 tbsp granulated sugar
- 1 cup whole milk, warm (about 110ºF)
- 2 large eggs, beaten
- 1 3/4 tsp kosher salt
- 1 cup unsalted butter, melted
- 5 cups bread flour
- Nonstick cooking spray (for greasing pans)
Garlic Butter Ingredients
- 1/2 cup unsalted butter
- 8 garlic cloves, grated
- 1 tsp kosher salt
- 1/4 cup finely chopped parsley
- 1 tbsp finely chopped rosemary
- 1/4 cup shredded parmesan cheese
Instructions
- Activate Yeast: In a small bowl, whisk together the warm water, active dry yeast, and 1/2 tablespoon of sugar. Let the mixture stand until foamy, about 5 minutes, to ensure the yeast is active and ready for dough making.
- Make the Dough: In the bowl of a stand mixer fitted with a dough hook, combine warm milk, beaten eggs, kosher salt, melted butter, the yeast mixture, and remaining 1 tablespoon of sugar. Beat on medium-low speed to mix, about 10 seconds. Gradually add bread flour while mixer runs on medium-low. Increase speed to medium and knead the dough until smooth and elastic, approximately 6 to 8 minutes. Transfer dough to a greased bowl, cover tightly with plastic wrap, and let it rise until doubled, about 1 to 1 1/2 hours.
- Prepare Garlic Butter: In a small saucepan over medium-low heat, melt 1/2 cup butter with grated garlic and 1 teaspoon kosher salt, stirring occasionally until melted and fragrant, about 5 minutes. Remove from heat, then stir in finely chopped parsley and rosemary. Reserve 1 tablespoon of this garlic butter mixture separately for brushing the baked bread later.
- Shape Dough Balls: Lightly grease two 9-by-5-inch loaf pans. Turn dough out onto a lightly floured surface and divide into 40 pieces (about 1 ounce each). Shape each piece into a ball. Roll 20 of the dough balls into the garlic butter mixture and place them evenly in the bottom of the prepared loaf pans. Sprinkle half of the shredded parmesan cheese over these.
- Layer and Assemble Loaves: Repeat rolling the remaining 20 dough balls in garlic butter and layering them into the pans. Sprinkle with remaining parmesan cheese and drizzle any leftover garlic butter evenly over the dough balls laid in the pans.
- Second Rise: Cover the loaf pans loosely with plastic wrap and let the dough rise again until doubled in size, approximately 45 minutes to 1 hour. Preheat the oven to 350°F during the last 20 minutes of this rise.
- Bake the Bread: Remove plastic wrap from the pans and bake the loaves in the preheated oven for 35 to 40 minutes, or until the tops are golden brown and an instant-read thermometer inserted in the center reads 200°F.
- Finish and Serve: Remove the bread from the oven and brush the tops with the reserved 1 tablespoon of garlic butter, warming the butter gently if needed. Allow the loaves to cool in the pans on a wire rack for 5 minutes, then carefully remove them from the pans. Serve warm for the best flavor and texture.
Notes
- Ensure that the water and milk are at the right temperature (about 110ºF) to activate the yeast without killing it.
- Use bread flour for better gluten development resulting in a chewier texture.
- You can substitute fresh herbs with dried herbs but reduce quantities by half.
- If you don’t have a stand mixer, knead the dough by hand for 10-12 minutes until elastic and smooth.
- For an extra cheesy bread, sprinkle additional parmesan on top before baking.
- This bread is best enjoyed fresh but can be wrapped tightly and stored for up to 2 days, then reheated.


