
I absolutely love sharing my Mummy’s Apple Pie Recipe with friends and family because it fills the kitchen with that irresistible aroma of cinnamon and baked apples that feels like a warm hug on a chilly day. This recipe has become a treasured tradition in my home, offering a perfect balance of sweet and tart flavors wrapped in buttery, flaky crusts that are simple to prepare but full of heart. Every bite feels like a little bit of nostalgia and comfort, and I know you’ll enjoy making and eating it just as much as I do.
Why You’ll Love This Mummy’s Apple Pie Recipe
What truly excites me about this Mummy’s Apple Pie Recipe is the wonderful flavor profile it creates. The tartness of Granny Smith apples blends beautifully with the rich brown sugar and warming spices like cinnamon and nutmeg, giving each bite depth and a cozy sweetness. The addition of vanilla extract adds a gentle aroma that makes the filling taste extra special. I love that the apples stay tender yet keep a slight bite, so you don’t end up with mushy pie filling.
Another thing I appreciate is how straightforward and manageable this recipe is. Whether you’re a seasoned baker or just trying your hand at pie for the first time, the process is clear and not intimidating. Plus, the option to prepare the filling ahead of time makes it a breeze for busy days or hosting family gatherings. This pie is perfect for holidays, cozy weekend desserts, or even an uplifting weeknight treat that brings everyone to the table with smiles.
Ingredients You’ll Need
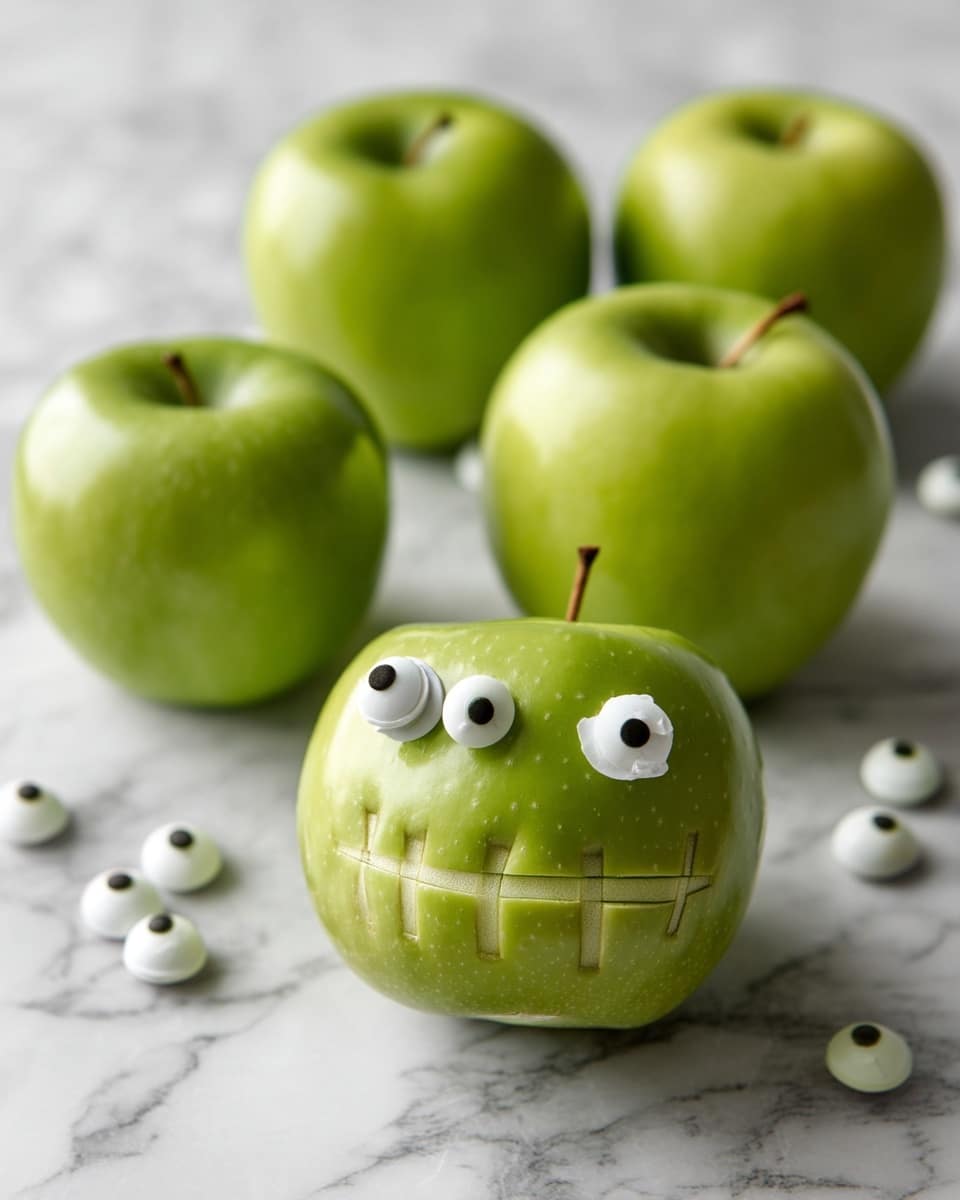
One of the things I love about this recipe is how it uses simple, classic ingredients that you probably already have or can easily find at your local store. Each plays a crucial role in creating the comforting texture, flavor, and color that make this pie so delicious.
- 6 Granny Smith apples: Their tartness balances the sweetness perfectly and holds up well during cooking.
- 1/4 cup unsalted butter: Adds richness and helps the apples soften beautifully.
- 1/2 cup brown sugar: Gives a deep, molasses-like sweetness that enhances the spice.
- 1/2 cup white sugar: Balances the brown sugar and intensifies the sweetness.
- 1/2 teaspoon salt: Enhances all the flavors and prevents the sweetness from being cloying.
- 2 teaspoons ground cinnamon: The star spice that infuses warmth and aroma.
- 1/4 teaspoon ground nutmeg: Adds a subtle, spicy earthiness.
- 1/2 teaspoon vanilla extract: Provides a lovely aromatic depth.
- 1 tablespoon cornstarch: Thickens the filling without making it gloopy.
- 1 tablespoon water: Helps dissolve the cornstarch for smooth thickening.
- 1 pie crust: Creates a crisp, tender base for the filling; homemade or store-bought works great.
- 1 puff pastry sheet: Adds flaky, golden layers on top, making these hand pies extra special.
Directions
Step 1: Peel and chop the Granny Smith apples into bite-sized pieces, making sure each piece is about the same size for even cooking. This keeps the texture consistent in every mouthful.
Step 2: In a medium saucepan, melt the unsalted butter over medium heat until it starts to turn lightly browned, about 1 to 2 minutes, which adds a lovely nutty flavor to the base.
Step 3: Add the chopped apples to the browned butter and cook for 1 minute, stirring gently to coat the fruit and start softening it just a bit.
Step 4: Sprinkle in both the brown and white sugars along with the salt. Cook the mixture for 5 to 10 minutes until the apples are tender but still hold some texture; you want that balance between softness and bite.
Step 5: Stir in the cinnamon, nutmeg, and vanilla extract. Let it cook for an additional minute so the spices bloom and infuse the filling with their warm flavors.
Step 6: In a small bowl, combine the cornstarch and water, mixing well until smooth. Pour this into the apple mixture to start thickening the sauce.
Step 7: Continue cooking the filling for 3 to 4 minutes, stirring frequently until the sauce has thickened nicely and coats the apples without being runny.
Step 8: Remove the saucepan from heat and let the filling cool completely before assembling the pies. You can prepare this ahead of time and refrigerate until ready to use.
Step 9: Preheat your oven to 400 degrees Fahrenheit, ensuring it’s hot enough to produce golden, flaky crust edges quickly.
Step 10: Roll out your pie crust to approximately 1/8-inch thickness and cut it into rectangles that will form the bottom layer of your hand pies. Arrange these pieces on a parchment-lined baking sheet, leaving enough space between them to bake evenly.
Step 11: Cut the puff pastry sheet into irregular strips, which you’ll use to top the pies for that fun “mummy” effect and extra flakiness.
Step 12: Spoon 1 to 2 tablespoons of the cooled apple pie filling onto the center of each pie crust rectangle.
Step 13: Place the puff pastry strips over the filling, slightly overlapping them for a wrapped appearance reminiscent of a mummy.
Step 14: Bake the pies in the preheated oven until the puff pastry is golden brown and crisp, about 12 to 15 minutes.
Step 15: Remove from the oven and let cool slightly before enjoying the perfect balance of flaky pastry and spiced apple filling.
Servings and Timing
This recipe makes about 8 delicious hand pies, perfect for sharing with family or guests. The preparation time is around 15 to 20 minutes for peeling, chopping, and cooking the filling, plus about 10 minutes for assembly. Baking takes 12 to 15 minutes. Altogether, you’re looking at approximately 30 minutes of active cooking time and some additional cooling time if you prepare the filling ahead. It’s a relatively quick dessert to make but absolutely worth every second.
How to Serve This Mummy’s Apple Pie Recipe
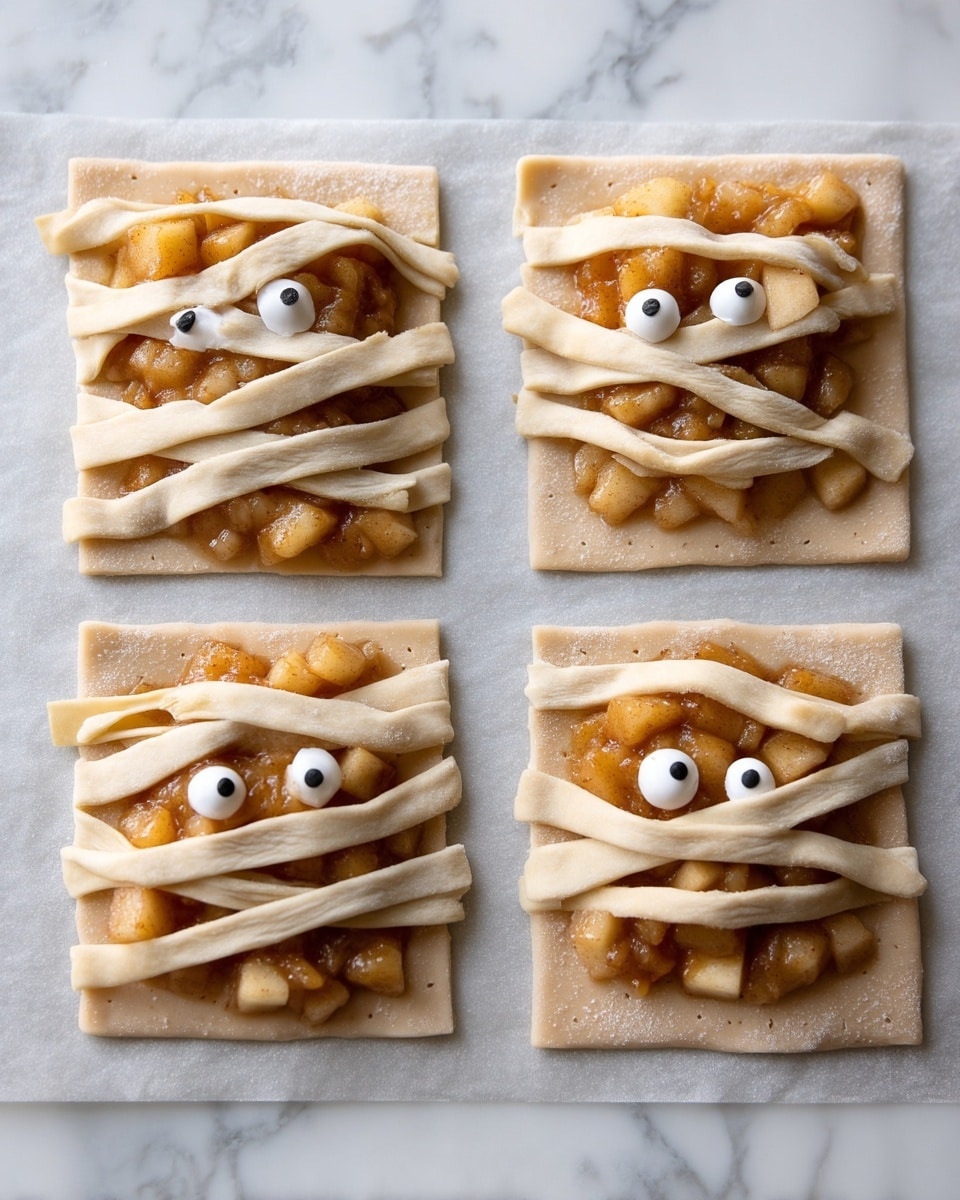
I love serving these warm from the oven, letting the puff pastry’s crispness contrast with the soft, spiced apple filling inside. They’re perfect on their own but also fantastic with a scoop of vanilla ice cream or a dollop of freshly whipped cream to add a creamy touch that complements the cinnamon and nutmeg perfectly.
For a lovely presentation, I like to arrange the pies on a rustic wooden board or individual small plates, garnishing with a light dusting of powdered sugar or a sprinkle of cinnamon for extra charm. A sprig of fresh mint or a few apple slices on the side never hurts to brighten up the look!
When it comes to beverages, I find that a crisp apple cider pairs wonderfully, especially on fall afternoons, but for adults, a glass of chilled Riesling or a spiced whiskey cocktail brings out the warm spices beautifully. These hand pies work well at casual family dinners, holiday parties, or even as a cozy weekend treat, and I recommend serving them warm or at room temperature to best enjoy those tender apples and flaky layers.
Variations
Over time, I’ve played around with this Mummy’s Apple Pie Recipe to keep it exciting. For example, swapping Granny Smith apples for Fuji or Honeycrisp creates a sweeter pie, while still keeping that satisfying texture. If you want to lighten it up, using a gluten-free pie crust works just as well, and for a vegan twist, try replacing butter with coconut oil or a plant-based alternative.
You can also experiment with the spice mix; adding ground cloves or cardamom can give a lovely twist, while a splash of lemon juice brightens the flavor and balances sweetness nicely. If you’re short on time, baking the pie as one larger pie instead of hand pies is an easy adaptation that still delivers fantastic results.
For a creative cooking method, I sometimes bake these hand pies in an air fryer at 375 degrees Fahrenheit for about 10 minutes, which yields an equally golden crust but with a slightly quicker cook time—perfect for last-minute dessert needs.
Storage and Reheating
Storing Leftovers
After enjoying your delicious Mummy’s Apple Pie Recipe, you can store any leftovers in an airtight container in the refrigerator for up to 3 days. I recommend using shallow containers so the pies keep their crispness and not get soggy. Before sealing, let the pies cool completely at room temperature to prevent condensation buildup, which can affect the puff pastry texture.
Freezing
Yes, you can freeze these hand pies! To do so, first assemble the pies but do not bake them. Place the prepared pies on a parchment-lined tray and freeze until solid, then transfer them to a freezer-safe bag or container. This method keeps the pies fresh for up to 2 months. When ready to enjoy, bake them straight from frozen, adding a few extra minutes to the baking time to ensure they cook evenly and the filling is heated through.
Reheating
To reheat, I recommend warming the pies in a conventional oven at 350 degrees Fahrenheit for about 8 to 10 minutes to restore the flaky texture and heat the filling evenly. Avoid microwaving if you can because it tends to make the crust soggy. If you’re in a hurry, you can also use a toaster oven for a similar effect. Reheating this way helps the flavors come alive just like when freshly baked.
FAQs
Can I use other types of apples for this recipe?
Absolutely! While Granny Smith apples give a perfect tartness and hold up well during cooking, Fuji, Honeycrisp, or Braeburn apples can be great substitutes if you prefer a sweeter or slightly different flavor. Just ensure that whichever apple you choose is firm to keep some texture in the filling.
Is it necessary to use both pie crust and puff pastry?
The combination in this recipe creates a fun textural contrast with a tender bottom and flaky top. However, if you want to simplify, you can use all puff pastry or all pie crust; just expect a slightly different mouthfeel. Mixing both gives a unique “mummy-wrapped” appearance and delightful texture, but I encourage you to experiment based on your preferences.
Can I make the filling completely ahead of time?
Yes! The apple filling can be prepared a day or two in advance and stored in the refrigerator. Just make sure to cool it thoroughly before refrigerating. When ready to bake, assemble your pies and bake as directed. This makes it super convenient for busy days or planned gatherings.
How do I prevent the puff pastry strips from burning?
To avoid burning, cut your strips a bit wider if you can and keep an eye on the baking time. Puff pastry browns quickly, so monitoring the oven between 12 and 15 minutes is key. If you notice the tops browning faster than desired, you can loosely tent them with foil during the last few minutes of baking.
Can this recipe be made vegan?
Definitely! Substitute the butter with a vegan butter or coconut oil, and use store-bought vegan pie crust and puff pastry (many brands offer dairy-free options). The filling ingredients are mostly naturally vegan, so this adaptation works beautifully with minimal changes.
Conclusion
I can’t wait for you to try my Mummy’s Apple Pie Recipe because it truly holds a special place in my heart—and on my table. Its comforting flavors, simple preparation, and charming presentation make it a go-to that always brings joy. Whether you’re baking for family, friends, or just a cozy night in, this recipe promises to deliver all the warmth and sweetness you could wish for in a dessert. Enjoy every delicious bite!
Print
Mummy’s Apple Pie Recipe
- Prep Time: 15 minutes
- Cook Time: 15 minutes
- Total Time: 30 minutes
- Yield: 8 servings
- Category: Dessert
- Method: Baking
- Cuisine: American
Description
Mummy’s Apple Pie is a fun and delicious twist on traditional apple pie, featuring tender spiced apples cooked in a buttery sauce, encased in flaky pie crust rectangles topped with puff pastry strips, then baked to a golden perfection. Perfect for Halloween or any cozy occasion, these handheld pies bring classic autumn flavors with a whimsical presentation.
Ingredients
Apple Filling
- 6 Granny Smith apples
- 1/4 cup unsalted butter
- 1/2 cup brown sugar
- 1/2 cup white sugar
- 1/2 teaspoon salt
- 2 teaspoons ground cinnamon
- 1/4 teaspoon ground nutmeg
- 1/2 teaspoon vanilla extract
- 1 tablespoon cornstarch
- 1 tablespoon water
Pastry
- 1 pie crust (homemade or store-bought)
- 1 puff pastry sheet
Instructions
- Prepare the apples: Peel and chop the Granny Smith apples into bite-sized pieces, ensuring that all pieces are uniform in size to promote even cooking.
- Brown the butter: In a medium saucepan, heat the unsalted butter over medium heat until it is lightly browned, about 1 to 2 minutes, which will add a nutty flavor to the filling.
- Cook apples: Add the chopped apples to the browned butter and cook for about a minute to begin softening them.
- Add sugars and salt: Stir in both brown and white sugars along with salt. Continue cooking for 5 to 10 minutes, until the apples have softened but still retain some texture.
- Spice the filling: Add ground cinnamon, nutmeg, and vanilla extract to the apples. Cook for an additional minute to incorporate the flavors.
- Thicken the sauce: In a small bowl, mix the cornstarch and water to form a slurry, then add it to the hot apple mixture. The sauce will thicken as you cook it for another 3 to 4 minutes.
- Cool the filling: Remove the apple filling from heat and allow it to cool completely before assembling the pies. This step can be done ahead of time if desired.
- Preheat oven: Set your oven to 400 degrees Fahrenheit (204 degrees Celsius) to prepare for baking the pies.
- Prepare crust rectangles: Roll out the pie crust to about 1/8 inch thickness. Cut into rectangles and place them spaced evenly on a baking sheet lined with parchment paper.
- Cut puff pastry strips: Cut the puff pastry sheet into irregular-sized strips that will serve as the ‘mummy bandages’ topping for the pies.
- Fill the crust: Spoon 1 to 2 tablespoons of the cooled apple filling onto each pie crust rectangle.
- Top with puff pastry: Arrange the puff pastry strips over the apple filling to resemble mummy bandages.
- Bake: Bake the assembled pies in the preheated oven for about 12 to 15 minutes, or until the pastry is golden and flaky.
- Serve: Remove from the oven and let cool slightly before serving. Enjoy these festive and tasty mummy apple pies!
Notes
- The apple filling can be made a day ahead and refrigerated to save time on baking day.
- For an extra festive touch, you can add small candy eyes on top of the puff pastry strips after baking to make them look more like mummies.
- Ensure the apple pieces are chopped evenly to avoid uneven cooking in the filling.
- Use a mix of sugars for balanced sweetness and depth of flavor.
- Let the filling cool completely to prevent the puff pastry from becoming soggy.


