
I absolutely love making festive treats that bring a smile to everyone’s face, and this Mummy Apple Slices Recipe is one of my absolute favorites to whip up, especially around Halloween or any fun gathering. The combination of crisp apple slices dipped in silky white chocolate, then drizzled to look like cute little mummies with candy eyes, never gets old. It’s simple, quick, and just plain adorable, making it a snack that’s as delightful to eat as it is to look at.
Why You’ll Love This Mummy Apple Slices Recipe
What I find irresistible about this Mummy Apple Slices Recipe is the way the flavors come together effortlessly. The tartness of the fresh apple slices paired with the creamy, sweet chocolate coating creates the perfect balance—each bite is a refreshing crunch with just enough sweetness. Plus, the drizzle of chocolate mimics mummy bandages in such a charming way, making it perfect for kids and adults alike. I can’t help but smile every time I take a bite and see those little candy eyeballs staring back at me.
Another reason this recipe holds a special place in my heart is how easy it is to prepare. Honestly, the hardest part is waiting for the chocolate to set! It takes just about 20 minutes from start to finish, and you don’t need any fancy equipment. This makes it a go-to for last-minute parties or when I want something festive but fuss-free. I’ve served these at family dinners, Halloween parties, and even as a fun after-school snack, and it always gets rave reviews. The simplicity combined with the playful presentation really sets this recipe apart for me.
Ingredients You’ll Need
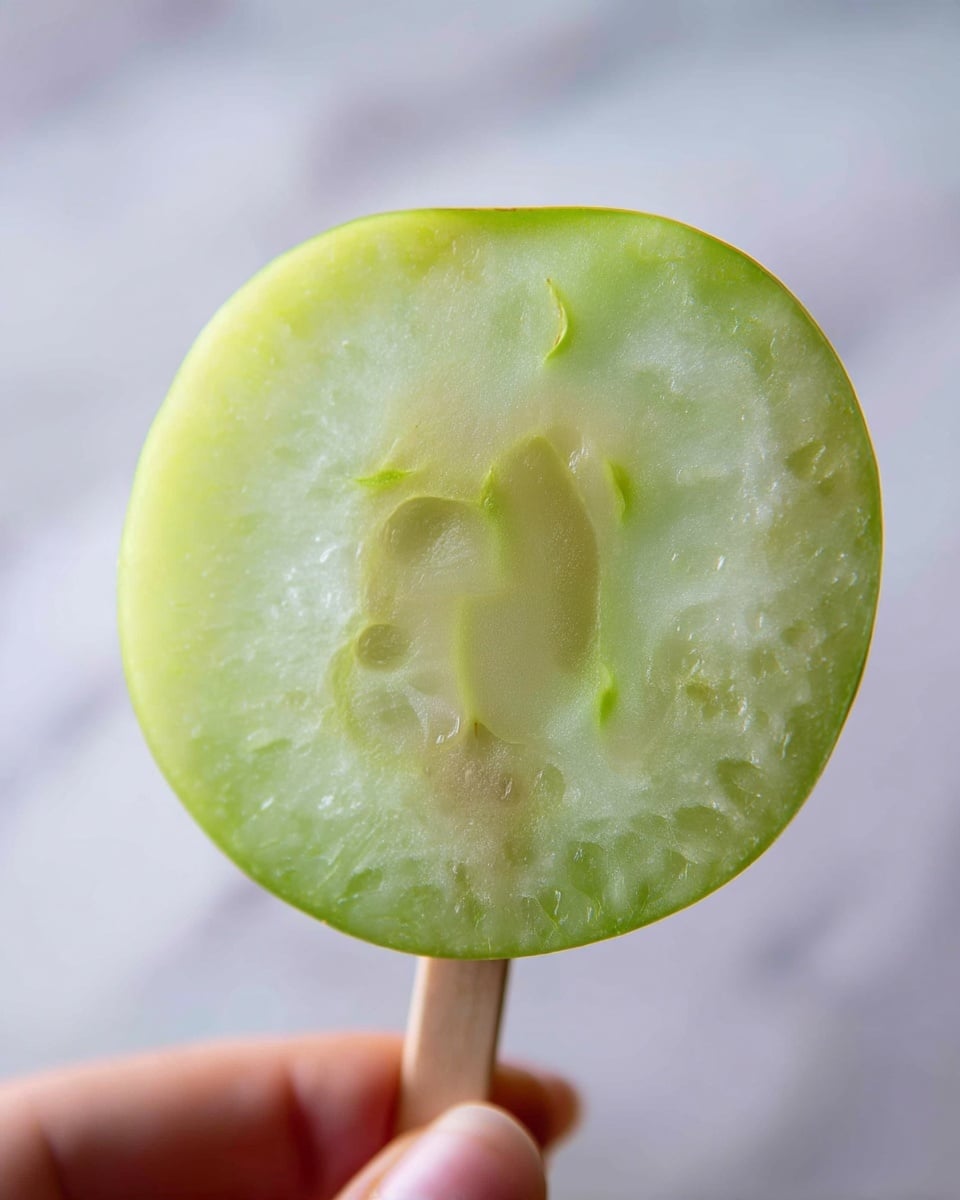
Gathering the ingredients for this recipe is a breeze, and each one plays an important role in making these Mummy Apple Slices truly shine. The fresh apples bring crispness and a natural tang, while the candy coating adds a smooth texture and sweet flavor that ties it all together. The candy eyeballs are the little whimsical touch that bring the whole mummy look to life.
- 2 large apples: Choose firm, fresh apples for the best crunch that holds up when dipped in chocolate.
- 16 ounces chocolate candy coating: I use white chocolate coating to replicate mummy bandages perfectly, but you can melt it gently to keep the shine and smoothness.
- Royal Icing Eyeball Decorations: These fun candy eyes instantly add character and spooky charm to each apple slice.
- 8-10 popsicle sticks: They make the slices easy to hold and dip without mess, turning each apple slice into a festive treat on a stick.
Directions
Step 1: Start by slicing your apples into thick slices, aiming for about 4 slices per apple. Be sure to remove the seeds from each slice to make them easy and pleasant to eat.
Step 2: Gently push a popsicle stick into the bottom of each apple slice. Take care to insert it firmly without cracking the apple; these sticks will help you dip and decorate without sticky fingers!
Step 3: Pat the apple slices dry carefully with a paper towel to remove any moisture. This step is key because dry slices help the candy coating adhere smoothly and prevent it from sliding off.
Step 4: Melt your white chocolate candy coating following the package instructions. Usually, this means heating gently in short bursts to avoid burning and stirring until silky smooth.
Step 5: Dip each apple slice completely into the melted chocolate, making sure it’s fully coated. I like to let excess chocolate drip back into the bowl for a cleaner finish.
Step 6: Place the coated apple slices onto a flat surface covered with foil or parchment paper. This ensures easy cleanup and prevents sticking as the chocolate hardens.
Step 7: Once the candy coating firms up, transfer any leftover coating back into a piping bag. If it’s hardened, simply remelt it gently for easy drizzling.
Step 8: Drizzle the candy coating side to side over each apple slice to create the fun mummy bandage effect. This step makes your Mummy Apple Slices look stretched out and spooky in the most adorable way.
Step 9: Carefully press two candy eyeballs onto each apple slice while the drizzle is still wet so they stick perfectly.
Step 10: Let your apple slices sit undisturbed until the chocolate hardens completely. Then, your Mummy Apple Slices are ready to impress!
Servings and Timing
This recipe makes about 8 servings, perfect for sharing with friends, family, or party guests. The prep time is around 10 minutes, mostly slicing the apples and setting up the sticks. Melting and dipping the chocolate takes another 5-7 minutes, and then allow about 10 minutes for the chocolate to harden fully after decorating. Overall, you’re looking at about 20 minutes from start to finish, with no additional resting time beyond the chocolate-setting phase. It’s quick enough for a weekday treat but special enough for celebrations.
How to Serve This Mummy Apple Slices Recipe
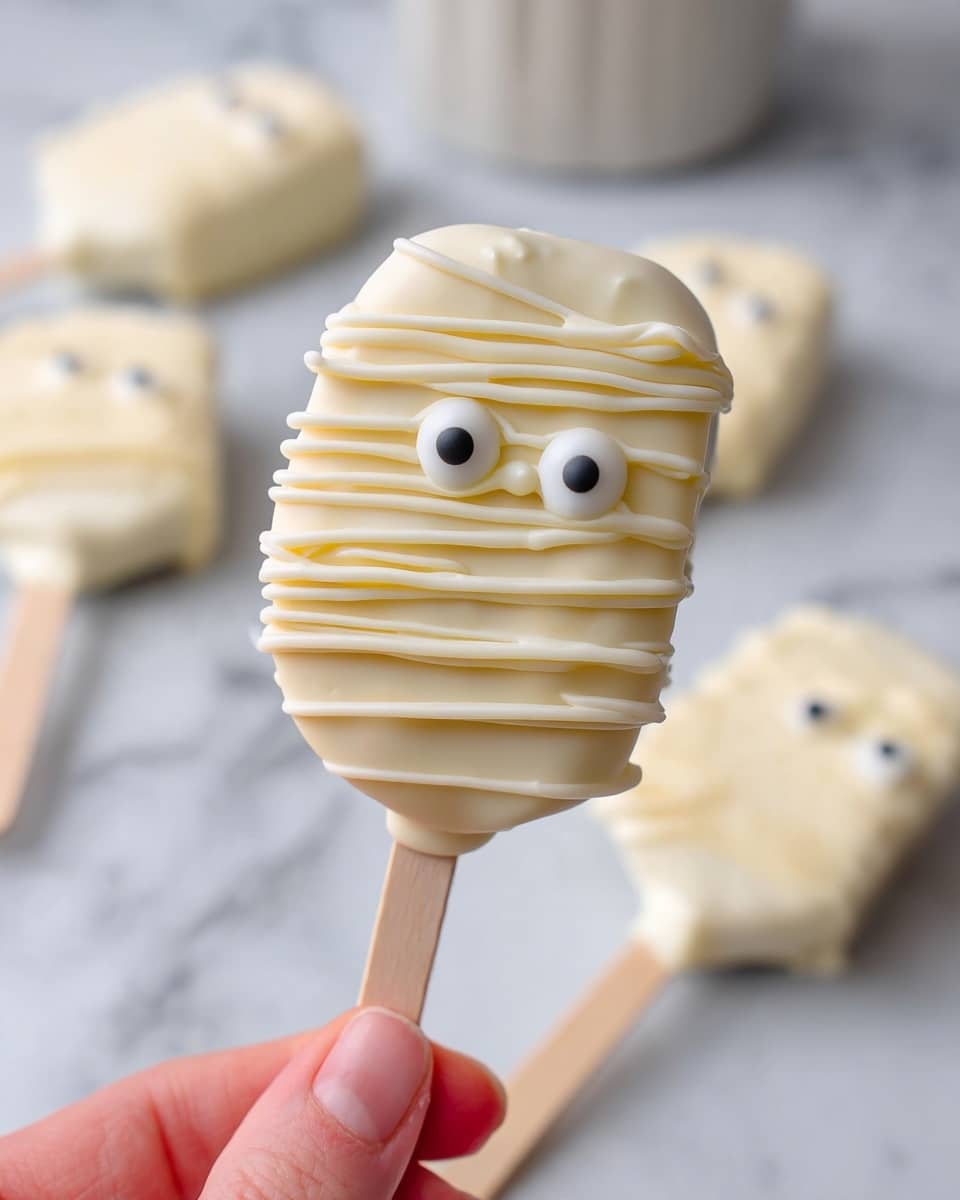
I love serving these Mummy Apple Slices chilled or at room temperature. They keep their crispness best when cool, and the chocolate is perfectly set for a satisfying snap. I often arrange them on a festive Halloween-themed platter, spacing the slices out so the little eyes really pop. Adding some autumn leaves or mini pumpkins around the plate adds a seasonal touch that makes presentation even more adorable.
To complement the sweetness and tartness, I like pairing these apple slices with a side of creamy peanut butter or almond butter for dipping. The nutty flavor creates a lovely contrast and adds a little extra protein if you’re serving them as a snack. For drinks, a sparkling apple cider or a lightly spiced chai tea feel perfectly seasonal and comforting alongside these treats. For adult gatherings, a crisp white wine like Sauvignon Blanc works wonderfully too.
These little mummy apples are a hit at parties, kids’ lunches, or as a fun dessert alternative during holiday dinners. I usually serve about two slices per person, which is plenty because they are quite satisfying. The interactive eating style, holding the popsicle stick, makes it a fun and mess-minimizing way for guests to enjoy a sweet bite. Presentation tip: try stacking a few on a tiered stand for an eye-catching centerpiece that invites everyone to dig in!
Variations
If you want to switch things up, I’ve experimented with a few variations on this Mummy Apple Slices Recipe that you might love as much as I do. Instead of white chocolate, you could use milk or dark chocolate candy coating to change the flavor profile, giving a richer or more intense chocolatey bite. You can also add a sprinkle of cinnamon or pumpkin pie spice into the melted chocolate before dipping for a warm, cozy twist.
For dietary needs, this recipe can easily be made vegan by selecting a dairy-free chocolate coating and ensuring your candy eyes are vegan-friendly. If you want gluten-free, just double-check the candy coatings and decorations, though most white chocolate coatings and candy eyes are naturally gluten-free. The apples themselves are perfect for virtually any diet.
Another fun idea is to swap out the candy eyeballs for edible googly eyes made from fondant or to use mini chocolate chips for eyes. If you want to get creative with cooking methods, lightly grilling the apple slices before dipping adds a subtle caramelized note that perks up the flavor nicely. However, be sure to cool them fully before dipping to prevent the chocolate from melting prematurely.
Storage and Reheating
Storing Leftovers
If you have any leftovers, I recommend storing the Mummy Apple Slices in an airtight container lined with parchment paper to prevent sticking. Keep them refrigerated for best freshness; they’ll stay crisp and delicious for up to 2 days. Beyond that, the apples may start to lose their crunch or discolor slightly, so best to enjoy them sooner rather than later.
Freezing
Freezing dipped apple slices isn’t my top choice because apples tend to become mushy when frozen and thawed, which changes the texture significantly. If you want to try, place the slices on a parchment-lined tray to freeze solid before transferring them to a freezer-safe container. Use them within 1 month, but be aware they won’t have that fresh crispness when thawed.
Reheating
Since this treat is best served chilled or at room temperature, reheating isn’t really recommended. If the chocolate coating softens too much in warmer temperatures, you can pop the slices into the fridge for 10-15 minutes to firm back up. Avoid microwaving or heating the slices, as the apples may lose their structure and the chocolate can become grainy.
FAQs
Can I use other fruits instead of apples in this Mummy Apple Slices Recipe?
Absolutely! While apples provide a nice crisp texture and natural tang, you can also use pears or firm peach slices for a similar effect. Just make sure the fruit is firm enough to hold a stick and withstand dipping in the candy coating.
What’s the best way to melt candy coating without burning it?
I always melt candy coating in short bursts in the microwave, stirring every 15-20 seconds, or use a double boiler on the stovetop to gently warm it. Stirring frequently helps prevent overheating and keeps the coating smooth and glossy.
How do I keep the apple slices from browning before dipping?
Patting the apple slices dry right before dipping helps, but you can also dip them briefly in lemon water to slow browning if you’re prepping ahead. Just be sure to dry them thoroughly afterward to keep the chocolate coating smooth.
Can the candy eyeballs be replaced with something else?
Definitely! If you can’t find candy eyeballs, mini chocolate chips or small dots of black icing gel work well. You can also make DIY eyes using small dots of white and dark chocolate with a toothpick.
Is this recipe kid-friendly and safe for little ones?
Yes, this Mummy Apple Slices Recipe is a fun and safe treat for kids, but I recommend supervising younger children when handling the popsicle sticks to avoid any poking accidents. The candy coating and eyes are fun for little hands to help decorate too!
Conclusion
I truly hope you give this Mummy Apple Slices Recipe a try because it’s such a festive, fun, and delicious way to celebrate any spooky season or special occasion. The ease and charm combined with the delightful taste make it one of my go-to treats to share. Once you see those adorable mummy faces smiling back at you, I’m sure you’ll love making these as much as I do!
Print
Mummy Apple Slices Recipe
- Prep Time: 10 minutes
- Cook Time: 10 minutes
- Total Time: 20 minutes
- Yield: 8 servings
- Category: Snack
- Method: Dipping
- Cuisine: American
Description
Mummy Apple Slices are a fun and festive Halloween treat that combines fresh apple slices dipped in creamy white chocolate candy coating, decorated with royal icing eyes and candy ‘bandages’ for a spooky yet delicious snack. Perfect for parties or kids’ lunches, these easy-to-make pops bring sweet and fruity flavors together with a playful twist.
Ingredients
Apples
- 2 large apples
Chocolate Coating
- 16 ounces white chocolate candy coating
Decorations
- Royal icing eyeball decorations
- 8 – 10 popsicle sticks
Instructions
- Slice Apples: Slice the apples into thick slices, approximately 4 slices per apple, and carefully remove the seeds from each slice.
- Insert Popsicle Sticks: Gently push a popsicle stick into the bottom of each apple slice, ensuring they don’t break or crack.
- Dry Apple Slices: Pat the apple slices dry thoroughly with a paper towel to help the candy coating adhere better.
- Melt Candy Coating: Melt the white chocolate candy coating according to the package instructions until smooth and fully melted.
- Dip Apple Slices: Dip each apple slice completely into the melted candy coating and tap off any excess chocolate for an even coating.
- Place on Foil or Parchment: Lay the coated apple slices flat on a surface lined with foil or parchment paper to set.
- Remelt if Needed: Once the initial candy coating hardens, remelt any remaining candy coating to a drizzle-friendly consistency and fill a piping bag.
- Drizzle Candy Bandages: Drizzle the candy coating over the apple slices side to side, creating the appearance of mummy bandages.
- Add Eyes: Place two royal icing eyeball decorations on each apple slice to complete the mummy look.
- Set Candy Coating: Let the apple slices sit at room temperature until the candy coating hardens completely before serving.
Notes
- Use tart apple varieties like Granny Smith for a nice balance with the sweet candy coating.
- Drying the apple slices well before dipping ensures better candy adhesion and less melting.
- If the candy coating thickens too much while decorating, gently remelt it to maintain a smooth drizzle.
- Store the finished mummy apple slices in a cool place or refrigerate for up to 2 days for best freshness.
- These treats are best enjoyed the day they are made to prevent the apples from browning.


