
I absolutely adore making and sharing this Thumbprint Cookies Recipe whenever I want to bring a bit of joy and homemade charm to the table. These cookies have such a delightful balance of buttery richness and fruity sweetness that makes them irresistibly comforting. I love how a dollop of colorful jam nestled perfectly in each cookie adds not just flavor but also a beautiful pop of color that always impresses guests or brightens my afternoon tea time.
Why You’ll Love This Thumbprint Cookies Recipe
What really makes this Thumbprint Cookies Recipe special for me is the way these cookies manage to be both simple and elegant at the same time. The buttery cookie base is soft but still holds a tender crumb, and the burst of jam in the center provides a sweet, slightly tart contrast that feels like a little surprise in every bite. I find the flavor profile perfectly balanced—not overly sweet, thanks to the buttery dough and a variety of jams you can use to suit your mood.
Aside from the wonderful taste, the ease of preparation has me hooked. Mixing up the dough is straightforward, and I love using my thumb to create those iconic little wells—it’s such a fun, hands-on step that adds to the homemade feel. These cookies are perfect for weekend baking sessions, holiday treats, or anytime you want to whip up something impressive without a complicated recipe. Their cheerful appearance and delicious flavor always make them stand out in any cookie platter.
Ingredients You’ll Need
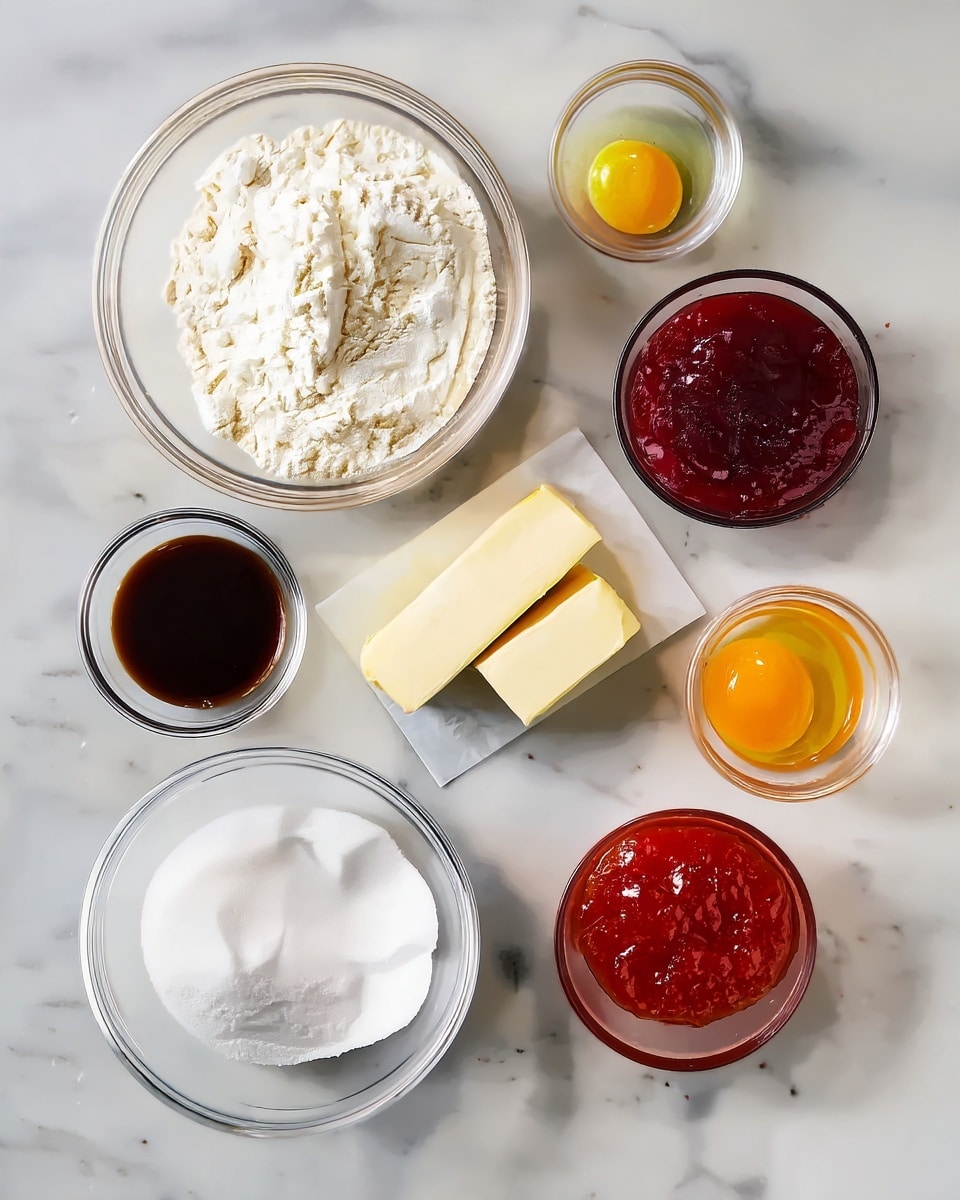
The magic of this recipe really lies in its simple, yet carefully chosen ingredients. Each one plays a vital role in creating the tender, luscious texture and classic flavor that defines these thumbprint cookies.
- 1 3/4 cups all-purpose flour: The sturdy base that ensures these cookies hold their shape while staying soft.
- 1/2 teaspoon baking powder: Adds a subtle lift so the cookies aren’t dense or heavy.
- 1/2 teaspoon kosher salt: Enhances the flavors and balances the sweetness perfectly.
- 3/4 cup (1 1/2 sticks) softened butter: The heart of the cookie, giving that rich and tender crumb I love.
- 1/2 cup granulated sugar: Sweetens the dough just right without overpowering the jam.
- 1 large egg: Binds the dough together and adds moisture for softness.
- 1 teaspoon pure vanilla extract: Brings a warm, comforting note to every bite.
- 1/3 cup assorted jams: I like using different flavors to keep things exciting—raspberry, apricot, or strawberry all work beautifully.
Directions
Step 1: Preheat your oven to 350ºF and line two baking sheets with parchment paper to prevent sticking and ensure even baking.
Step 2: In a large bowl, whisk together the flour, baking powder, and kosher salt. This dry mixture will guarantee your cookies have perfect texture and subtle rise.
Step 3: In a separate bowl, beat the softened butter and sugar on medium speed until the mix is pale and fluffy—this usually takes about 3 minutes. This step is key for creating that melt-in-your-mouth texture.
Step 4: Beat in the egg and vanilla extract until everything is well combined, then gradually add the dry ingredients in two batches. Mix until just incorporated; overmixing can toughen the dough.
Step 5: Using a small cookie scoop or spoon, form 1-inch dough balls and place them spaced evenly on your prepared baking sheets. Press your thumb firmly into the center of each ball to create a well about 1/2 inch deep—this is where the jam magic happens!
Step 6: Fill each indentation with a small spoonful of your chosen jam. Don’t overfill to avoid spills while baking.
Step 7: Bake the cookies in your preheated oven for 13 to 14 minutes, or until the edges just start turning golden. Keep a close eye on them to prevent overbaking.
Step 8: Remove from the oven and let the cookies cool on the baking sheets completely before transferring to a wire rack for serving or storage.
Servings and Timing
This Thumbprint Cookies Recipe yields about 35 cookies, making it perfect for sharing with a crowd or saving some extras for later. The prep time is roughly 15 minutes, largely spent mixing and filling, while the baking time clocks in at 13 to 14 minutes. Altogether, from start to finish, you’re looking at about 40 minutes, including cooling time which is crucial for the jam to set and the cookies to firm up just right.
How to Serve This Thumbprint Cookies Recipe

I like to serve these cookies at room temperature, which really lets their flavors shine. They pair wonderfully with a hot cup of tea or freshly brewed coffee for a cozy afternoon treat. When I’m entertaining, I sometimes place them on a festive platter garnished with sprigs of fresh mint or edible flowers to make the presentation extra special.
If I’m offering these at a holiday party or family gathering, I love pairing them with a light dessert wine like a Moscato or even a sparkling rosé—the slight sweetness and acidity complement the fruity jam perfectly. For a non-alcoholic option, a chilled glass of sparkling water with a twist of lemon is refreshing and balances the richness of the cookies.
For portioning, I usually recommend two or three cookies per person to satisfy sweet cravings without feeling overwhelming. These cookies make a delightful addition to dessert tables, cookie exchanges, or just as a thoughtful homemade gift packed in pretty tins or boxes.
Variations
I enjoy experimenting with this Thumbprint Cookies Recipe to tailor it to different tastes and dietary needs. For instance, I sometimes swap out the all-purpose flour for a gluten-free blend when baking for friends with gluten sensitivities, and the results are just as tender and delicious. Using vegan butter and a flax egg instead of a regular egg makes these cookies suitable for vegan diets without sacrificing flavor.
When it comes to the jam, I like to mix it up seasonally—try fresh peach preserves in the summer or spiced cranberry jam in the winter for festive flair. For an indulgent twist, dipping the baked cookies partially into melted chocolate and letting that set adds a rich, decadent layer that makes these cookies feel extra special.
If you want to try a different texture, baking the cookie dough balls before adding the jam creates a crispier cookie base. Alternatively, you can experiment with cream cheese in the dough for tanginess, or add a hint of almond extract instead of vanilla for a subtle nutty note.
Storage and Reheating
Storing Leftovers
Once completely cool, these thumbprint cookies keep best in an airtight container at room temperature. I recommend using a metal or plastic container with a tight seal to avoid moisture getting in. Layer the cookies with parchment paper between them to prevent sticking. Stored this way, they stay fresh and flavorful for up to one week, which is perfect for savoring over several days.
Freezing
You can absolutely freeze this Thumbprint Cookies Recipe, which is a great way to have them on hand for unexpected guests. Freeze the baked and cooled cookies in a single layer on a baking sheet first, then transfer them into a freezer-safe container or heavy-duty freezer bag, separating layers with parchment paper. They’ll keep well frozen for up to three months. When ready to enjoy, thaw them at room temperature for a few hours—no oven needed.
Reheating
If you prefer your thumbprint cookies slightly warm, I recommend reheating them gently in a low oven (about 300ºF) for 5 minutes or so. Avoid microwaving as it can make the cookies overly soft and the jam runny. Heating slowly in the oven helps preserve the firmness of the cookie while nudging the jam into a deliciously gooey state that feels just like fresh-baked.
FAQs
Can I use different types of jam for this recipe?
Absolutely! This Thumbprint Cookies Recipe is very versatile when it comes to jam. I often switch between raspberry, strawberry, apricot, and even fig preserves depending on what’s in season or my mood. Just choose a jam that’s not too runny to avoid spreading too much during baking.
How do I prevent the cookies from spreading too much in the oven?
Make sure your butter is softened but not melted—room temperature is best for beating. Also, chilling the dough briefly before baking can help keep the cookies from spreading excessively. Lastly, don’t overfill the thumbprint with jam, as that might cause leakage and spreading.
Can I make these cookies ahead of time?
Yes! You can actually make the dough and shape the cookies with jam up to a day in advance and keep them refrigerated until you’re ready to bake. This makes for easy preparation when you want fresh baked cookies on short notice.
Are these cookies gluten-free?
The classic recipe uses all-purpose flour, which contains gluten, but you can easily substitute a good gluten-free baking blend to make them gluten-free. I recommend choosing one that doesn’t contain too much xanthan gum to keep the texture light and tender.
What’s the best way to make the thumbprint indentation?
Using your thumb is traditional and gives the cookies their name, but if you prefer, a small spoon handle or the back of a teaspoon works just as well to create a neat, uniform indentation for the jam.
Conclusion
I truly hope you enjoy making and sharing this Thumbprint Cookies Recipe as much as I do. It’s one of those timeless, joyful treats that always brings a smile and tastes like a warm hug from the oven. Whether you bake them for a festive gathering or a quiet moment with a cup of tea, these cookies are guaranteed to become a beloved favorite in your baking repertoire.
Print
Thumbprint Cookies Recipe
- Prep Time: 15 minutes
- Cook Time: 14 minutes
- Total Time: 29 minutes
- Yield: 35 cookies
- Category: Dessert
- Method: Baking
- Cuisine: American
Description
These classic Thumbprint Cookies are buttery and tender with a delightful center of sweet jam. Perfect for holiday gatherings or a simple homemade treat, these cookies combine a soft, crumbly texture with a burst of fruity flavor in every bite.
Ingredients
Dry Ingredients
- 1 3/4 cups all-purpose flour
- 1/2 teaspoon baking powder
- 1/2 teaspoon kosher salt
Wet Ingredients
- 3/4 cup (1 1/2 sticks) butter, softened
- 1/2 cup granulated sugar
- 1 large egg
- 1 teaspoon pure vanilla extract
Filling
- 1/3 cup assorted jams (such as raspberry, strawberry, or apricot)
Instructions
- Preheat Oven and Prepare Baking Sheets: Preheat your oven to 350ºF (175ºC). Line two baking sheets with parchment paper to ensure the cookies bake evenly and prevent sticking.
- Mix Dry Ingredients: In a large bowl, whisk together the all-purpose flour, baking powder, and kosher salt. This ensures even distribution of the raising agent and seasoning.
- Cream Butter and Sugar: In a separate bowl, beat the softened butter and granulated sugar using a hand mixer or stand mixer until the mixture is pale and fluffy. This usually takes about 3 minutes and is key to achieving a light texture.
- Add Egg and Vanilla: Beat in the large egg and pure vanilla extract until fully incorporated, adding flavor and moisture to the dough.
- Combine Dry and Wet Ingredients: Gradually add the dry ingredient mixture to the butter mixture in two batches, mixing until just combined to avoid overworking the dough which can cause toughness.
- Form Dough Balls and Create Thumbprints: Use a small cookie scoop to portion 1-inch balls of dough onto the prepared baking sheets, spacing them evenly. Press a thumbprint or the back of a spoon into the center of each ball about 1/2 inch deep to create a well for the jam.
- Fill with Jam: Spoon a small amount of your favorite jam into each thumbprint, filling the indentation without overfilling to prevent spilling during baking.
- Bake Cookies: Bake in the preheated oven for 13 to 14 minutes or until the edges turn a light golden brown, indicating the cookies are perfectly baked through.
- Cool and Serve: Allow the cookies to cool on the baking sheets to set the jam and prevent breaking, then transfer to a wire rack or serve directly.
Notes
- Ensure the butter is softened but not melted for the best texture.
- You can use any flavor of jam to customize the cookies to your liking.
- These cookies can be stored in an airtight container at room temperature for up to 5 days.
- For added texture, consider rolling the dough balls in sugar before pressing the thumbprint.
- If you prefer a healthier option, use whole wheat flour, but the texture may be slightly different.


