
I absolutely adore sharing snacks that are both festive and fuss-free, which is exactly why The Easiest Mummy Rice Krispie Snacks Recipe has become one of my favorites to whip up. These cute little mummies are perfect for Halloween or anytime you want a sweet treat with a fun twist. I love how quick they come together—just three simple ingredients transform into charming, crunchy, chocolate-coated delights adorned with playful candy eyes that bring out everyone’s inner kid. Honestly, once you try this recipe, you’ll see why it’s such a go-to for parties and casual get-togethers!
Why You’ll Love This The Easiest Mummy Rice Krispie Snacks Recipe
What makes this recipe truly special for me is its brilliant balance of flavors and textures. The classic crispy crunch of the Rice Krispie bars pairs beautifully with the smooth, sweet white chocolate coating. And those candy eyes? They add a whimsical pop that makes each snack feel like a tiny work of edible art. I love how the vanilla notes from the candy coating elevate the simple rice treat into something festive and thrilling without any complicated steps.
Another reason I’m so enthusiastic about The Easiest Mummy Rice Krispie Snacks Recipe is how quickly it comes together. I can have a batch ready in well under an hour, making it a lifesaver for last-minute celebrations or when I want to add a bit of seasonal flair to a weeknight snack. These treats are a hit at Halloween parties, classroom events, or even just to surprise my family with something sweet and silly. Plus, they don’t require any baking skills, which means anyone can make them confidently and still impress.
Ingredients You’ll Need
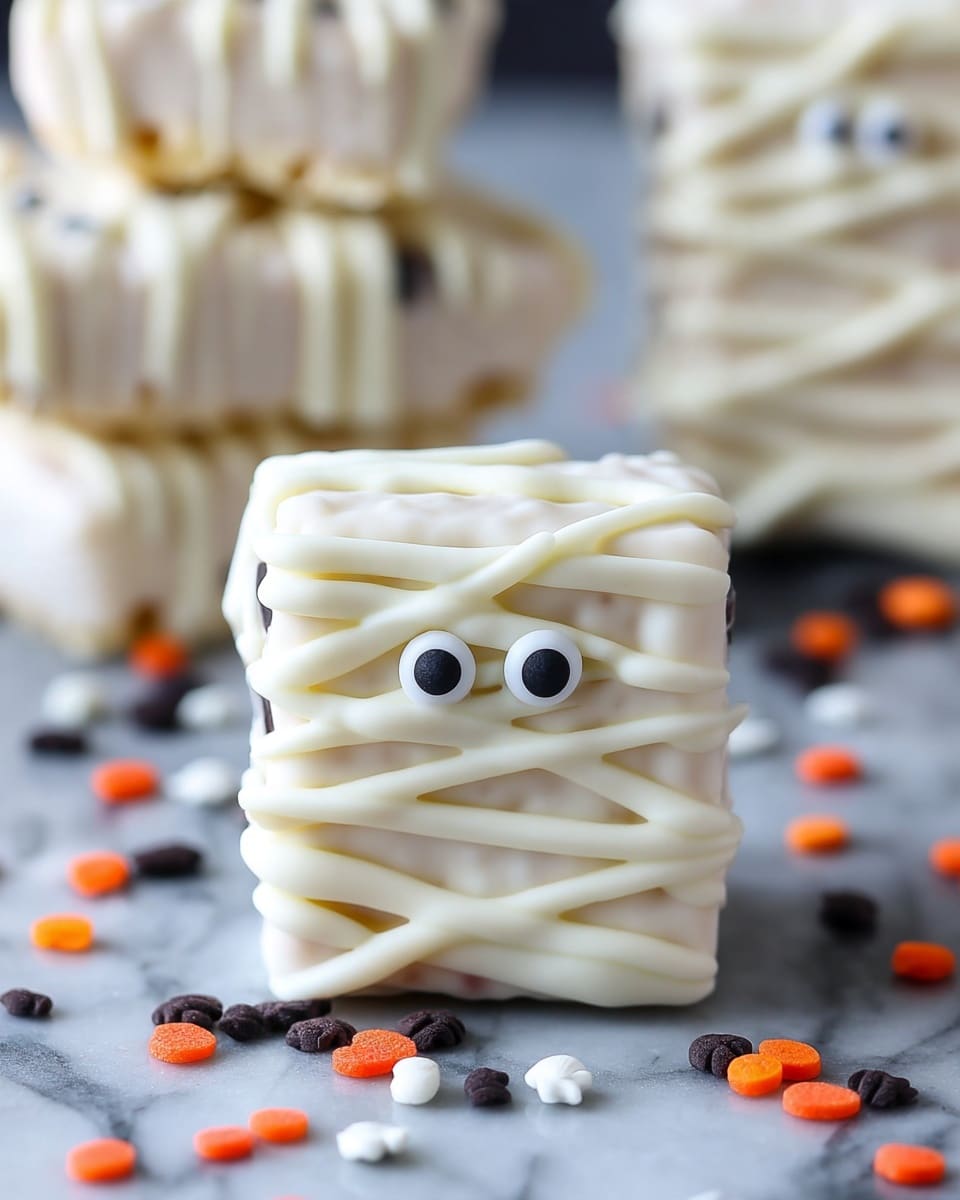
The beauty of this recipe lies in its simplicity—only a handful of ingredients come together to create such an irresistible treat. Each one plays a crucial role, from taste to texture, ensuring you get that perfect mummy effect and delightful crunch every time.
- 12 ounces white chocolate candy coating: This melts smoothly and creates the delicious mummy wrapping effect that’s crucial for both flavor and decoration.
- 12 rice krispie treat bars (unwrapped): The crunchy, chewy foundation for your mummy snacks – make sure they’re well-formed but soft enough to dip.
- 24 candy eyes: The magical finishing touch that brings these mummies to life and makes them irresistibly fun.
Directions
Step 1: Place your white chocolate candy coating in a microwave-safe bowl. Heat on medium power in 30-second bursts, stirring in between each, until completely melted and velvety smooth. Take care not to overheat, so your chocolate stays glossy without burning.
Step 2: Line a baking sheet with parchment paper to keep your treats from sticking. If you want mummy pops, cut paper straws in half or gather lollipop sticks. Dip the tip of each straw or stick into the melted white chocolate, then insert it into the bottom short edge of each Rice Krispie treat. Let these set completely to secure the sticks in place.
Step 3: One by one, dip each Rice Krispie treat into the white chocolate, coating one side and the edges. Gently shake off the excess chocolate to avoid clumps, then place the treat on the parchment paper with the uncoated side down. While the chocolate is still wet, press two candy eyes onto each treat so they stick perfectly.
Step 4: Reheat any remaining white chocolate again gently if it has hardened, then transfer it into a piping bag fitted with a Wilton 101 tip or a Ziplock bag with a tiny corner cut off. Drizzle the chocolate over the treats in thin, overlapping lines to mimic mummy bandages, giving your treats that signature look. Let everything cool and set completely at room temperature.
Step 5: Once dry, your mummies are ready to serve! If you don’t eat them right away, store them in an airtight container to keep their crispiness fresh for up to a week.
Servings and Timing
This recipe makes approximately 12 Mummy Rice Krispie Snacks, perfect for sharing with friends or family. The prep time is about 15 minutes, but to account for the cooling and setting steps, plan for a total time of around 1 hour and 15 minutes. There’s no actual cooking required beyond melting the candy coating, but the resting time is essential to get the perfect texture and decoration finish.
How to Serve This The Easiest Mummy Rice Krispie Snacks Recipe
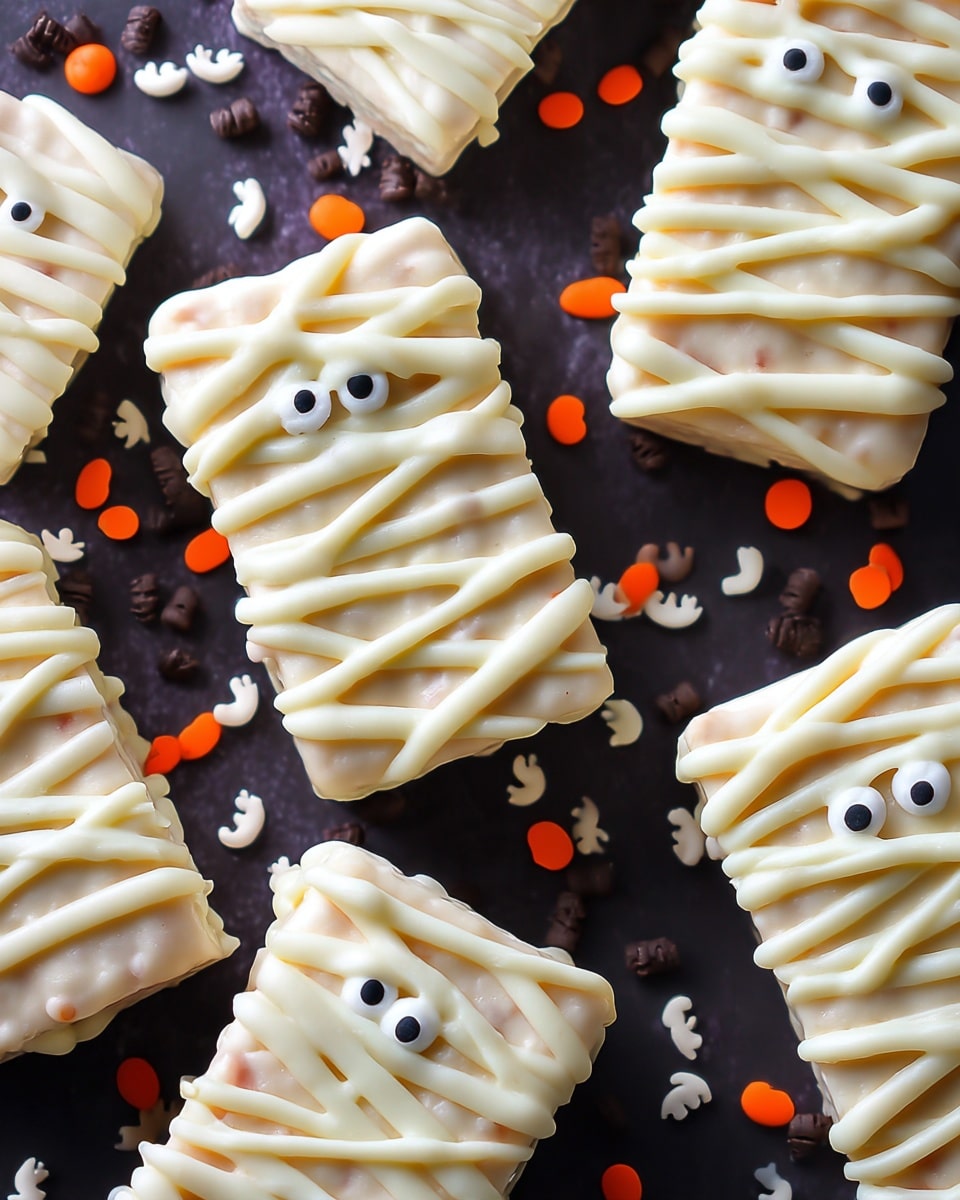
I love serving these adorable snacks at Halloween parties or during fun family movie nights. They’re perfect as finger food straight from the platter with their little sticks or just as bite-sized treats. For an extra festive touch, I sometimes present them on a black or orange serving tray lined with Halloween-themed napkins, which really makes the white chocolate wrapping pop visually.
Garnishing ideas can include a sprinkle of edible glitter or a few mini Halloween sprinkles around the plate, but I honestly find the candy eyes and striped chocolate drizzle do all the work for me. When it comes to beverages, these treats pair wonderfully with a cool glass of milk or a fun non-alcoholic punch for kids. Adults might enjoy them alongside a lightly sweetened iced tea or even a creamy, spiced latte to balance the sweetness.
Room temperature is ideal for enjoying these snacks, as chilling can harden the white chocolate and make the Rice Krispie bars less chewy. I recommend portioning them out in individual servings during parties so everyone can grab a mummy snack and enjoy it without fuss. They’re also a fantastic treat for lunchboxes or after-school snacks because they hold up well and travel nicely.
Variations
I’ve had so much fun experimenting with different spins on The Easiest Mummy Rice Krispie Snacks Recipe. For instance, swapping the white chocolate coating for dark or milk chocolate makes for a richer flavor and is just as easy to work with. If you’re after a vegan or dairy-free option, check out vegan white chocolate alternatives or use white candy melts made from plant-based ingredients.
To mix up the look, I’ve also tried colored candy eyes or adding a tiny bit of food coloring to the white chocolate to create different “bandage” colors. Another fun twist is stirring mini chocolate chips or sprinkles into the Rice Krispie base before coating for extra texture. For different occasions beyond Halloween, skipping the eyes and drizzles lets you turn these into elegant white chocolate-dipped bars, perfect for bridal showers or birthdays.
If you’re feeling adventurous, try warming the Rice Krispie bars slightly before coating. This makes them extra soft and easier to coat smoothly, though you do want to be careful not to melt them. I usually stick with the standard way, but the slight variations can be great depending on your preferences and available ingredients.
Storage and Reheating
Storing Leftovers
I always recommend storing any leftover mummy snacks in an airtight container at room temperature. This keeps them crisp and prevents the white chocolate from sweating or becoming sticky. They’re best enjoyed within a week for optimal freshness. Avoid stacking them too tightly to keep the chocolate decorations intact.
Freezing
While these treats can be frozen, I find they thaw best if individually wrapped in plastic wrap and placed in a freezer-safe container or bag. Frozen, they can last up to one month. When you want to enjoy them again, just let them thaw at room temperature—don’t microwave, as that can make the chocolate melt unevenly and affect texture.
Reheating
Thankfully, these treats don’t really require reheating. If you want to soften the Rice Krispie base slightly, warming them very gently in a low oven (around 200°F) for a few minutes works, but avoid heat directly on the chocolate coating to prevent melting. In general, I recommend enjoying them as is to preserve their crisp edges and creamy finish.
FAQs
Can I use homemade Rice Krispie treats for this recipe?
Absolutely! Homemade Rice Krispie treats work wonderfully and give you the chance to customize the base flavor, like adding cinnamon or vanilla. Just make sure they’re fully set and firm enough to dip without falling apart.
What if I don’t have candy eyes? Can I use something else?
If candy eyes aren’t available, small chocolate chips, dots of black icing, or even edible markers can create a fun eye effect. You can also use colorful sprinkles or mini M&Ms for a creative twist.
Is it necessary to use paper straws or sticks?
Not at all! The sticks are optional and just add a fun way to hold or display the treats. You can simply coat the bars and serve them without any sticks if you prefer bite-sized snacks.
Can I make these ahead of time for a party?
Yes, these snacks hold up well when made a day or two in advance. Just store them in an airtight container in a cool, dry place, and add any last-minute drizzle or decorations just before serving if you want the freshest look.
How do I prevent the white chocolate from seizing while melting?
To avoid seizing, heat the white chocolate in short bursts, stirring constantly between each session. Make sure no water comes in contact with the chocolate, as even a small drop can cause it to seize. Using a microwave-safe bowl and stirring well helps maintain a smooth melt.
Conclusion
I’m so excited for you to try The Easiest Mummy Rice Krispie Snacks Recipe because it’s one of those joyful, simple treats that brings smiles without any stress. Whether you’re throwing a Halloween bash or just want a fun dessert to brighten up your day, these mummies deliver on charm and taste every time. Trust me, once you’ve made them, they’ll become your go-to for festive fun and sweet cravings alike!
Print
The Easiest Mummy Rice Krispie Snacks Recipe
- Prep Time: 1 hour 15 minutes
- Cook Time: 0 minutes
- Total Time: 1 hour 15 minutes
- Yield: 12 Rice Krispie Treats
- Category: Dessert
- Method: No-Cook
- Cuisine: American
Description
These Mummy Rice Krispie Treats are a fun and festive Halloween snack made with only three simple ingredients. Easy to make and perfect for parties, they feature classic Rice Krispie treats coated in white chocolate and decorated with candy eyes to look like cute mummies. Ready in just over an hour, they make a spooky yet delicious addition to any celebration.
Ingredients
Basic Ingredients
- 12 ounces white chocolate candy coating
- 12 Rice Krispie treat bars (unwrapped)
- 24 candy eyes
Optional Tools
- Parchment paper
- Paper straws or lollipop sticks (optional)
- Piping bag
- Wilton 101 piping tip
- Coupler
Instructions
- Melt the White Chocolate: Place the white chocolate candy coating in a microwave-safe bowl and heat it according to the package instructions or in 30-second intervals, stirring thoroughly between each interval until smooth and fully melted.
- Prepare Treats on Sticks (Optional): Lay a large piece of parchment paper on your workspace. If you want your treats on sticks, cut paper straws in half or use lollipop sticks, dip the tip into the melted white chocolate, then insert it into the short bottom side of each rice krispie treat. Let it dry to secure the stick.
- Coat the Treats: Dip each Rice Krispie treat one at a time into the melted white chocolate, coating the dipped side and edges well. Shake off excess chocolate gently and place the coated side down onto the parchment paper. While the coating is still wet, attach two candy eyes to each treat. Let them dry completely.
- Make the Mummy Wrapping: Reheat any remaining white chocolate if it has hardened. Pour the melted chocolate into a piping bag fitted with a Wilton 101 tip or a makeshift piping bag using a Ziplock bag with a tiny corner snipped off. Drizzle the white chocolate over the treats in a back-and-forth pattern to create the mummy bandage effect. Set aside until fully cooled and hardened.
- Serve or Store: Serve the mummy treats immediately or store them in an airtight container for up to one week to keep them fresh.
Notes
- You can use paper straws or lollipop sticks to make the treats easier to handle and eat, but it’s optional.
- If you don’t have a piping bag, a Ziplock bag works well as a substitute for drizzling the chocolate.
- Make sure to allow the white chocolate to dry completely between dipping and piping for best results.
- Store the treats in an airtight container to maintain freshness for up to 7 days.
- Be gentle when shaking off excess chocolate to avoid breaking the treats.


