
I am beyond excited to share my absolute favorite indulgence with you — The Best Fudgy Chocolate Brownies Ever Recipe. From the moment I took my first bite, I knew these brownies were something special: unbelievably rich, deeply chocolatey, and perfectly gooey in all the right places. I love how simple the ingredients are yet how they come together to create such an irresistible treat that’s always a crowd-pleaser in my house and beyond.
Why You’ll Love This The Best Fudgy Chocolate Brownies Ever Recipe
When I think about what makes this recipe stand out, the flavor profile is the very first thing that comes to mind. These brownies boast an intense chocolate flavor that’s balanced beautifully by just the right amount of sweetness and a hint of vanilla that lingers on the palate. The texture? Utterly divine. They are incredibly fudgy, but also slightly cakey around the edges, which gives you the best of both worlds in every bite. Honestly, I can’t help but smile every time I’ve got a warm square in front of me.
Beyond the amazing taste and texture, what I really appreciate about this recipe is how straightforward it is to prepare. Even if you’re not a seasoned baker, these brownies come together quickly with simple mixing, and the step-by-step process is clear and forgiving. Plus, it’s perfect for just about every occasion — whether it’s a casual weeknight dessert, a festive family gathering, or a last-minute party contribution. I always keep this recipe in my back pocket because no one ever says no to fudgy chocolate brownies!
Ingredients You’ll Need
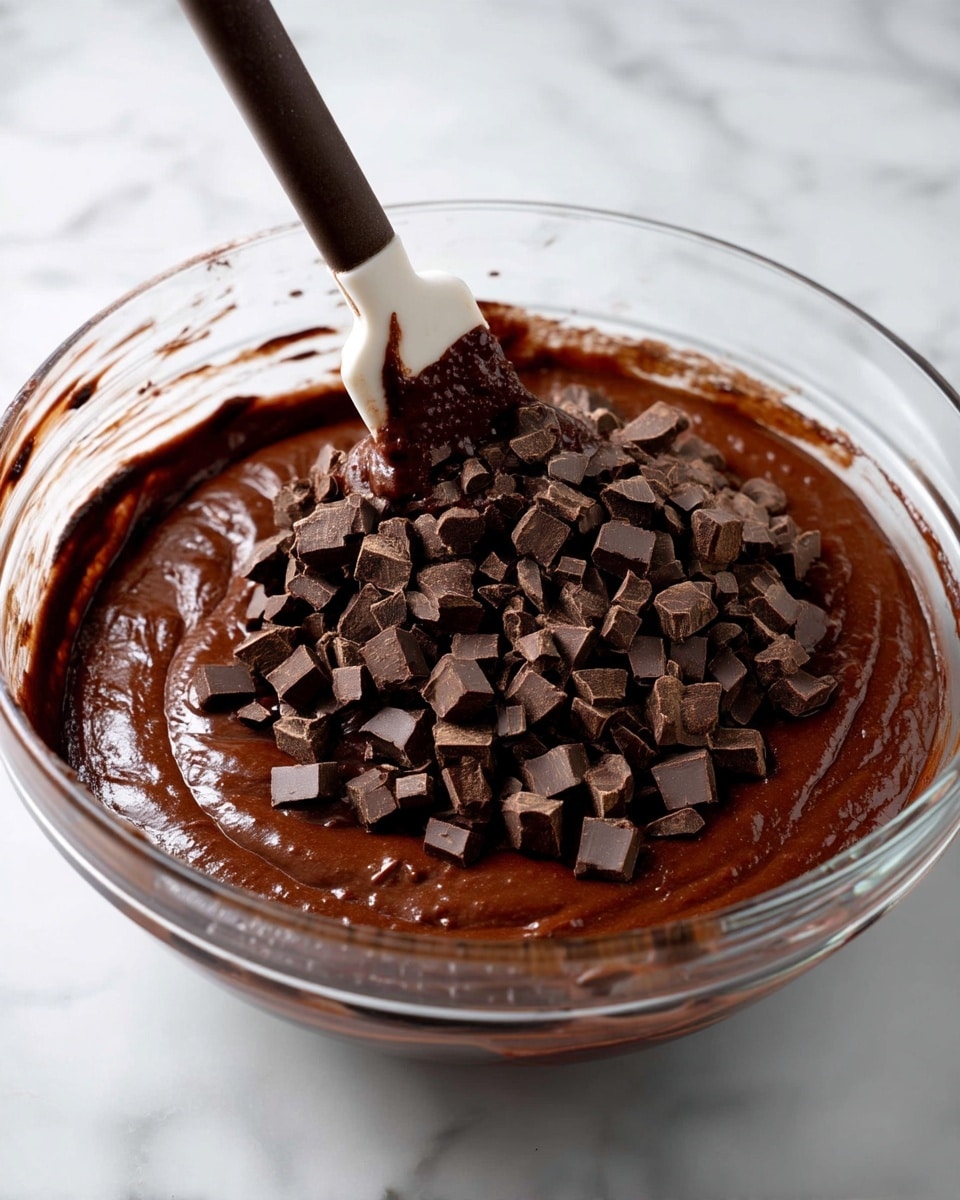
The magic here is in the simplicity and quality of ingredients. Each component plays an essential role, whether it’s lending richness, texture, or that unmistakable chocolate flavor that makes these brownies unforgettable.
- Unsalted butter (1 cup, melted and cooled): Provides a luscious fat base that makes the brownies moist and fudgy.
- Vegetable oil (2 tablespoons): Adds extra moisture to keep the texture soft and chewy without greasiness.
- White sugar (1 1/4 cups): Balances the bitterness of the cocoa and adds structure to the batter.
- Light brown sugar (1 cup, packed): Contributes a subtle caramel undertone and helps keep the edges tender.
- Large eggs (4, room temperature): Bind the ingredients together and add richness to the batter.
- Pure vanilla extract (1 tablespoon): Enhances the depth of chocolate flavor and adds warmth.
- Salt (3/4 teaspoon): Elevates the chocolate notes and balances the sweetness perfectly.
- All-purpose flour (1 cup): Provides structure while keeping the brownies dense but not cakey.
- Unsweetened cocoa powder (1 cup, good quality): The star ingredient for deep, rich chocolate flavor.
- Semi-sweet chocolate chips (7 oz, or roughly chopped chocolate): Melts throughout for pockets of gooey chocolate and a luscious topping.
Directions
Step 1: Preheat your oven to 175°C (350°F). This ensures it’s nice and hot when you’re ready to bake and helps the brownies cook evenly.
Step 2: Lightly grease an 8×12-inch baking pan with cooking oil spray. Then, line it with parchment paper or baking paper, leaving some overhang on the sides for easy removal later. Set this aside; it’s a small step that makes a big difference for clean brownies.
Step 3: In a medium bowl, combine the melted butter, vegetable oil, and both sugars. Whisk these together until smooth and fully combined. Then add the room temperature eggs and vanilla extract, beating again until the mixture lightens in color and becomes slightly fluffy — about a minute. This step is key for a tender crumb.
Step 4: Sift the flour, cocoa powder, and salt into the wet mixture. Gently fold these dry ingredients in using a spatula or wooden spoon until just combined. Resist the urge to over-mix — this will keep your brownies dense and fudgy, not tough.
Step 5: Fold in three-quarters of the chocolate chips or chopped chocolate, folding carefully so they are evenly distributed without breaking up too much.
Step 6: Pour the brownie batter into your prepared pan and smooth the surface evenly with a spatula. Sprinkle the remaining chocolate pieces on top for a decadent finish that melts into a glossy, chocolatey topping.
Step 7: Bake for 25 to 30 minutes if you like your brownies just a little underdone and extra fudgy. You’ll want the center to be set to the touch with no jiggle, but a toothpick inserted should come out with some moist crumbs sticking to it. If you prefer them firmer and more set, bake closer to 35 to 40 minutes, but be prepared for a less gooey texture.
Step 8: Once baked, remove your brownies from the oven and allow them to cool in the pan for 15-20 minutes. Then carefully lift them out using the parchment overhang and let them cool completely on a wire rack before slicing into 16 pieces. This cooling step is crucial as it allows the brownies to set and makes slicing a breeze.
Servings and Timing
This recipe yields 16 generous brownies, perfect for sharing at a gathering or enjoying over several days. Prep time is about 10 minutes, with baking taking between 25 and 40 minutes depending on your preferred fudginess. Allow an additional 20-30 minutes for cooling and setting. Overall, you’ll spend roughly 35 minutes actively preparing and baking, plus some hands-off cooling time. It’s a fantastic, relatively quick dessert that’s well worth the wait!
How to Serve This The Best Fudgy Chocolate Brownies Ever Recipe
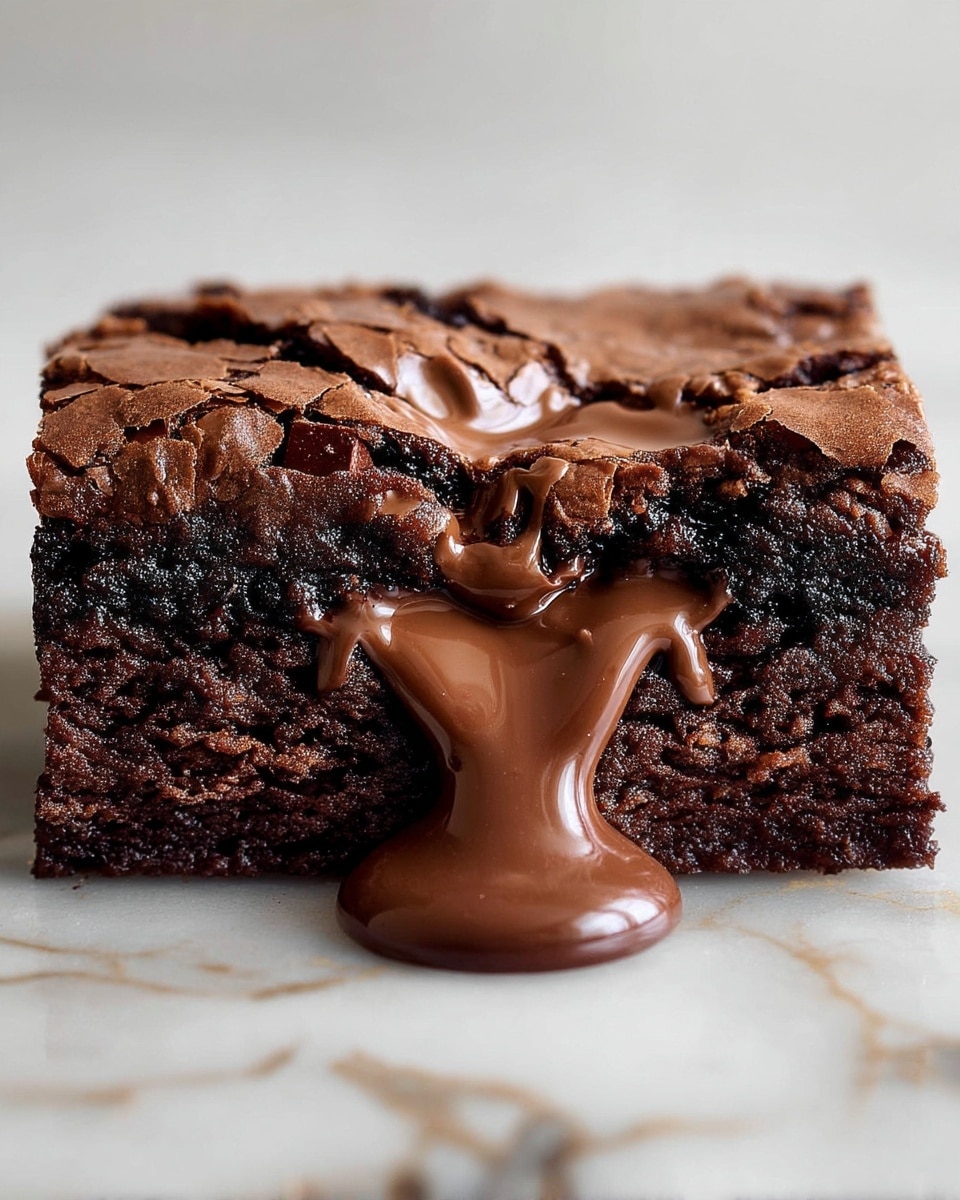
I love serving these brownies slightly warm to really highlight the melty chocolate chips nestled inside. You can nuke individual squares for about 10 seconds to revive that gooey sensation if they’ve been refrigerated. They’re wonderful on their own for a simple indulgence, but I also like adding a scoop of vanilla bean ice cream on top for a classic dessert pairing. A drizzle of caramel or raspberry sauce can really elevate the experience if you’re feeling fancy.
For a casual presentation, I cut the brownies into even squares and arrange them on a pretty platter with some fresh berries on the side to add a pop of color and brightness. If you want to impress guests at a party, sprinkling a little flaky sea salt on top just before serving adds a sophisticated contrast that keeps people coming back for more. When it comes to drinks, a bold cup of coffee or espresso complements these brownies perfectly, and for adults, a glass of rich red wine like a Zinfandel or Cabernet pairs wonderfully with the deep chocolate flavors.
These brownies are versatile in their serving temperature and occasion. They shine on holiday dessert tables, at family dinners, or as a sweet pick-me-up on a cozy weekend afternoon. I recommend serving them at room temperature or just slightly warm so everyone can enjoy that signature fudgy texture.
Variations
I love experimenting with this basic recipe to tailor it to different tastes or dietary needs. For a nutty twist, adding chopped walnuts, pecans, or almonds right into the batter or sprinkled on top gives the brownies a satisfying crunch and extra flavor. If you want to switch up your chocolate profile, try using bittersweet or dark chocolate chips instead of semi-sweet for a richer, more intense taste.
If you’re looking for gluten-free options, swapping the all-purpose flour with a good quality gluten-free baking flour blend works beautifully without compromising on texture or flavor. For a vegan version, you can replace the butter with coconut oil, use a flax or chia egg substitute, and opt for dairy-free chocolate chips. The fudgy nature is still there, though the texture is slightly different — but still so delicious that I often make this version for friends with dietary restrictions.
Another variation I adore is adding mix-ins like shredded coconut, peanut butter chips, or dried cranberries for bursts of flavor. Sometimes I even swirl some peanut butter into the batter before baking for a luxurious marbled effect. Alternatively, baking these brownies in individual ramekins or muffin tins creates portable brownie cups that are perfect for parties or lunchbox treats.
Storage and Reheating
Storing Leftovers
Once cooled, I store leftover brownies in an airtight container at room temperature to keep them fresh and moist. They will stay delicious for up to three days this way. If it’s warmer or more humid where you live, or you want them to last a little longer, refrigerating the brownies in a sealed container is a great option — they’ll keep well for up to five days without drying out.
Freezing
These brownies freeze beautifully, making them a perfect make-ahead treat. I recommend cutting them into squares first, then wrapping each piece tightly in plastic wrap or parchment paper to prevent freezer burn. Place the wrapped brownies in a freezer-safe bag or container, and they’ll keep well for up to three months. When you’re ready to eat, thaw them overnight in the fridge and bring to room temperature, or warm gently in the microwave for 10-15 seconds to regain that fresh-baked feel.
Reheating
To enjoy the best texture and flavor when reheating, I avoid the oven because it can dry the brownies out. Instead, I pop a single brownie or two in the microwave for about 10 seconds — any longer, and they might become too soft or chewy. Another method I like is letting the brownies come to room temperature after thawing, then warming them with a small pat of butter melted on top under a hot cup of tea or coffee. This brings the chocolate chips back to their gooey glory and enhances the decadent experience.
FAQs
Can I use dark chocolate instead of semi-sweet chocolate chips?
Absolutely! Dark chocolate will give your brownies a richer and slightly less sweet flavor, which pairs wonderfully with the cocoa powder. Just make sure it’s a good quality chocolate for the best results.
What’s the best way to tell when the brownies are done baking?
I always look for a firm surface that no longer jiggles when you gently shake the pan. If you test with a toothpick, it should come out with moist crumbs but not wet batter to guarantee that fudgy texture.
Can I add nuts or other mix-ins to this recipe?
Definitely! I love tossing in chopped nuts, chocolate chips, or dried fruits for extra texture and flavor. Just fold them in along with the chocolate chips before baking to keep everything evenly distributed.
How do I make these brownies vegan?
You can substitute the butter with coconut oil, replace eggs with flax eggs (1 tablespoon ground flaxseed + 3 tablespoons water per egg), and use dairy-free chocolate chips. These swaps keep the brownies moist and fudgy with slightly different textures.
Why are my brownies cakey instead of fudgy?
This usually happens if the batter is overmixed or if you bake them for too long. Try to fold the dry ingredients in gently and keep an eye on your baking time to achieve that perfect fudgy texture I adore.
Conclusion
I can’t wait for you to try The Best Fudgy Chocolate Brownies Ever Recipe because it truly is one of my favorite baking triumphs. It’s the kind of brownie that brings smiles, cozy moments, and a little extra joy to any day. Once you make these, I’m confident you’ll agree: fudgy, rich, and utterly scrumptious brownies like these are a must-have in your recipe collection.
Print
The Best Fudgy Chocolate Brownies Ever Recipe
- Prep Time: 10 minutes
- Cook Time: 25-40 minutes
- Total Time: 35-50 minutes
- Yield: 16 servings
- Category: Dessert
- Method: Baking
- Cuisine: American
Description
Deliciously fudgy chocolate brownies with a rich, moist texture. These brownies combine melted butter, a blend of sugars, cocoa powder, and chunks of semi-sweet chocolate to create the best fudgy chocolate brownies perfect for any chocolate lover.
Ingredients
Wet Ingredients
- 1 cup unsalted butter (melted and cooled)
- 2 tablespoons vegetable oil
- 4 large eggs (at room temperature)
- 1 tablespoon pure vanilla extract
Dry Ingredients
- 1 1/4 cups white sugar
- 1 cup light brown sugar (packed)
- 3/4 teaspoon salt
- 1 cup all-purpose flour
- 1 cup unsweetened cocoa powder (good quality)
Chocolate
- 7 oz large semi-sweet chocolate chips (or roughly chopped chocolate)
Instructions
- Preheat Oven: Preheat your oven to 175°C (350°F) to ensure it reaches the correct baking temperature while you prepare the batter.
- Prepare Baking Pan: Lightly grease an 8×12-inch baking pan with cooking oil spray and line it with parchment paper. This will prevent the brownies from sticking and make removal easier.
- Mix Wet Ingredients and Sugars: In a medium bowl, combine the melted and cooled butter, vegetable oil, white sugar, and brown sugar. Whisk well to fully incorporate the ingredients.
- Add Eggs and Vanilla: Beat in the eggs one at a time, followed by the vanilla extract. Continue beating until the mixture is lighter in color and slightly fluffy, about one minute.
- Add Dry Ingredients: Sift together the all-purpose flour, unsweetened cocoa powder, and salt. Gently fold these dry ingredients into the wet mixture just until combined. Avoid over-mixing to keep the brownies fudgy.
- Incorporate Chocolate Chips: Fold in three-quarters of the semi-sweet chocolate chips evenly throughout the batter.
- Transfer Batter to Pan: Pour the batter into the prepared pan and smooth the top with a spatula. Sprinkle the remaining chocolate chips evenly on top for extra melty goodness.
- Bake: Bake for 25-30 minutes for fudgier brownies where the center is just set and slightly jiggly, or 35-40 minutes for firmer, well-set brownies. To test doneness, the center should be just set and a toothpick inserted should come out dirty.
- Cool and Slice: Remove the brownies from the oven and let them cool in the pan for 15-20 minutes. Then carefully lift them out using the parchment paper and allow to cool completely to room temperature before slicing into 16 squares.
- Optional Add-Ins: Enhance your brownies by adding crushed walnuts, peanuts, almonds, pecans, peanut butter chips, shredded coconut, or dried fruits such as cranberries or raisins to the batter before baking.
- Storage: Store brownies in an airtight container at room temperature for up to 3 days or in the refrigerator for up to 5 days. You can also freeze brownies for up to 3 months; thaw overnight in the refrigerator and serve at room temperature or reheat in the microwave.
Notes
- Do not overmix the batter once the dry ingredients are added to preserve the fudgy texture.
- Brownies will continue to cook slightly in the hot pan after removal from the oven, so be careful not to overbake.
- Use good quality unsweetened cocoa powder for best flavor.
- Allow brownies to cool completely before slicing to ensure clean cuts.
- Adding nuts or other mix-ins can enhance texture and flavor.


