
I absolutely adore this Spooky Black Cocoa Cheesecake Recipe because it combines everything I love about rich, creamy cheesecakes with a dramatic, deep black cocoa twist that’s perfect for making any gathering feel a little more special — or a little more spooky! The intense chocolatey flavor paired with a smooth, velvety texture makes it something I always look forward to sharing with friends and family, especially when I want to impress without fuss. If you love bold desserts with a surprisingly simple process, this cheesecake hits every mark for me.
Why You’ll Love This Spooky Black Cocoa Cheesecake Recipe
What really excites me about this cheesecake is its flavor profile. The use of black cocoa powder gives it a strikingly deep, almost bittersweet chocolate taste that stands out from your typical dessert. I find it’s perfectly balanced—rich but not overpowering. The Oreo crust adds a familiar crunch that contrasts so beautifully with the silky filling, creating an irresistible texture combo. Each bite feels indulgent but refined, and honestly, the dark color adds such an eye-catching element that I love to show off.
From a prep standpoint, I appreciate how straightforward this recipe is despite its gourmet vibe. You don’t need fancy equipment—just some patience for chilling and a little attention to each step. I often make the crust ahead and appreciate how freezing it quickly keeps everything neat. Plus, it’s a great crowd-pleaser, so I make it for Halloween parties, dinner with friends, or any occasion that calls for a wow-worthy dessert. It’s one of those recipes that feels special without being intimidating.
Ingredients You’ll Need
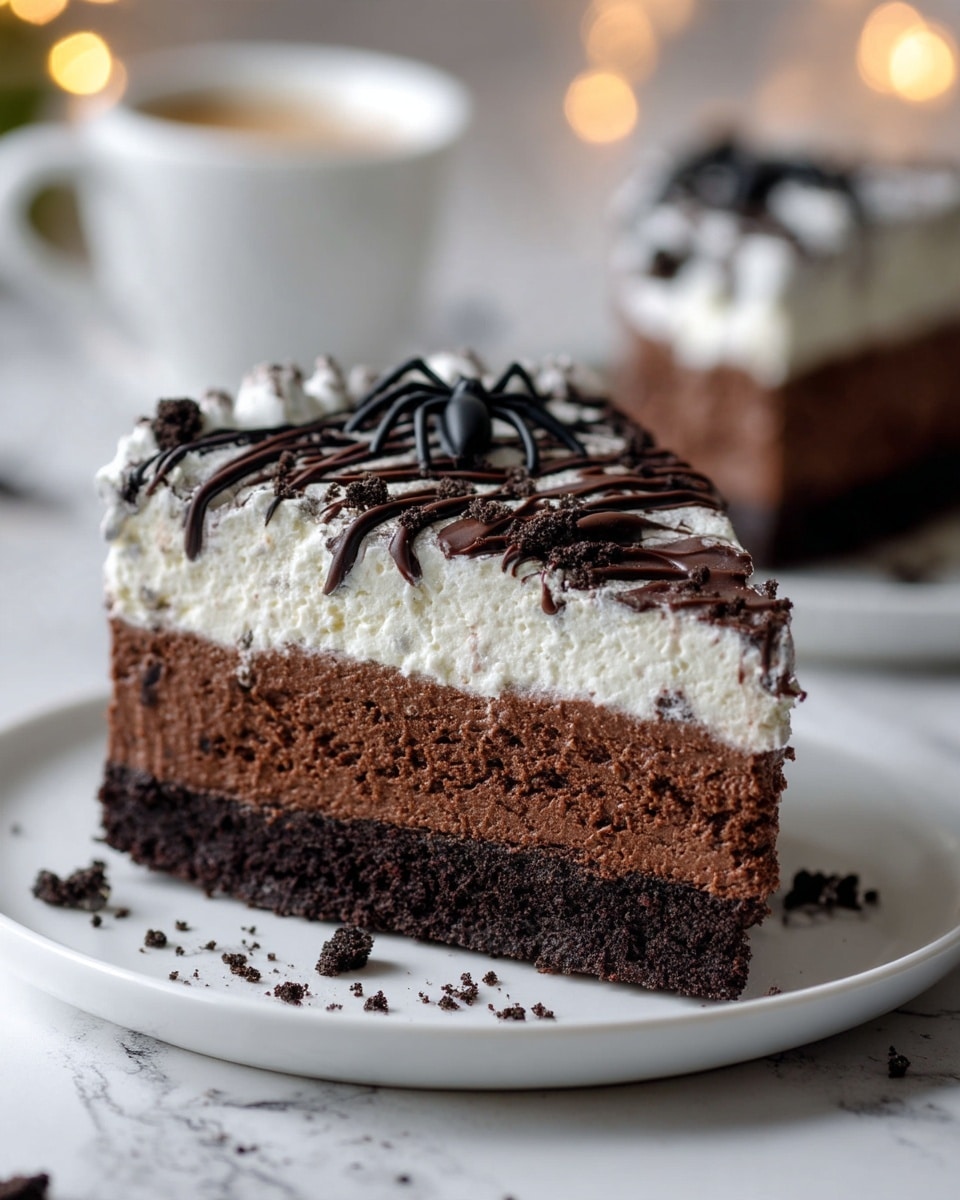
The ingredients list is wonderfully simple but thoughtfully chosen to build amazing texture, flavor, and that signature black color. Each item plays a key role—whether it’s the oreo crumbs for the base, the black cocoa for that rich depth, or the whipped cream to keep everything light and airy. Here’s what you’ll gather before diving in:
- Oreo crumbs (2 ½ cups, about 26 Oreos): This forms a crunchy, chocolatey crust that’s the perfect foundation for the cheesecake.
- Granulated sugar (¼ cup): Adds just enough sweetness to complement the cocoa without overwhelming.
- Unsalted butter (½ cup, melted): Binds the crust together and adds richness.
- Kosher salt (¼ teaspoon): Enhances the overall flavors by balancing sweetness.
- Heavy whipping cream (1 ¼ cups total): Used both in the filling’s chocolate paste and whipped for fluffiness.
- Water (¼ cup): Helps make the smooth cocoa paste that infuses the filling.
- Black cocoa powder (¾ cup): The star ingredient that creates the deep black color and robust chocolate flavor.
- Dark or semi-sweet chocolate (6 oz, chopped): Melts into the filling to deepen flavor complexity and texture.
- Cream cheese (24 oz, softened): The creamy heart of the cheesecake, best when full-fat for that classic richness.
- Powdered sugar (1 ½ cups): Sweetens the filling smoothly without graininess.
- Vanilla paste or extract (1 tablespoon): Adds a hint of warmth and balances the cocoa’s intensity.
- Black food coloring (optional): For an even darker, more dramatic finish if you want it extra spooky.
Directions
Step 1: Start by mixing your Oreo crumbs, granulated sugar, melted butter, and kosher salt in a bowl. Use a fork to stir until every crumb is well-coated and moistened. This will ensure your crust sticks together nicely.
Step 2: Press the crust mixture firmly into a 9-inch springform pan, packing it tightly halfway up the sides for a sturdy base. Pop it into the freezer to chill while you prepare the filling—this helps the crust hold shape later on.
Step 3: In a small saucepan over medium heat, combine ¼ cup of heavy cream with the water and warm until it’s steaming hot but not boiling. Remove from heat and sift in the black cocoa powder to prevent lumps, then stir until it becomes a thick, smooth paste.
Step 4: Meanwhile, place the chopped chocolate in a microwave-safe bowl and melt it in 30-second bursts, stirring between each, until fully melted and glossy. Set this aside to cool slightly.
Step 5: Using a stand mixer with a whisk attachment (or a handheld mixer), whip the remaining 1 cup of heavy cream until firm peaks form—when you lift the whisk, the cream should hold its shape without falling. Transfer this whipped cream to a separate bowl and set it aside.
Step 6: Next, switch to the paddle attachment and beat the softened cream cheese on low speed until smooth and free of lumps. Scrape the sides, then sift in the powdered sugar to keep things smooth while mixing. Cover the mixer with a kitchen towel to avoid a sugar cloud and blend again on low until fully combined.
Step 7: Slowly incorporate your cocoa paste into the cream cheese mixture, then increase the speed to medium and beat for 30 seconds to blend everything thoroughly. Add in the melted chocolate and vanilla paste or extract, mixing on low to combine. Scrape down the bottom and sides of the bowl and mix once more, adding a few drops of black food coloring if you want an even darker shade.
Step 8: Carefully fold the whipped cream into the cheesecake batter by hand. The goal is to maintain that light, airy texture without deflating the mixture—gently fold until no white streaks remain.
Step 9: Pour the filling over your chilled Oreo crust and smooth the top with a spatula. Refrigerate the cheesecake uncovered for at least 4 hours, or even better, overnight to let the flavors meld and the texture set perfectly.
Servings and Timing
This recipe yields approximately 16 generous servings, making it ideal for a crowd or festive occasion. Prep time clocks in around 30 minutes, which mostly involves mixing and whipping. You’ll need about 4 hours for chilling and setting, though I recommend letting the cheesecake rest overnight for the best texture and flavor. There’s no baking involved, which saves you time and energy, and the total time from start to finish is roughly 4 hours and 30 minutes, mostly hands-off.
How to Serve This Spooky Black Cocoa Cheesecake Recipe
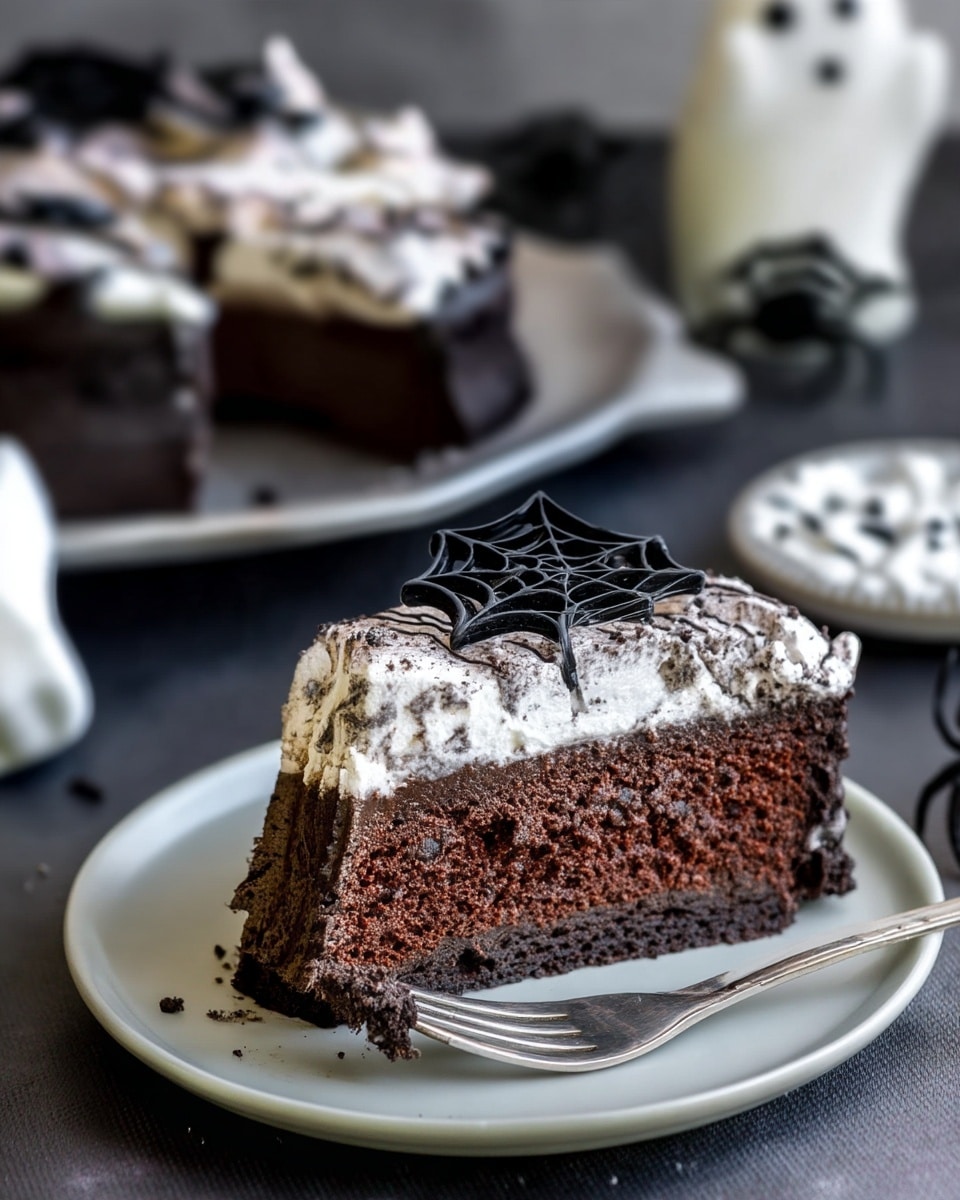
When it’s time to serve, I love the versatility of this cheesecake. It’s best enjoyed chilled directly from the fridge because that helps maintain its rich, creamy texture and keeps the crust crisp. I like slicing it into small wedges since it’s quite rich, but for festive occasions like Halloween parties or holiday dinners, you can go bigger to really indulge.
As for garnishes, I often add a few fresh raspberries or blackberries on top to introduce a pop of color and a touch of tartness that pairs beautifully with the chocolate. Sprinkling a little cocoa powder or crushed Oreos on the edges adds a nice finishing touch if you’re serving guests. For a spooky vibe, edible glitter or Halloween-themed sprinkles make things fun and festive.
Regarding beverages, one of my favorite pairings is a bold red wine like a Malbec or Cabernet Sauvignon to complement the deep chocolate flavors. If you prefer non-alcoholic drinks, a rich coffee or a creamy chai latte turns this dessert into a cozy treat. It’s an excellent centerpiece for family gatherings, parties, or even a special weeknight treat when you want to make dessert feel extraordinary.
Variations
I love experimenting with variations on this recipe depending on dietary preferences or flavor cravings. For a gluten-free twist, simply swap out the Oreo crumbs for gluten-free chocolate cookie crumbs, which are readily available or easy to make at home. The rest of the ingredients remain the same, so it’s just as delicious without the gluten.
If you need a vegan version, things get a bit trickier but still doable. I recommend using vegan cream cheese alternatives and coconut cream whipped to stiff peaks instead of heavy cream. Substitute the melted chocolate with a dairy-free dark chocolate, and opt for vegan friendly black cocoa powder if possible. It won’t be exactly the same but still incredibly tasty in its own right.
For fun flavor shifts, you can add a teaspoon of espresso powder to the cocoa paste for a mocha flair or swirl in some raspberry purée before chilling for a fruity surprise. If you want a no-chill version, try baking it gently in a water bath at low temperature—just reduce black cocoa slightly to keep it from drying out and watch the time carefully for that perfect creamy set.
Storage and Reheating
Storing Leftovers
After serving, I always recommend storing leftover cheesecake in an airtight container or tightly wrapped with plastic wrap in the fridge. This preserves freshness and prevents it from absorbing any fridge odors. Properly stored, the cheesecake will stay delicious for up to 4 days, but you’ll want to enjoy it sooner rather than later for the best texture.
Freezing
This cheesecake freezes wonderfully, which is a lifesaver if you want to prep in advance. To freeze, wrap the entire cheesecake tightly in plastic wrap and then place it in a freezer-safe zip bag or container. It can keep for up to 2 months frozen. When you’re ready to enjoy, thaw it overnight in the fridge before serving—avoid thawing at room temperature as it can affect texture.
Reheating
Since this is a no-bake cheesecake, I don’t recommend heating it. It’s best enjoyed chilled to maintain the creamy texture and the integrity of the chocolate flavors. If you want to warm components, you might gently heat chocolate sauce or prepare a warm beverage to accompany each slice, but the cheesecake itself tastes and feels best cold.
FAQs
Can I use regular cocoa powder instead of black cocoa powder?
Regular cocoa powder will work if you can’t find black cocoa, but the texture and flavor will not be as intense or as dark. Black cocoa powder has a richer, slightly smoky taste and a deep black color that makes this cheesecake special. If using regular cocoa, you might want to add a bit of black food coloring to mimic the look.
Do I have to use Oreos for the crust?
Oreos are my top choice because they add sweetness and chocolate crunch without extra work, but you can substitute with any chocolate cookie crumbs or even graham crackers if you prefer a less intense chocolate flavor. Just be sure to keep the ratio of crumbs to butter to maintain the crust’s texture.
Can I make this cheesecake ahead of time?
Absolutely! This Spooky Black Cocoa Cheesecake Recipe actually benefits from resting overnight in the fridge, as it gives the flavors time to meld and the texture to firm up beautifully. It’s a perfect make-ahead dessert for parties or holiday meals.
What’s the best way to slice this cheesecake?
For clean slices, I recommend running a sharp knife under hot water and wiping it dry before slicing. Repeat between slices to prevent sticking and get those perfect, smooth cuts that look great on the plate.
Is the black food coloring necessary?
The black food coloring is optional and mainly for appearance. The black cocoa powder already provides a really dark color, but a few drops of food coloring can deepen it for a more dramatic presentation. If you prefer all-natural, you can skip it without compromising flavor.
Conclusion
If you’re ready to dive into a dessert that’s both show-stopping and comforting, I can’t recommend the Spooky Black Cocoa Cheesecake Recipe enough. It’s an exciting twist on a classic favorite, with a mysterious, rich color and an incredible depth of flavor that always delights my guests and family. Making it has quickly become a favorite ritual of mine, and I hope it will be for you too. Go ahead, treat yourself and your loved ones to this unforgettable cheesecake—it’s worth every bite.
Print
Spooky Black Cocoa Cheesecake Recipe
- Prep Time: 30 minutes
- Cook Time: 10 minutes
- Total Time: 4 hours 40 minutes
- Yield: 16 servings
- Category: Dessert
- Method: No-Cook
- Cuisine: American
Description
This spooky cheesecake is a rich and creamy dessert featuring a dark Oreo crust and a luscious black cocoa and chocolate cream cheese filling. Perfect for Halloween or any occasion where you want to impress guests with a visually striking and delicious treat. The cheesecake sets in the refrigerator, resulting in a smooth, velvety texture with a decadent chocolate flavor.
Ingredients
Crust
- 2 ½ cups Oreo crumbs (~26 Oreos)
- ¼ cup granulated sugar
- ½ cup unsalted butter (melted)
- ¼ teaspoon kosher salt
Chocolate Cocoa Paste
- ¼ cup heavy whipping cream
- ¼ cup water
- ¾ cup black cocoa powder
Chocolate
- 6 oz dark or semi-sweet chocolate (chopped)
Filling
- 1 cup heavy whipping cream (cold)
- 24 oz cream cheese (softened to room temperature, full-fat brick style, Philadelphia brand)
- 1 ½ cups powdered sugar
- 1 tablespoon vanilla paste or extract
- Black food coloring (optional, for darker color)
Instructions
- Make the crust: In a bowl, stir together Oreo crumbs, granulated sugar, melted butter, and kosher salt with a fork until the mixture is fully moistened. Press the mixture firmly into the bottom and about halfway up the sides of a 9-inch springform pan. Freeze the crust while preparing the filling to ensure it sets well.
- Prepare the cocoa paste: In a small saucepan over medium heat, combine ¼ cup heavy whipping cream and ¼ cup water. Heat until steaming and hot, then remove from heat. Sift the black cocoa powder into the hot liquid to remove any clumps and stir until a smooth paste forms.
- Melt the chocolate: Place the chopped dark or semi-sweet chocolate in a microwave-safe bowl. Heat in 30-second intervals, stirring between each, until the chocolate is completely melted. Set aside to cool slightly.
- Whip the cream: Using a stand mixer with a whisk attachment or a handheld mixer, whip the remaining 1 cup of cold heavy whipping cream to stiff peaks, so the cream holds its shape on the whisk without falling. Set aside or transfer to a large mixing bowl.
- Prepare the cream cheese base: In the bowl of a stand mixer fitted with a paddle attachment (or using a handheld mixer), beat the softened cream cheese on low speed until smooth and broken down. Scrape down the sides. Sift in the powdered sugar to avoid lumps and mix on low speed until fully incorporated, covering the bowl with a kitchen towel to prevent sugar dust.
- Combine chocolate elements: Add the prepared black cocoa paste to the cream cheese mixture and mix on medium speed for 30 seconds until combined. Then add the melted chocolate and vanilla extract or paste, mixing again on low speed until fully incorporated. Scrape down the sides to ensure an even mixture. Optionally, add a few drops of black food coloring to deepen the filling’s color and mix gently.
- Fold in whipped cream: Remove the mixing bowl from the stand mixer and gently fold the whipped cream into the cheesecake batter by hand using a spatula until no white streaks remain, being careful not to deflate the mixture to maintain the light texture.
- Assemble and chill: Spread the cheesecake filling evenly over the chilled Oreo crust in the springform pan. Refrigerate uncovered for at least 4 hours or preferably overnight to allow the cheesecake to set properly before serving.
Notes
- Freezing the crust before adding the filling helps to prevent a soggy crust.
- Sifting cocoa powder into hot cream ensures a smooth chocolate paste without lumps.
- Use full-fat cream cheese for the best creamy texture and flavor.
- Whip the cream to stiff peaks for a light and fluffy filling that holds its shape.
- A kitchen towel over the mixer bowl when adding powdered sugar prevents sugar dust from flying.
- Black food coloring is optional but enhances the spooky, dark color of the cheesecake.
- Chilling the cheesecake overnight yields the best texture and flavor development.


