
I am absolutely in love with this Soft No-Knead Dinner Rolls Recipe because it has completely changed the way I approach homemade bread. These rolls are incredibly soft with a tender crumb and a golden, buttery crust that melts in your mouth. What I really appreciate is how easy it is to make the dough—no pounding or kneading required, just simple mixing and a little patience during the rising stages. Whether I’m hosting a family dinner or just craving something fresh from the oven, these rolls always hit the spot and make any meal feel special.
Why You’ll Love This Soft No-Knead Dinner Rolls Recipe
From the very first bite, I knew this recipe was something special. The flavor is wonderfully mild with just the right sweetness from the caster sugar and richness from the butter and eggs. The soft, pillowy texture feels like a warm hug and pairs beautifully with anything from savory soups to holiday roasts. It always reminds me of bakery rolls but without the fuss or fancy equipment.
What truly sets this Soft No-Knead Dinner Rolls Recipe apart for me is how effortless it is. I do all the mixing in one bowl and let the dough rise without kneading for nearly two hours, which feels like magic. The hands-off approach means I can prep it early and focus on other dishes. I love serving them at dinners where I want guests to feel cozy and pampered without spending hours in the kitchen. Plus, they stay soft for days when stored properly, so leftovers are just as delightful.
Ingredients You’ll Need
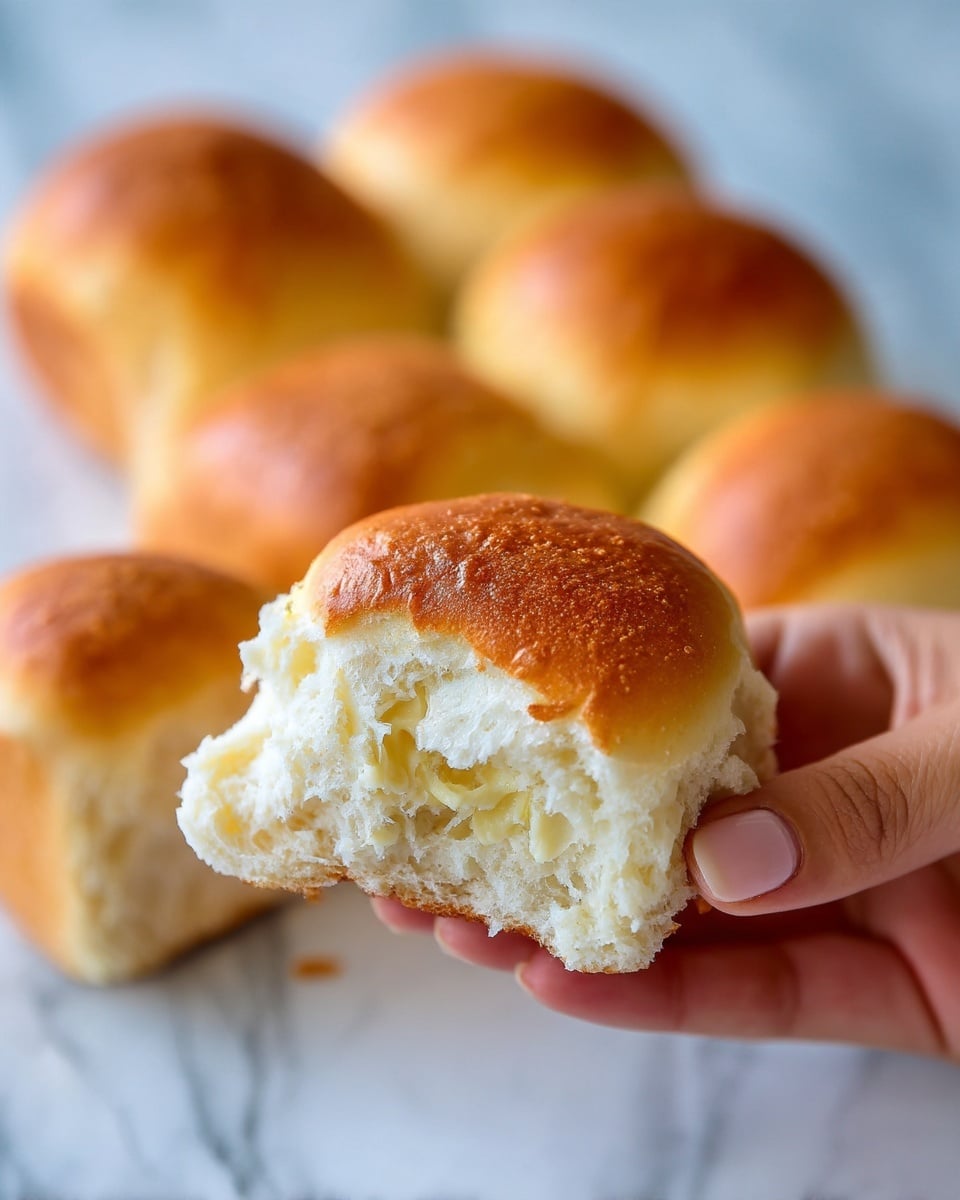
The beauty of this recipe lies in its simple, staple ingredients—each one plays a crucial role in achieving that incredible soft texture and rich flavor. From the yeast that brings the dough to life, to the milk and butter that add tenderness and moisture, each component is essential and thoughtfully included.
- Dry yeast: Acts as the leavening agent to make the rolls rise and become fluffy.
- Caster sugar: Adds a gentle sweetness and helps activate the yeast quickly.
- Warm water: Enlivens the yeast, creating a foamy starter for the dough.
- Bread flour: Provides enough gluten to develop structure without kneading.
- Salt: Balances the sweetness and enhances overall flavor.
- Lukewarm milk: Adds fat and softness, contributing to the tender crumb.
- Unsalted butter: Melted and cooled, it enriches the dough without weighing it down.
- Eggs: Bring moisture and richness, making the rolls slightly golden and smooth.
- Melted butter for brushing: Gives that irresistible buttery sheen and extra flavor after baking.
Directions
Step 1: Start by mixing the dry yeast and 2 teaspoons of sugar in a medium bowl, then pour in the warm water. Let it sit for 5 minutes until you see a nice froth forming on top—that’s your yeast waking up and doing its job.
Step 2: In a larger mixing bowl, combine the flour, remaining sugar, and salt evenly so the seasoning is well distributed throughout the rolls.
Step 3: Make a well in the center of your dry ingredients, then add the lukewarm milk, melted butter, beaten eggs, and all the frothy yeast mixture. This comes together into a thick, sticky dough similar to muffin batter—not runny but very soft.
Step 4: Mix everything with a wooden spoon until just combined. Resist the urge to add more flour; the dough should feel sticky and a bit messy at this stage.
Step 5: Cover the bowl with a clean, damp tea towel and place it in a warm spot (around 25 degrees Celsius or 77 Fahrenheit) for 1 1/2 to 2 hours. The dough will almost triple in size and be covered in lovely bubbles—a sign it’s ready for the next step.
Step 6: Prepare your baking tray by lining it with baking paper that overhangs on the sides. This makes removing the rolls after baking so easy.
Step 7: Punch down the dough gently to release air bubbles, then dust a clean surface with flour. Turn the dough out and dust the top lightly as well. Shape it into a log and cut the log into 12 equal pieces.
Step 8: Take each piece, press it down slightly, then gather the edges under while rolling it into a smooth ball with the rounded side facing up. Don’t be shy about using flour to avoid sticking, but handle the dough gently to keep that soft texture intact.
Step 9: Arrange your dough balls in a 3 by 4 grid on the prepared tray, making sure the smooth side is up on all rolls for that perfect golden finish.
Step 10: Lightly spray the rolls with oil or lightly brush with oil, then cover with cling wrap. Let them rise again in your warm spot for 30 to 45 minutes, until they’ve puffed up by about 75 percent.
Step 11: While the dough is rising the second time, preheat your oven to 200 degrees Celsius (390 Fahrenheit) if you’re using a standard oven, or 180 degrees Celsius (350 Fahrenheit) for a convection oven.
Step 12: Bake the rolls for 15 to 18 minutes until they’re a beautiful golden brown. To test doneness, tap the center roll and listen for a hollow sound—this means they’re perfectly baked inside.
Step 13: Take the rolls out of the oven and immediately brush with melted butter, which gives them a gorgeous shine and adds a final layer of flavor.
Step 14: Use the paper overhang to lift the rolls onto a cooling rack. Let them cool until warm before serving to enjoy the best texture and softness.
Servings and Timing
This Soft No-Knead Dinner Rolls Recipe makes 12 generously sized rolls, perfect for a family gathering or sharing with friends. The prep time is about 25 minutes, but you’ll need to allow for 1 1/2 to 2 hours of initial rising and an additional 30 to 45 minutes for the second rise. Baking takes around 15 to 18 minutes. Total time from start to finish is roughly 3 hours, but most of this is hands-off rising, so you can multitask around the house or prepare other dishes while the dough is transforming.
How to Serve This Soft No-Knead Dinner Rolls Recipe
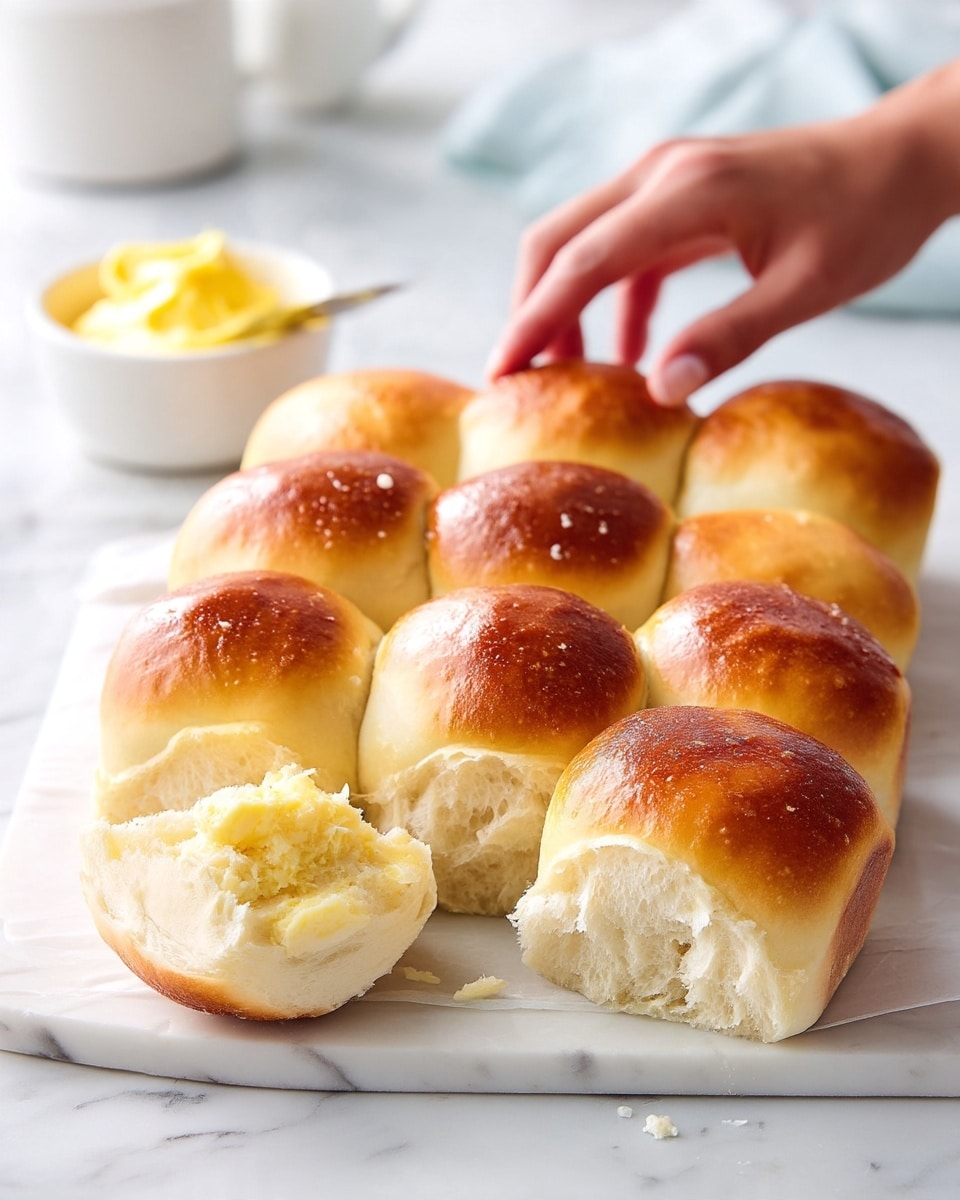
I love serving these rolls fresh and warm straight from the oven, brushed with that luscious melted butter. They’re perfect alongside hearty soups and stews, such as creamy tomato bisque or a classic chicken pot pie. The soft texture makes them an ideal bread option for mopping up sauces or thick gravies.
For holiday dinners or special occasions, I like to arrange the rolls in a basket lined with a colorful napkin and garnish with a few sprigs of fresh herbs like rosemary or thyme for a rustic yet elegant look. They also pair wonderfully with chilled or warm butter mixed with crushed garlic or fresh herbs for guests to spread on top.
Beverage-wise, I often serve these rolls with a crisp white wine like Sauvignon Blanc during dinner parties, or for more casual meals, a chilled sparkling water with lemon complements their buttery richness beautifully. I’ve found these rolls taste best when served warm to room temperature, not fully cooled or refrigerated, to maintain that irresistibly soft crumb.
Variations
One of the things I enjoy most about this Soft No-Knead Dinner Rolls Recipe is how adaptable it is. If you want to experiment with flavors, adding a tablespoon of honey instead of sugar adds a subtle floral sweetness that pairs well with savory meals. For an herby twist, I sometimes fold in finely chopped rosemary or thyme right into the dough before the first rise.
If you need a dairy-free option, swapping the milk with any plant-based milk like almond or oat milk works wonderfully, and substituting the butter with coconut oil or vegan margarine keeps the rolls soft and tender. For an egg-free version, you can replace the eggs with a flax “egg” (1 tablespoon ground flaxseed mixed with 3 tablespoons water) which also helps bind the dough nicely.
I’ve also tried baking these rolls in individual muffin tins for perfectly shaped, pull-apart rolls that make portioning a breeze at parties. Alternatively, instead of baking all at once, shaping the dough into one large loaf and baking it as a no-knead bread works well when you want a rustic centerpiece.
Storage and Reheating
Storing Leftovers
Because these rolls stay soft for several days, I like to store any leftovers in an airtight container or resealable plastic bag at room temperature. This keeps the crust tender without drying out the crumb. They’ll keep fresh and delicious for up to 3 days, making them perfect for weekend breakfasts or sandwiches.
Freezing
If I want to save these rolls longer, I freeze them individually once completely cooled. I wrap each roll tightly in plastic wrap, then place them together in a freezer-safe bag. They keep well for up to 3 months frozen. When I’m ready to enjoy them, I simply thaw at room temperature or warm them gently.
Reheating
To revive the soft texture and fresh-from-the-oven feel, I reheat the rolls wrapped loosely in foil at 160 degrees Celsius (320 Fahrenheit) for about 10 minutes. Avoid microwaving them directly as they tend to become rubbery or dry. A quick brush with a little butter after reheating instantly refreshes their flavor and tenderness.
FAQs
Can I use all-purpose flour instead of bread flour?
Yes, you can substitute all-purpose flour if that’s what you have on hand. The rolls might turn out a bit less chewy and slightly softer due to the lower gluten content, but they will still be delicious and fluffy. Just be mindful that the dough might be a little stickier and handle accordingly with extra flour for shaping.
Do I have to use two rises? Can I skip the second rise?
I recommend both rises because the first develops flavor and texture, and the second gives the rolls their perfect puffiness before baking. Skipping the second rise usually results in denser rolls with less volume. If you’re short on time, at least allow the dough to rise once fully to get soft rolls.
Can I make this dough ahead of time and refrigerate it?
Absolutely! After mixing, you can cover the dough tightly and refrigerate it overnight. This slow, cold fermentation actually enhances the flavor. Just bring it back to room temperature before shaping and do the second rise as usual. You’ll still get those soft, fluffy rolls with an even richer taste.
What causes rolls to be tough or dense?
Tough or dense rolls usually result from either overworking the dough or not allowing enough rising time. Because this is a no-knead recipe, avoid fiddling with the dough too much. Also, make sure your yeast is fresh and your rising environment is warm enough for proper fermentation. Patience during rising is key to light rolls.
Can I add seeds or toppings to the rolls?
Definitely! After shaping and placing the rolls on the tray, brush lightly with water or egg wash then sprinkle your choice of toppings like sesame seeds, poppy seeds, or coarse sea salt. It adds a nice crunch and flavor contrast while keeping the rolls soft inside. Just bake as directed.
Conclusion
I truly hope you give this Soft No-Knead Dinner Rolls Recipe a try because it has become a staple in my kitchen for good reason. It’s so easy to make, requires simple ingredients, and produces perfectly soft, buttery rolls every time. Whether you’re a beginner or a seasoned baker, this recipe brings that bakery magic home without the fuss. Trust me, once you bake these, you won’t want to buy dinner rolls again!
Print
Soft No-Knead Dinner Rolls Recipe
- Prep Time: 25 minutes
- Cook Time: 15-18 minutes
- Total Time: 2 hours 40 minutes
- Yield: 12 dinner rolls
- Category: Bread
- Method: Baking
- Cuisine: American
- Diet: Vegetarian
Description
These Soft No-Knead Dinner Rolls are fluffy, tender, and easy to make with minimal effort. The dough uses yeast and requires two rises, developing a perfect texture without the need for kneading. Ideal as a side for any meal, these rolls have a golden brown crust brushed with melted butter for a rich finish.
Ingredients
Yeast Mixture
- 1 tbsp dry yeast
- 2 tsp caster/superfine sugar (from the 1/4 cup total sugar)
- 1/2 cup warm water
Dry Ingredients
- 4 cups bread flour, plus extra for dusting
- 1/4 cup caster/superfine sugar (remaining)
- 1 1/2 tsp salt (cooking/kosher salt)
Wet Ingredients
- 1 cup lukewarm milk (whole or low fat)
- 50g / 3 1/2 tbsp unsalted butter, melted and cooled
- 2 eggs, at room temperature, beaten
For Finishing
- 1 tbsp butter, melted (for brushing)
Instructions
- Activate Yeast: Place the yeast and 2 teaspoons of the sugar in a medium bowl, then pour in warm water. Leave it for 5 minutes until it froths, indicating the yeast is active.
- Mix Dry Ingredients: In a separate large bowl, combine the bread flour, remaining sugar, and salt. Mix well to distribute evenly.
- Combine Wet and Dry: Make a well in the center of the dry ingredients, then add the lukewarm milk, melted butter, beaten eggs, and the frothy yeast mixture including all the liquid.
- Stir Dough: Mix everything together thoroughly with a wooden spoon until combined. The dough will be thick and sticky but not pourable.
- First Rise: Cover the bowl with a wet, clean tea towel and place it in a warm spot (about 25°C/77°F) to rise for 1 1/2 to 2 hours or until the dough nearly triples in size and becomes bubbly.
- Prepare Rolling Surface: Line a 31.5 x 23.5 cm (9 x 13 inch) tray with baking paper, leaving an overhang on the sides for easy lifting later.
- Shape Dough into Rolls: Remove the tea towel, punch down the dough to deflate, and mix briefly to remove air bubbles. Dust your work surface and top of dough with flour, shape it into a log, then cut into 12 equal pieces.
- Form Dough Balls: Press each piece with your palm, gather the edges into a smooth ball, flip so the smooth side is up, and briefly roll to perfect the shape, using flour as needed to prevent sticking but avoid piercing the dough.
- Arrange Rolls on Tray: Place each dough ball on the tray in a 3 by 4 arrangement, smooth side up.
- Second Rise: Spray the rolls’ surface with oil or lightly grease cling wrap, then cover the tray with cling wrap. Return it to the warm spot and let rise for 30 to 45 minutes until the rolls have risen about 75% in volume.
- Preheat Oven: Partway through the second rise, preheat your oven to 200°C (390°F) for conventional ovens or 180°C (350°F) for fan/convection ovens.
- Bake the Rolls: Remove cling wrap and bake the rolls for 15 to 18 minutes until golden brown on top and the center roll sounds hollow when tapped, which indicates doneness.
- Butter Finish: Take the rolls out of the oven and brush them immediately with melted butter to add flavor and keep the crust soft.
- Cool and Serve: Use the baking paper overhang to lift the rolls from the tray onto a wire rack. Allow them to cool to warm before serving for the best texture and taste.
Notes
- Note 1: Using dry yeast ensures a reliable rise.
- Note 2: Warm liquids activate the yeast properly; avoid overheating to prevent killing the yeast.
- Note 3: Bread flour provides better structure and chewiness compared to all-purpose flour.
- Note 4: Placing the dough in a slightly warm environment (like an oven with just the light on) helps maintain perfect rising temperature.
- You can substitute caster/superfine sugar with regular white sugar if unavailable.
- Do not over-flour the dough while shaping to maintain softness inside.
- Check the rolls’ doneness primarily by color and sound when tapped rather than time alone, as oven temperatures vary.


