
I am absolutely thrilled to share my No Knead Cinnamon Rolls Recipe with you because it has completely transformed my weekend mornings. This recipe gives you delightfully soft, fluffy rolls with that perfect gooey cinnamon-sugar swirl, all without the usual hassle of kneading dough for ages. It’s an incredibly satisfying experience to mix up a simple batter, let it rise peacefully, and then enjoy those irresistible, aromatic cinnamon rolls fresh from the oven, topped with a luscious cream cheese glaze that melts in your mouth. If you love cinnamon rolls but dread the labor-intensive process, this recipe will become your new go-to.
Why You’ll Love This No Knead Cinnamon Rolls Recipe
What makes this recipe stand out for me is the fantastic balance of flavors and textures. The cinnamon-sugar filling is rich and comforting without being too sweet, and the dough itself turns out wonderfully tender and moist because it skips traditional kneading. I love how the dough has a slightly sticky, muffin-batter-like consistency before rising, which makes the whole process feel so effortless but still yields bakery-quality rolls. Every bite feels like a warm hug.
Beyond the taste, the ease of preparation is what really won me over. I’m no stranger to baking projects that feel complicated or time-consuming, but this No Knead Cinnamon Rolls Recipe is refreshingly straightforward. You simply mix, wait for the dough to rise, roll it out, fill, and bake. It’s perfect for weekends when you want a special treat but don’t want to spend the whole morning in the kitchen. Plus, these cinnamon rolls are a great crowd-pleaser at family breakfasts, holiday brunches, or even casual get-togethers. Trust me, everyone will be asking for seconds.
Ingredients You’ll Need
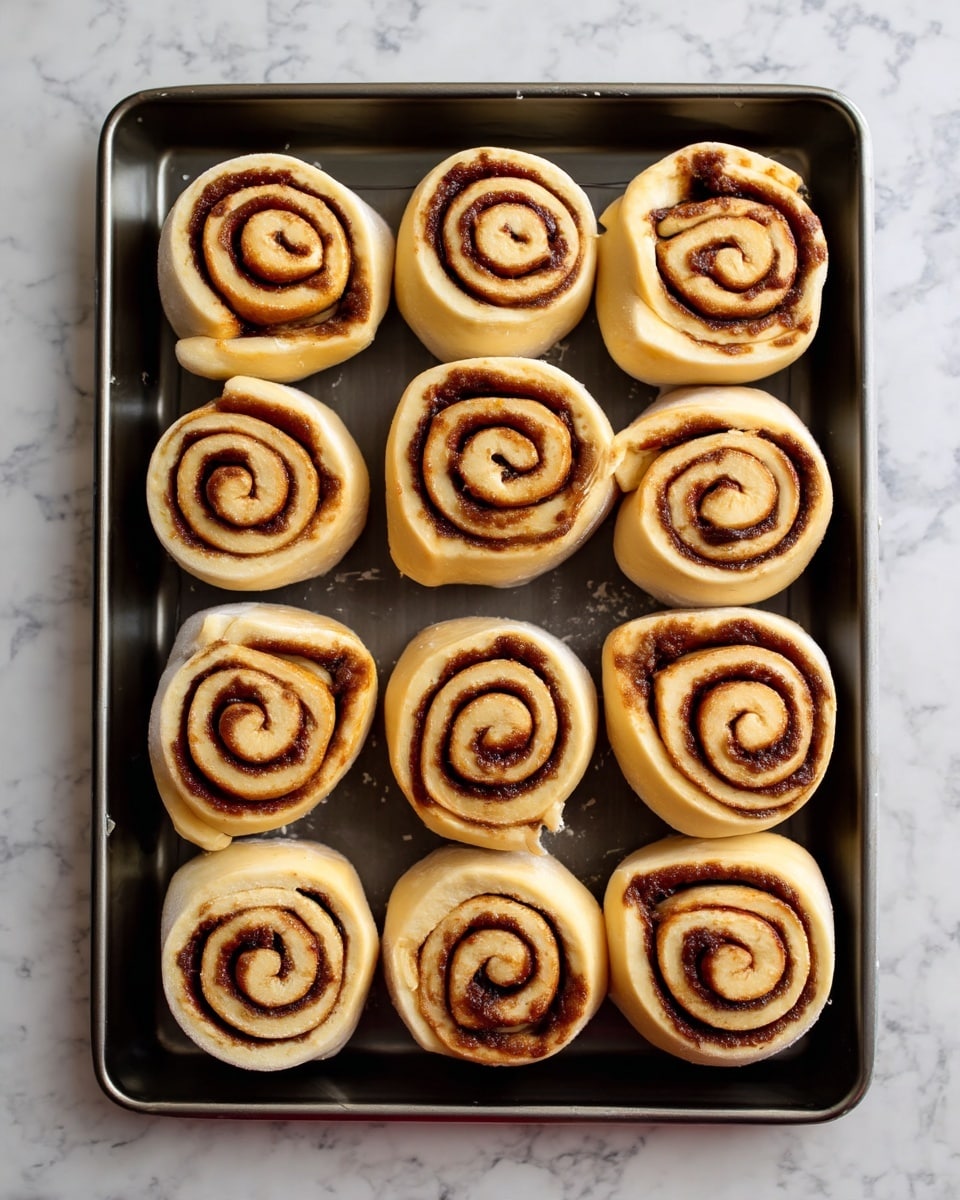
These ingredients are simple and familiar, yet each one plays a crucial role in creating the perfect cinnamon roll. From the yeast that gives the dough its airy texture to the cinnamon and brown sugar that infuse every swirl with warmth and sweetness, every component is essential.
- Dry yeast: This helps the dough rise beautifully, creating that soft, fluffy texture.
- Caster sugar: I use superfine sugar to dissolve quickly and sweeten the dough evenly.
- Warm water: Activates the yeast perfectly—make sure it’s not too hot to keep yeast happy.
- Plain flour (all-purpose): The foundation of the dough, providing structure but still tender.
- Salt: Balances the sweetness and enhances all the flavors.
- Milk (lukewarm): Adds richness and moisture to the dough for softness.
- Unsalted butter (melted): Keeps the dough tender and enriches the flavor.
- Large eggs: Bind the dough and contribute to the airy crumb.
- Extra plain flour: Helps take the stickiness out when rolling the dough.
- Brown sugar: Adds deep caramel notes in the cinnamon filling.
- Cinnamon powder: The star spice that makes the rolls irresistibly aromatic.
- Cream cheese (softened): Key for the luscious glaze that tops each roll.
- Unsalted butter (softened for glaze): Gives the frosting a creamy texture.
- Vanilla extract: Adds a subtle sweetness and rounds out the glaze flavor.
- Icing sugar (powdered sugar): Sweetens and thickens the glaze perfectly.
- Milk or water (for glaze): Adjusts glaze consistency for drizzling just right.
Directions
Step 1: Start by combining the dry yeast and 2 teaspoons of sugar in a medium bowl, then add the warm water. Leave it undisturbed for about 5 minutes until you see a frothy layer forming on top—this means the yeast is active and ready.
Step 2: In a large bowl, mix the 600g of flour, remaining sugar, and salt until evenly combined. Then create a well in the center.
Step 3: Into that well, pour the lukewarm milk, melted butter, beaten eggs, and the frothy yeast mixture. Using a wooden spoon, stir everything together until the dough just comes together; it will look like a sticky muffin batter rather than a smooth ball of dough.
Step 4: Cover the bowl tightly with cling wrap and place it somewhere warm (at least 25°C or 77°F) to rise. Let it rest for about 1 hour and 15 minutes to 1 hour and 30 minutes, until the dough has nearly tripled in size and looks bubbly on the surface.
Step 5: Meanwhile, prepare your work surface by lining your baking tray with parchment paper with an overhang—it’ll make transferring the rolls easier later.
Step 6: Mix together cinnamon and brown sugar in a small bowl for the filling.
Step 7: Once the dough has risen, gently deflate it by mixing with a spoon. Sprinkle half of the extra flour on your work surface, then pour the dough out. Sprinkle the remaining extra flour on top and gently incorporate it into the dough with your hands. It will still be soft and slightly sticky, but no longer wet and gooey.
Step 8: With a little more flour if needed, roll the dough into a rectangle roughly 28 by 48 cm (or 11 by 19 inches).
Step 9: Brush the melted butter evenly on the dough’s surface and then sprinkle the cinnamon sugar mixture across it, making sure every corner is covered.
Step 10: Starting from the long side, tightly roll the dough into a log shape. Then slice it into 12 equal pieces, about 4 cm (1.6 inches) thick.
Step 11: Arrange the rolls in your prepared tray (3 rows of 4 rolls). Cover with a tea towel and let them rise again in a warm spot for around 40 minutes or until nearly doubled.
Step 12: Preheat your oven to 180°C (350°F) or 160°C (320°F) if you have a fan/convection setting. Place the tray in the middle rack.
Step 13: Bake for 20 minutes, rotating the tray after 16 minutes to ensure even browning. The rolls should be golden brown on the edges, with the center rolls sounding hollow when tapped.
Step 14: Optional: As soon as they come out, brush them lightly with melted butter to keep the tops soft and shiny.
Step 15: Use the parchment paper overhang to lift the rolls off the tray and onto a wire rack to cool for about 1 hour before glazing.
Step 16: To make the glaze, beat together softened cream cheese, butter, and vanilla until smooth. Gradually add icing sugar, beating until thick but spoonable, then add 2 to 3 tablespoons of milk (or water) to get a drizzle-able consistency.
Step 17: Spoon the glaze generously over the warm rolls. They are absolutely best served warm, fresh from the oven, with that creamy glaze melting into every crevice.
Servings and Timing
This No Knead Cinnamon Rolls Recipe yields 12 generous rolls, perfect for sharing with family, friends, or enjoying over a few days. The prep time is around 15 minutes to mix and roll the dough, but you’ll need about 1 hour and 30 minutes for the first rise and another 40 minutes for the second rise. Baking takes 20 minutes, and then allow about 1 hour for cooling before adding the glaze. I find the total time clocks in at roughly 3.5 to 4 hours, mostly hands-off, so it’s great for a relaxed morning or afternoon baking project.
How to Serve This No Knead Cinnamon Rolls Recipe
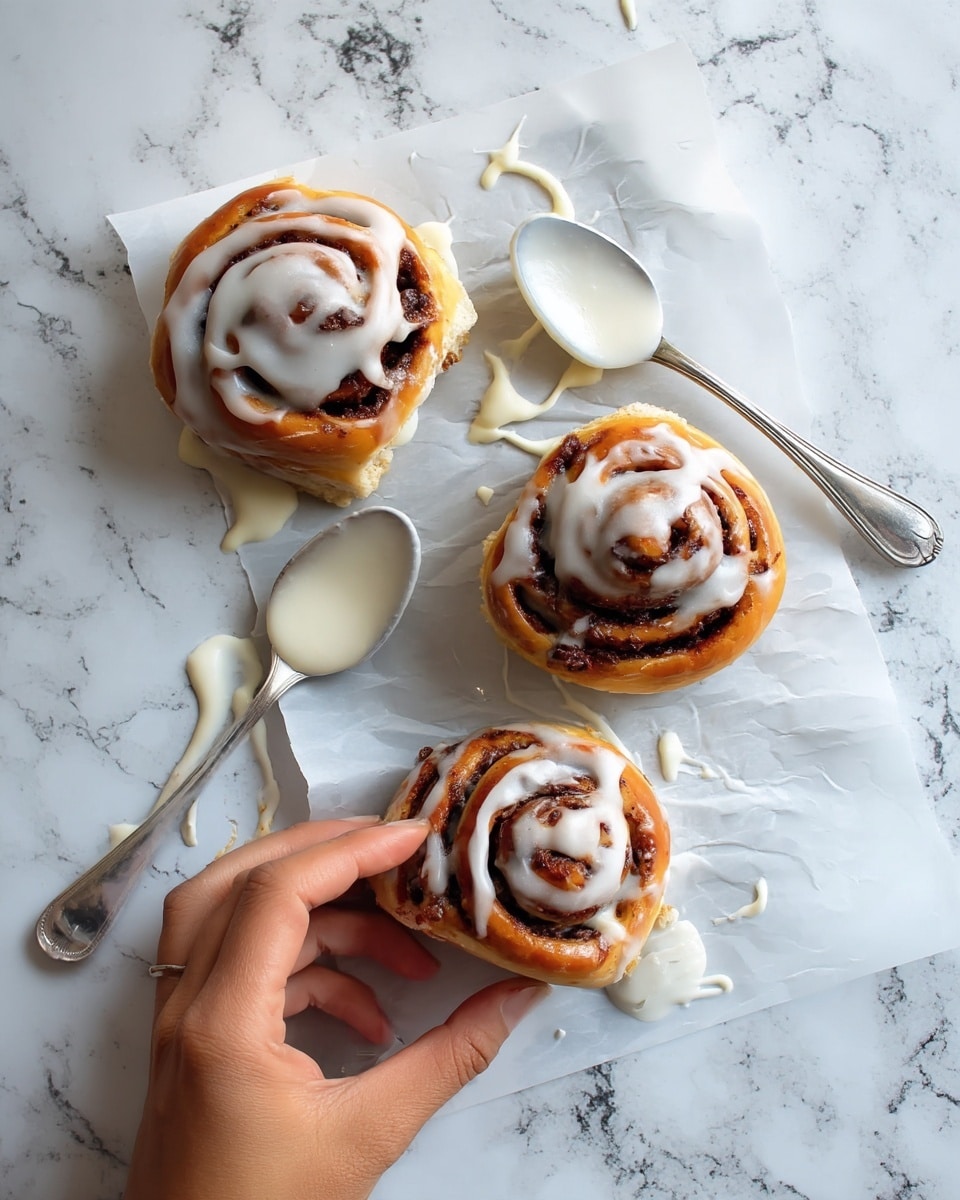
When I serve these cinnamon rolls, I like to keep things simple because the rolls are rich and flavorful on their own. They’re absolutely perfect for breakfast or brunch alongside a strong cup of coffee or a creamy latte. For a bit of contrast, I sometimes add fresh fruit on the side—berries or sliced apples complement the cinnamon beautifully.
Presentation-wise, I find serving the rolls warm is the ultimate experience—the glaze is still slightly melted and glazy over each swirl. You can plate one or two rolls per person, maybe styled on a plain white plate to really let their golden color and gooey texture shine. If it’s a special occasion like a holiday brunch or a weekend treat, I’ll garnish the platter with little sprigs of fresh mint or a light dusting of cinnamon powder for an inviting touch.
For beverages, besides coffee, they pair wonderfully with a creamy chai tea, a glass of cold milk, or even a mild apple cider for a cozy vibe. These rolls also make a delightful sweet ending to a family dinner or a festive gathering. I love the way they fill the house with warmth and invite people to relax and savor each bite.
Variations
I enjoy experimenting with this No Knead Cinnamon Rolls Recipe to suit different tastes and dietary needs. For instance, if you prefer a vegan version, swapping the milk for almond or oat milk, replacing eggs with flax eggs, and using vegan butter and cream cheese alternatives works beautifully without sacrificing texture.
You can also play around with the fillings. While the classic cinnamon and brown sugar is my favorite, I’ve added chopped nuts, raisins, or even a drizzle of caramel inside for extra indulgence. Some days, I like to sprinkle a little nutmeg or cardamom into the cinnamon sugar mix for a slightly different spice profile that still feels comforting.
In terms of technique, although this recipe is designed for the oven, I’ve tried making mini rolls in a slow cooker lined with parchment paper—cooking on low for a few hours gives a soft, steamed texture that’s worth exploring if you want a no-bake option.
Storage and Reheating
Storing Leftovers
If you have leftovers, I recommend storing the rolls in an airtight container or wrapping them tightly in plastic wrap. Keep them at room temperature if you plan to eat them within 2 days. After that, refrigeration is best, although it might make them a bit denser. They should stay good and safe to eat for up to 4 days when refrigerated.
Freezing
These cinnamon rolls freeze wonderfully if you want to make them ahead of time. Once cooled and glazed, wrap each roll individually in plastic wrap, then place them in a freezer-safe bag or container. They can be frozen for up to 3 months without losing much freshness. When you’re ready, simply thaw them overnight in the fridge and reheat gently for that freshly-baked feel.
Reheating
To reheat, I find the best method is to microwave a roll on medium power for about 20 to 30 seconds until warm, then if you want a slight crisp on the edges, pop it in a preheated oven at 170°C (340°F) for 5 minutes. Avoid prolonged microwaving as it can dry them out or make them tough. Reheating this way revives that soft, gooey texture and slightly melty glaze that makes each bite so delightful.
FAQs
Can I make this No Knead Cinnamon Rolls Recipe ahead of time?
Absolutely! You can prepare the dough and complete the first rise the day before, then refrigerate it overnight. Next day, roll out, fill, and bake fresh. This slow fermentation often improves flavor, too, so it’s a great option if you want fresh rolls without the morning rush.
What if my dough is too sticky to roll out?
Don’t worry if the dough feels sticky—that’s normal for this no-knead style. Just sprinkle a little more flour on your surface and hands as you work. The dough should be soft and pliable, not dry, so add flour gradually until it’s manageable but still soft.
Can I use whole wheat flour instead of plain flour?
You can substitute some or all of the plain flour with whole wheat for a nuttier flavor and added fiber, but keep in mind the rolls may be slightly denser. I recommend replacing no more than half the flour with whole wheat for the best texture.
Is this recipe suitable for beginners in baking?
Definitely! That’s one of the reasons I love this No Knead Cinnamon Rolls Recipe. It requires no kneading and has very straightforward steps, making it perfect even if you haven’t made cinnamon rolls before. Just follow the timing and measurements, and you’ll be rewarded with delicious homemade rolls.
Can I double this recipe for a bigger batch?
You can double the ingredients easily to make a larger batch. Be sure to use a bigger bowl for rising and a larger baking tray or two trays to avoid crowding. Also, check the baking time—larger batches might need a few extra minutes in the oven but watch them closely to avoid overbaking.
Conclusion
I hope you feel as excited as I do to try this No Knead Cinnamon Rolls Recipe at home. It’s a perfect blend of simplicity and indulgence that will fill your kitchen with amazing aromas and bring joy to your breakfast or brunch table. Once you experience the ease and flavor of these rolls, I’m sure they’ll become a beloved staple in your baking repertoire. Happy baking and even happier eating!
Print
No Knead Cinnamon Rolls Recipe
- Prep Time: 20 minutes
- Cook Time: 20 minutes
- Total Time: 1 hour 45 minutes
- Yield: 12 servings
- Category: Breakfast, Dessert, Snack
- Method: Baking
- Cuisine: American, European
Description
Delicious and easy No Knead Cinnamon Rolls recipe that requires minimal effort but yields soft, fluffy rolls filled with cinnamon sugar and topped with a creamy cream cheese glaze. Perfect for a comforting breakfast or sweet treat without the traditional kneading process.
Ingredients
Dough:
- 1 tbsp dry yeast
- 70 g / 1/3 cup caster sugar (superfine sugar, or normal white sugar as substitute)
- 1/2 cup / 125 ml warm water
- 600 g / 20 oz plain flour / all purpose flour (4 1/2 US Cups, 4 Cups elsewhere)
- 1/2 tsp salt
- 1 cup / 250 ml lukewarm milk (whole or low fat)
- 50 g / 3.5 tbsp unsalted butter, melted and slightly cooled
- 2 large eggs, beaten
- 1/4 cup / 35 g plain flour (for dusting)
Filling:
- 90 g / 6 tbsp unsalted butter, melted
- 1 cup / 220 g brown sugar, packed
- 2 tbsp cinnamon powder
Glaze:
- 90 g / 3 oz cream cheese, softened
- 50 g / 3 tbsp unsalted butter, softened
- 1 tsp vanilla extract or essence
- 1 1/4 cups / 150 g soft icing sugar / powdered sugar
- 2 – 3 tbsp milk (any) or water
Instructions
- Activate Yeast: Place the yeast and 2 teaspoons of sugar in a medium bowl, pour in the warm water, and leave for 5 minutes until frothy.
- Prepare Dry Ingredients: In a large bowl, combine flour, the remaining sugar, and salt, mixing them well.
- Mix Dough: Make a well in the center of the flour mixture, add the lukewarm milk, melted butter, beaten eggs, and yeast mixture with froth. Mix with a wooden spoon until combined; the dough will be sticky and more like a thick muffin batter rather than kneadable dough.
- First Rise: Cover the bowl with cling wrap and place it in a warm spot (about 25°C/77°F or warmer) for 1 hour 15 minutes to 1 hour 30 minutes, or until the dough has nearly tripled in size and its surface appears bubbly.
- Prepare Baking Tray: Line a 31.5 x 23.5 cm (9 x 13 inches) tray with baking paper, allowing some overhang for easy roll transfer later.
- Mix Filling: Combine the brown sugar and cinnamon powder in a bowl and set aside.
- Deflate and Flour Dough: Uncover the risen dough and stir it gently with a spoon to deflate. Sprinkle half of the extra plain flour on your work surface, turn out the dough, then sprinkle the remaining flour on top. Use your hands to incorporate the flour into the dough until it stops absorbing flour and is soft and pliable. Add more flour if necessary to prevent stickiness.
- Roll Dough: Shape the dough into a log, then roll it out into a rectangle approximately 28 x 48 cm (11 x 19 inches).
- Add Filling: Pour the melted butter over the dough and brush it evenly. Sprinkle the cinnamon sugar mixture all over the buttered surface.
- Form Rolls: Roll the dough up firmly into a log, and shape it into an even cylinder.
- Cut & Arrange Rolls: Using a sharp knife, cut the log into 12 equal pieces (about 4 cm / 1.6 inches each) and place them cut-side down in the prepared tray in a 3 x 4 arrangement.
- Second Rise: Cover the rolls with a tea towel and place them in a warm spot for 40 minutes or until almost doubled in size.
- Preheat Oven: Preheat your oven to 180°C (350°F) standard or 160°C (320°F) fan/convection with the rack positioned in the middle.
- Bake Rolls: Bake the cinnamon rolls for 20 minutes, rotating the tray once at 16 minutes, until center rolls are golden and outer ones have a deep golden edge. Check doneness by tapping rolls; they should sound hollow.
- Optional Butter Brush: Brush rolls with 1 tbsp (15 g) melted butter to eliminate any residual flour spots.
- Cool Rolls: Use the baking paper overhang to lift rolls onto a cooling rack and let them cool for about 1 hour; they will still be warm.
- Prepare Glaze: In a bowl, beat together softened butter, cream cheese, and vanilla extract until smooth, about 10-15 seconds. Add icing sugar and beat until incorporated. Stir in 2-3 tablespoons of milk or water to achieve a drizzle-able consistency.
- Frost Rolls: Spoon the glaze generously over the warm cooled cinnamon rolls. Serve best when still warm.
Notes
- Use warm water and milk but not too hot as excessive heat can kill yeast.
- Check dough surface for bubbly texture after first rise as an indicator of proper fermentation.
- Flour incorporated into dough during shaping helps make it workable without kneading.
- Allow rolls to cool slightly before glazing to prevent glaze from melting off completely.
- Using baking paper with overhang is key for removing rolls easily from the tray.


