
I absolutely love sharing this New York Style Cheesecake Recipe with friends and family because it captures everything I adore about classic cheesecake — that rich, creamy texture paired with a perfectly buttery graham cracker crust. When I bake this cheesecake, the house fills with the most inviting aroma of vanilla and lemon, hinting at the delight to come. It’s indulgent yet somehow comforting, the kind of dessert that effortlessly impresses but is straightforward enough for me to make any time I’m craving something special.
Why You’ll Love This New York Style Cheesecake Recipe
From the first bite, what stands out to me about this cheesecake is its luscious, velvety mouthfeel combined with that signature tangy cream cheese flavor expertly balanced by a touch of lemon zest and juice. It’s delightfully rich without being overly sweet, which I think makes it truly stand apart from other cheesecakes I’ve tried. The graham cracker crust provides that essential crunch and buttery depth that perfectly complements the creamy filling.
One thing I really appreciate about this New York Style Cheesecake Recipe is how approachable it is. The ingredients are all simple pantry staples, and the method — including baking it in a water bath for that silky finish — is straightforward with clear steps that even weekday bakers like me can follow. It’s a dessert that easily fits any occasion, whether I’m hosting a family dinner or just treating myself on a lazy afternoon. It’s reliably decadent, yet feels like an elegant, timeless classic every time.
Ingredients You’ll Need
This recipe uses a handful of simple, essential ingredients that work together to create the perfect balance of flavor and texture. Each one has a role, from building the flavorful crust to achieving that signature creamy filling and subtle citrus brightness.
- Graham cracker crumbs: The base of the crust — make sure they’re finely crushed for a smooth, even layer.
- Unsalted butter: Melted and mixed into the crumbs to give the crust its rich, buttery texture.
- Sugar: Though used in both crust and filling, it’s carefully balanced to add sweetness without overpowering the cheesecake.
- Cream cheese: The star of the filling — room temperature is key for smooth blending.
- All-purpose flour: Helps to stabilize the filling and keep the texture perfect.
- Vanilla extract: Provides that classic aromatic lift that pairs beautifully with cream cheese.
- Lemon zest and juice: Adds a fresh, bright note that cuts through the richness.
- Salt: Enhances the overall flavors.
- Eggs: The binding agent, added one at a time for smooth incorporation.
- Sour cream: Adds creaminess and a touch of tang to round out the texture and flavor.
Directions
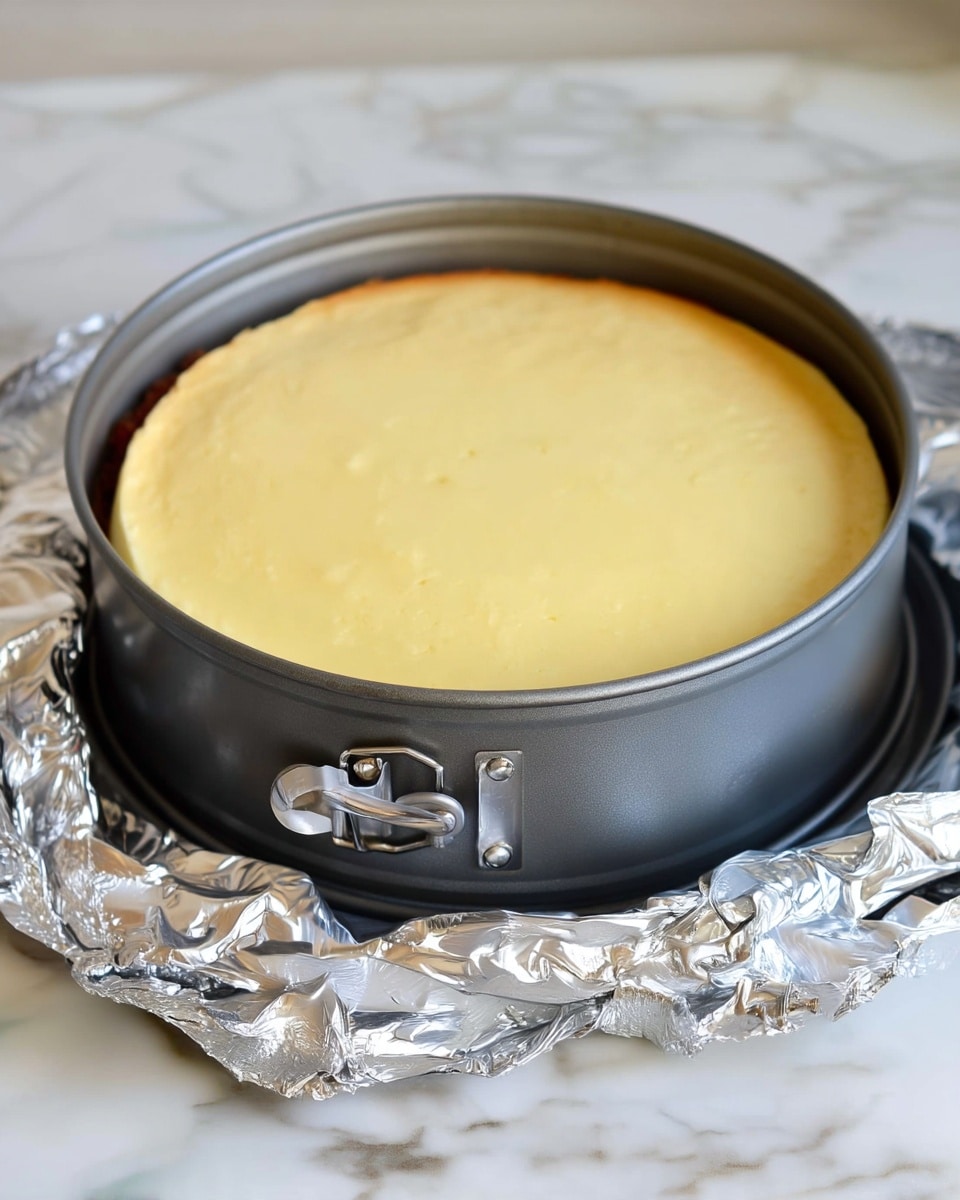
Step 1: Start by preheating your oven to 375°F (190°C) and placing the oven rack in the lower-middle position. Wrap your springform pan with heavy-duty aluminum foil to ensure no water seeps in during baking, covering the bottom and sides fully, then spray the inside with nonstick cooking spray. This step is crucial to protect your cheesecake from the water bath.
Step 2: In a medium bowl, combine the graham cracker crumbs, melted butter, sugar, and salt. Stir until everything is nicely blended. Press this crumb mixture evenly into the bottom of your prepared pan. Pop it into the oven and bake the crust for 10 minutes until it’s set and fragrant—this little pre-bake step locks in the crust’s structure and flavor perfectly.
Step 3: Lower your oven temperature to 325°F (165°C) and boil a kettle of water to prepare for the water bath. The water bath is what helps keep the cheesecake moist and prevents cracks by regulating the baking temperature.
Step 4: Using an electric mixer fitted with the paddle attachment or beaters, beat the cream cheese, sugar, and flour on medium speed until smooth. This only takes about a minute, but be sure to scrape down the bowl to get everything evenly combined — no lumps allowed!
Step 5: Next, add the vanilla extract, lemon zest, lemon juice, and salt. Beat on low speed until these ingredients are just mixed in, preserving that fresh pop of citrus and flavor.
Step 6: Add the eggs one at a time on low speed, mixing just until each one is incorporated before adding the next. This gentle method keeps the batter smooth without overbeating. Then fold in the sour cream until everything is uniformly combined but not over-mixed.
Step 7: Make sure your oven has cooled to 325°F, then place the cheesecake pan inside a larger roasting pan. Pour the batter over the crust and carefully pour in boiling water until it comes about 1 inch up the side of the cheesecake pan, creating the water bath.
Step 8: Bake for about 1 hour and 30 minutes to 1 hour and 45 minutes. The cheesecake should be mostly set but still wobble slightly in the center. If the top starts to brown too much near the end, tent loosely with foil. This water bath baking method helps keep the texture creamy and crack-free.
Step 9: Once done, carefully remove the roasting pan from the oven and place it on a wire rack. Cool the cheesecake in the warm water bath for about 45 minutes until the water is just warm — this gradual cooling prevents shrinkage and cracking.
Step 10: Remove the foil from the cheesecake pan. Run a knife around the edges to loosen the cake if it’s sticking to the sides, then cover tightly with plastic wrap and refrigerate for at least 8 hours, preferably up to 2 days. Patience here results in the most luscious texture.
Step 11: When ready to serve, carefully remove the springform sides. You can serve the cheesecake right on the base or transfer it to a serving platter by gently running a spatula underneath and lifting with two large spatulas. Slice with a sharp knife, wiping it clean between cuts for the prettiest slices. I love topping mine with fresh berries or a tangy berry sauce.
Servings and Timing
This New York Style Cheesecake Recipe makes about 8 hearty servings, perfect for a small gathering or family dessert. Prep time is around 30 minutes, with about 10 minutes for crust prep and 20 minutes for mixing the filling. Baking time is fairly precise at 1 hour and 30 to 45 minutes, plus cooling in the water bath for 45 minutes. Don’t forget the essential chilling step in the refrigerator for at least 8 hours to let all those flavors meld and the texture set beautifully. Counting everything, plan for approximately 2 hours and 25 minutes from start to ready-to-eat.
How to Serve This New York Style Cheesecake Recipe
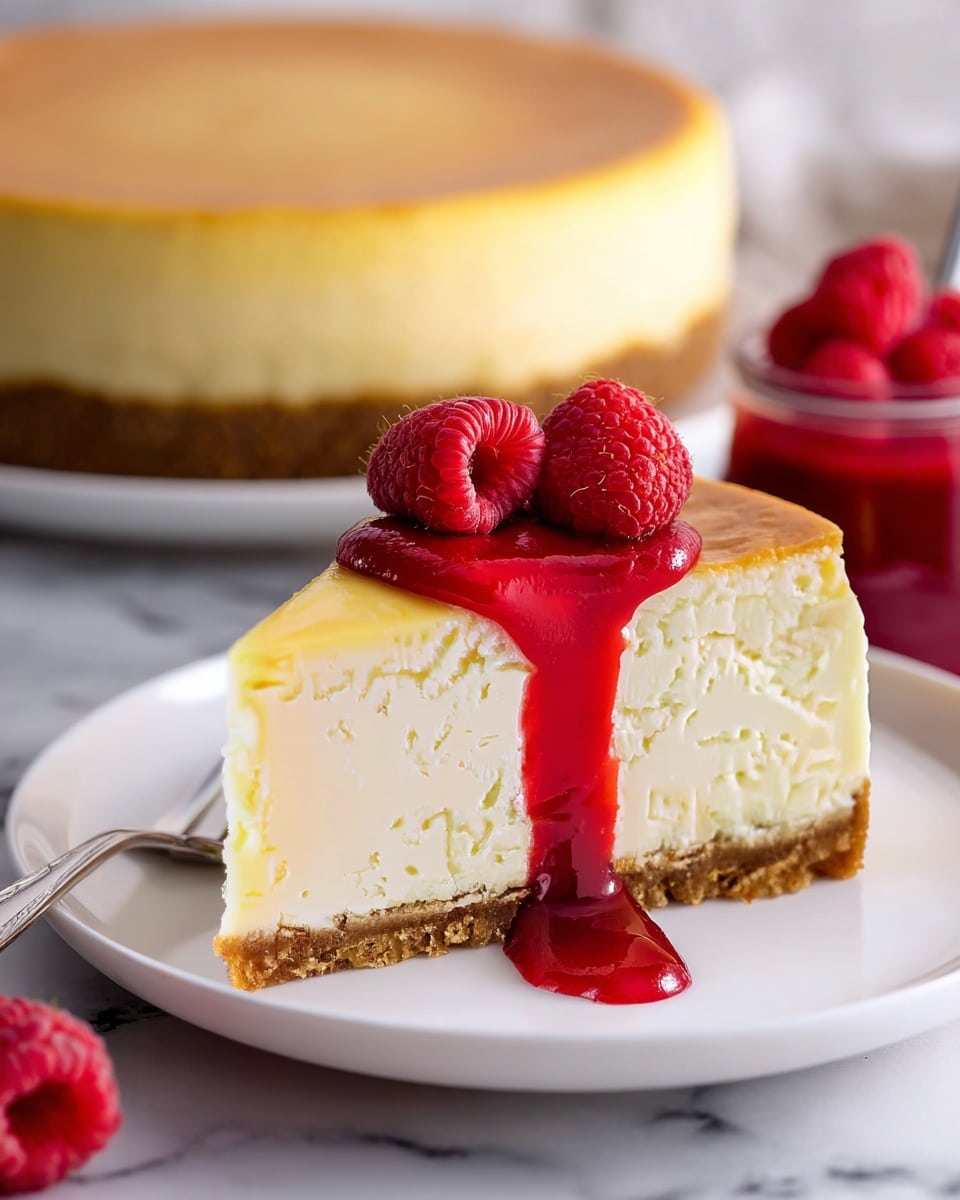
I find that serving this cheesecake slightly chilled right from the refrigerator works best to appreciate its creamy texture and tangy profile. For added elegance, pairing it with a fresh berry sauce or a handful of mixed berries on top elevates both color and flavor, adding a vibrant contrast. I sometimes garnish with a sprig of mint or a dusting of powdered sugar, which makes it feel extra special.
This cheesecake pairs wonderfully with light, bubbly drinks like Prosecco or a crisp Riesling if you’re going the wine route. For non-alcoholic options, I enjoy serving it with sparkling water infused with a splash of lemon or a fresh berry iced tea. I’ve also brought this dessert to holiday dinners and casual weekend brunches — it always makes a sweet, memorable finale.
When it comes to plating, I like to serve slices about 1 to 1.5 inches thick, ensuring everyone gets a satisfying portion. Using a warm, sharp knife to slice helps keep those edges clean and smooth. For a party, I’ll arrange slices on a beautiful platter with a drizzle of berry sauce artfully trailing across the plate for that wow factor that always impresses guests.
Variations
Over time, I’ve experimented with different twists on this classic New York Style Cheesecake Recipe to suit various tastes and dietary needs. For a gluten-free version, simply swap the graham cracker crumbs with a gluten-free alternative — I’ve had great success with almond flour crusts too, which add a rich nutty depth. If you want to lighten it up, using low-fat cream cheese and sour cream can reduce richness without sacrificing too much of that signature creaminess.
If you’re feeling adventurous, try swapping the lemon zest and juice with orange or lime for a new citrus note, or incorporate swirls of raspberry or caramel sauce into the batter before baking for a fun marbled effect. Vegan variations can be made by using plant-based cream cheese substitutes and flax eggs, though I do find the texture shifts slightly, so it’s worth experimenting to your preference.
For a different cooking technique, I once tried steaming the cheesecake instead of using the water bath in the oven. It produced an incredibly smooth, custard-like texture, though it took a bit more attention to avoid overcooking. If you’re curious, I recommend giving it a try for a unique spin, but the classic water bath baking is my trusted go-to for consistent results.
Storage and Reheating
Storing Leftovers
When I have leftover cheesecake, I always store it in an airtight container or tightly wrapped in plastic wrap in the refrigerator. This keeps it moist and prevents it from picking up any other fridge odors. Properly stored, it stays fresh and delicious for up to 5 days. If I’m serving it again during that span, I also make sure to bring it to a gentle room temperature before slicing to preserve that perfect creamy texture.
Freezing
This New York Style Cheesecake Recipe freezes beautifully. I usually slice it first, then wrap individual pieces tightly in plastic wrap and place them in a freezer-safe container or bag to avoid freezer burn. Frozen cheesecake can last up to 2 months. When I’m ready to enjoy it again, I thaw it overnight in the refrigerator to keep the texture intact. Avoid freezing the cheesecake with any fresh berry toppings, though; it’s best to add those fresh after thawing.
Reheating
I typically serve cheesecake chilled, but if you prefer a slightly warmer texture, I gently warm slices in a low-temperature oven (around 275°F/135°C) for 10 to 15 minutes. Avoid microwaving, as that can mess with the texture and make it rubbery. Warming slowly brings back some of the creaminess without losing that luscious mouthfeel. Serving with room-temperature toppings like a drizzle of honey or berry sauce right after warming always delights my guests.
FAQs
Can I make this New York Style Cheesecake Recipe in advance?
Absolutely! In fact, I highly recommend making it at least one day ahead, as chilling the cheesecake for 8 hours or overnight improves the texture and flavor. You can even prepare it up to two days in advance, keeping it covered tightly in the refrigerator.
What’s the purpose of the water bath in baking this cheesecake?
The water bath keeps the environment in your oven moist and ensures the heat is gentle and even around the cheesecake. This method prevents cracks and creates that silky, creamy texture that’s so characteristic of a New York style cheesecake.
Why do I need to wrap the springform pan in foil?
Wrapping the pan with foil protects it from any water that might seep in during the water bath baking. Without that, water could leak into your crust and batter, ruining the texture. I always double-wrap for peace of mind!
Can I use a regular pan instead of a springform pan?
I strongly suggest using a springform pan because the sides come off easily, making it simple to release the delicate cheesecake without damaging it. If you don’t have one, you could try a regular cake pan lined with parchment paper and remove cheesecake by flipping it out carefully, but it’s trickier.
How do I avoid cracks on the cheesecake surface?
Besides the water bath and slow cooling, be gentle when mixing — over-beating can incorporate air that leads to cracks. Also, running a knife along the edge before chilling prevents the cheesecake from sticking to the pan and cracking as it cools and shrinks.
Conclusion
I genuinely hope you enjoy making and savoring this New York Style Cheesecake Recipe as much as I do. It’s one of those timeless, crowd-pleasing desserts that never fails to make me feel proud and delighted every single time. Whether you’re a seasoned baker or just starting out, this recipe brings together simple ingredients and thoughtful steps to create something truly special. So go ahead, grab your mixing bowl and give it a try — your taste buds will thank you!
Print
New York Style Cheesecake Recipe
- Prep Time: 30 minutes
- Cook Time: 1 hour 45 minutes
- Total Time: 2 hours 25 minutes
- Yield: 8 servings
- Category: Dessert
- Method: Baking
- Cuisine: American
Description
This classic New York Style Cheesecake features a rich and creamy filling atop a buttery graham cracker crust. Baked in a water bath for a smooth, dense texture with a slight tang from lemon zest and juice, this cheesecake is perfect served chilled and can be topped with optional berry sauce for extra sweetness and color.
Ingredients
For the Crust
- 1½ cups graham cracker crumbs (from 12 whole crackers)
- 5 tablespoons unsalted butter, melted
- 2 tablespoons sugar
- 1/8 teaspoon salt
For the Filling
- 32 oz (four 8-oz blocks) cream cheese, at room temperature
- 2 cups sugar
- 3 tablespoons all-purpose flour
- 4 teaspoons vanilla extract
- 1 teaspoon packed lemon zest (from 1 lemon)
- 2 teaspoons fresh lemon juice (from 1 lemon)
- ¼ teaspoon salt
- 6 large eggs
- ½ cup sour cream
For Serving (Optional)
- Berry sauce
Instructions
- Prepare the Crust: Preheat your oven to 375°F (190°C) and position a rack in the lower middle. Wrap a 9 or 10-inch springform pan with two layers of heavy-duty aluminum foil to prevent leaks. Spray the inside with nonstick cooking spray. In a medium bowl, combine graham cracker crumbs, melted butter, sugar, and salt, then press the mixture evenly into the bottom of the prepared pan. Bake for 10 minutes until set, then remove and set aside.
- Prepare the Filling: Reduce oven heat to 325°F (165°C) and bring a kettle of water to a boil. Using an electric mixer with a paddle attachment, beat the cream cheese, sugar, and flour on medium speed for about 1 minute until smooth. Scrape down the bowl.
- Add Flavorings: Beat in vanilla extract, lemon zest, lemon juice, and salt on low speed until just combined.
- Incorporate Eggs and Sour Cream: Add the eggs one at a time, mixing on low until each is fully incorporated, scraping the bowl regularly. Mix in the sour cream until just uniform; avoid over-mixing.
- Prepare Water Bath and Bake: Place the cheesecake pan inside a large roasting pan. Pour the filling over the crust. Pour boiling water into the roasting pan until it reaches about 1 inch up the side of the springform pan to create a water bath. Bake for 1 hour and 30 minutes to 1 hour and 45 minutes, covering loosely with foil if the top browns too much. The cheesecake should be mostly set with a slight wobble.
- Cool the Cheesecake: Remove the roasting pan from the oven and place on a wire rack. Let the cheesecake cool in the water bath until the water is just warm, about 45 minutes.
- Chill: Remove the foil and springform pan from the water bath. Run a thin knife along the edge if needed to loosen. Cover tightly with plastic wrap and refrigerate for at least 8 hours and up to 2 days to fully set.
- Serve: Remove the sides of the springform pan carefully. You can serve the cheesecake on the pan base or transfer it to a serving platter with spatulas. Slice with a sharp knife wiped clean between cuts. Serve chilled, optionally with berry sauce.
Notes
- Using heavy-duty foil and a water bath prevents cracking and ensures even baking.
- Do not overmix the batter to avoid incorporating too much air, which can cause cracks.
- Cooling gradually in the water bath helps maintain a creamy texture.
- Remove the cake edges from the pan after baking to prevent sticking and cracking.
- Chilling for at least 8 hours is essential for best texture and flavor.


