
I absolutely love how the Graveyard Brownies Recipe brings spooky fun and delicious flavors together in such an easy dessert. To me, these brownies aren’t just about the classic rich, chocolatey base. They’re a playful Halloween treat with those cute Milano cookie “headstones” and candy pumpkins nestled in green buttercream frosting. I’ve made these for parties and family gatherings, and every time they get rave reviews for being as charming as they are tasty!
Why You’ll Love This Graveyard Brownies Recipe
What really makes this recipe special for me is how it balances decadence with whimsical presentation. The brownie base is perfectly fudgy with that deep chocolate flavor I crave, but then you’ve got those Milano cookies decorated with “R-I-P” in black gel that instantly set the eerie, festive vibe. The green buttercream frosting adds a smooth, sweet contrast while also looking like grass on a graveyard scene. Every bite is a delightful mix of creamy, crunchy, and chewy textures.
Another thing I adore about this Graveyard Brownies Recipe is how quick and straightforward it is to prepare. If you have your brownie batter ready, it’s basically just bake, cool, frost, and decorate. I love that I don’t have to fuss with complicated techniques, yet the final result feels so creative and festive. These brownies are perfect for Halloween parties, school events, or any casual get-together where you want to impress but still keep things simple.
Ingredients You’ll Need
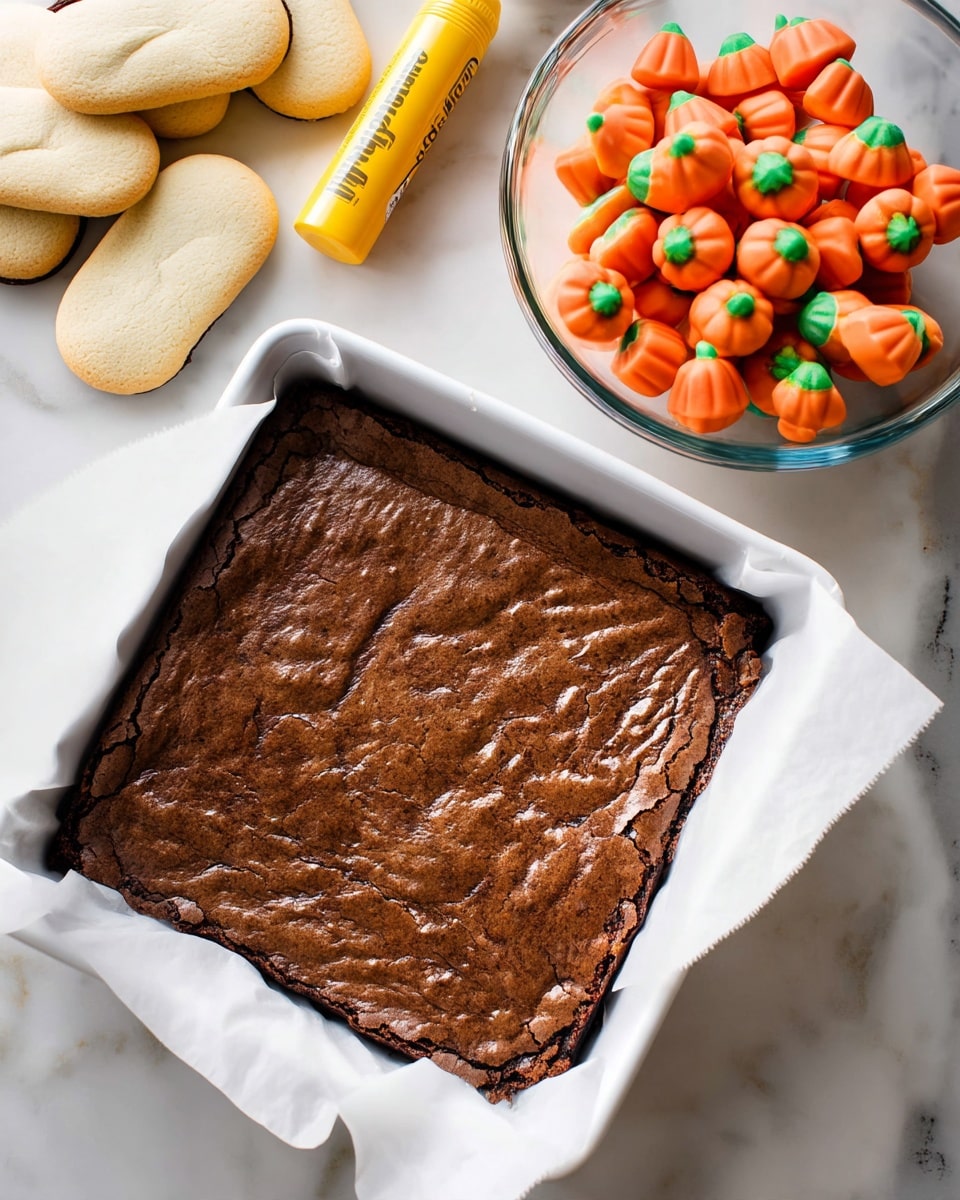
These ingredients are wonderfully straightforward and each one pulls its weight in building this dessert’s perfect flavor and texture. From the rich brownie batter to the sweet green frosting, everything comes together beautifully in this recipe.
- Prepared brownie batter for an 8” pan: The foundation of the dessert, fudgy and rich, use your favorite homemade or a trusted boxed mix.
- 12 Milano cookies: Perfect as grave headstones due to their sturdy yet crumbly texture.
- Black decorating gel: For that spooky “R-I-P” lettering on each cookie, easy to find in most baking aisles.
- 12 candy pumpkins: Tiny pops of seasonal sweetness that really bring the graveyard to life.
- 1 cup powdered sugar: Needed for the silky smooth buttercream frosting that tastes just sweet enough.
- 1/4 cup butter, softened: Gives the frosting its creamy, luscious texture; salted or unsalted works fine.
- 2 teaspoons milk: Balances the frosting’s consistency, making it easy to spread or pipe.
- Green food coloring: Adds the spooky grass color that makes the pumpkin and cookies pop visually.
Directions
Step 1: Line an 8-inch baking pan with parchment paper, making sure to leave a little overhang on the sides so you can easily lift out the brownies once baked.
Step 2: Pour your prepared brownie batter into the pan and smooth it out evenly with a spatula, making sure there are no air pockets or uneven spots.
Step 3: Bake the brownies according to your batter’s recipe instructions, usually around 30 minutes. Check for doneness by inserting a toothpick in the center—it should come out with a few moist crumbs but not wet batter.
Step 4: Let the brownies cool completely in the pan. Once cool, lift them out using the parchment overhang and place on a flat surface to cut into 12 rectangular pieces (I like 4 rows by 3 columns).
Step 5: While the brownies cool, make the green buttercream frosting by mixing powdered sugar, softened butter, milk, and green food coloring in a bowl. Beat for about 2 minutes until it becomes light, fluffy, and evenly colored. Adjust thickness by adding more powdered sugar if it’s too thin or a little milk if too thick.
Step 6: Take the Milano cookies and carefully use the black edible gel to write “R-I-P” on each one. I like to trim a tiny bit off the bottom edge to make them a little shorter, so they look more like mini gravestones, but that’s optional.
Step 7: Press each decorated cookie face-up firmly into the top of each brownie piece to stand like a gravestone.
Step 8: Spoon a small dollop of green buttercream frosting near the cookie on each brownie, then place a candy pumpkin on top of the frosting to finish the spooky graveyard look perfectly.
Servings and Timing
This Graveyard Brownies Recipe makes 12 servings, perfect for sharing at a small party or family gathering. Prep time is a quick 10 minutes, thanks to simple frosting and decorations. Bake time takes about 30 minutes for the brownies to come out just right. Total hands-off time including cooling and decorating rounds out to around 40 minutes, making it a great weeknight or weekend dessert that fits into almost any busy schedule.
How to Serve This Graveyard Brownies Recipe
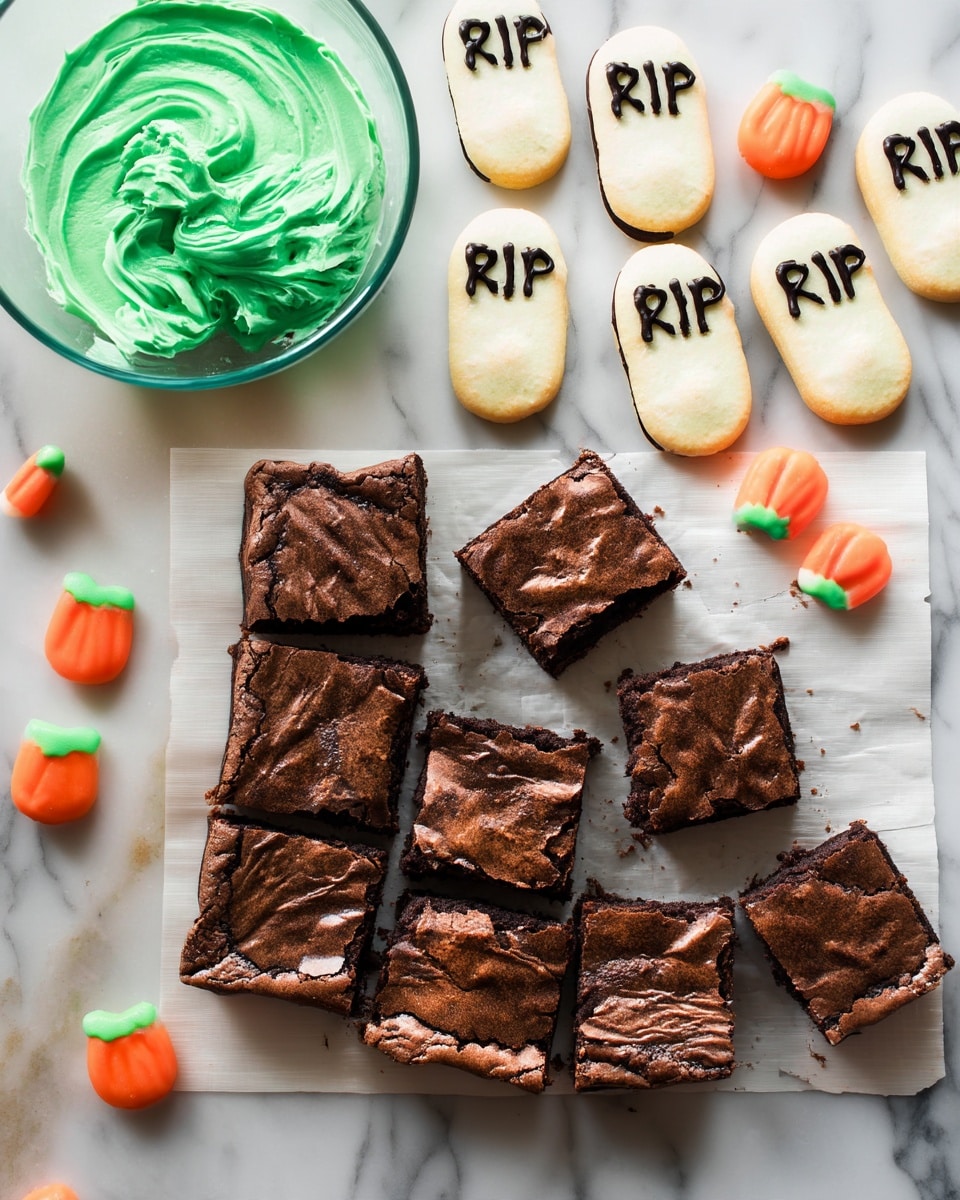
When I serve these Graveyard Brownies, I love presenting them on a rustic wooden board or a black serving tray to really amp up the Halloween vibe. You could scatter some faux leaves or edible candy bones around the tray for extra spooky effect. These brownies are best served at room temperature so the frosting holds its shape but the brownies aren’t too chilled to be chewy and tender.
Pairing is also so much fun with this recipe! I often serve them alongside warm spiced apple cider or a rich hot chocolate for an ultimate cozy fall dessert experience. For adult parties, a deep red wine like a Zinfandel or a blackberry cocktail surprisingly complements the rich chocolate and sweet frosting flavors quite nicely.
These brownies are a hit at any festive occasion, from Halloween classroom parties to casual weekend get-togethers. You can serve the brownies as individual treats or alongside bowls of popcorn or roasted nuts for a full Halloween snack spread. I usually cut them into reasonably sized rectangles so guests get a satisfying bite without feeling too heavy.
Variations
I love tweaking this recipe depending on the occasion or dietary needs. For instance, if you prefer a gluten-free version, you can easily swap in a gluten-free brownie mix without losing any of that fudgy texture. Vegan friends? Try using a plant-based butter and milk substitute in the frosting and a vegan brownie recipe for a fully plant-powered spooky treat.
To switch up the look and flavor, I’ve also tried swapping the candy pumpkins for gummy worms creeping out from the “graves” or even mini chocolate chips sprinkled around to resemble “pebbles.” Instead of green food coloring, you could use orange or purple to match other Halloween color schemes.
If I want a slightly different texture, I sometimes toast the Milano cookies just a few seconds under a broiler (watch carefully!) to add a bit of crunch and warmth. You could experiment with making the frosting a bit tart by adding a tiny bit of lemon juice for a fun contrast to the sweet brownies.
Storage and Reheating
Storing Leftovers
To store any leftover Graveyard Brownies, I recommend placing them in an airtight container at room temperature if you plan to eat them within two days. If your kitchen is quite warm, storing in the fridge is better, but let them come to room temperature before serving so the frosting softens and the brownie regains its chewy quality.
Freezing
This recipe freezes well if you want to prepare ahead or save some for later. I usually cut the brownies first, then wrap each piece individually in plastic wrap before placing them in a freezer-safe bag or container. They keep well for up to 3 months frozen. When ready to enjoy, thaw overnight in the fridge and then bring to room temp before serving.
Reheating
I avoid microwaving these brownies directly since the frosting can melt messily. Instead, I let them warm naturally at room temperature or, if in a hurry, pop them in a low oven (around 300°F) for 5-7 minutes to soften without melting the frosting completely. This method helps restore the brownie’s fudgy texture and the frosting stays nicely set.
FAQs
Can I use other cookies instead of Milano cookies for the headstones?
Absolutely! While Milano cookies work great because of their shape and texture, you can substitute any oval or rectangular cookies that can stand upright. Think biscotti, thin graham crackers cut down to size, or even chocolate wafers. Just make sure they’re sturdy enough to hold the “R-I-P” lettering and stand in the frosting.
What type of brownie batter should I use?
I’m a fan of both homemade and boxed brownie mixes here. If using boxed, I highly recommend the Ghirardelli brand for its rich chocolate flavor and great texture. Homemade brownie batter lets you customize with your favorite recipe, but cutting the ingredients by half for an 8×8 pan keeps things simple and perfectly sized for this recipe.
Can I make the green buttercream frosting in advance?
Yes! You can prepare the frosting a day ahead and keep it covered in the refrigerator. Before decorating, bring it to room temperature and give it a quick whisk to restore its creamy texture. This is especially helpful if you’re multitasking and want to save time on assembly day.
Is the black decorating gel safe to eat?
Yes, the black decorating gel used for the “R-I-P” writing is an edible product made specifically for cake and cookie decorating. You can usually find it near other cake decorating supplies such as colored gels or decorating pens. Just be sure to use edible gel, not craft markers or anything not labeled as food-safe.
Can I make these brownies gluten-free or vegan?
Definitely! Use a gluten-free brownie mix or your favorite gluten-free brownie recipe. For vegan, swap the butter in frosting with a vegan butter and replace dairy milk with almond or soy milk. Use a vegan brownie recipe as your base too. I’ve done both variations with great success!
Conclusion
I hope you give this Graveyard Brownies Recipe a try soon because it’s truly one of my favorite festive desserts that combines fun, flavor, and simplicity all in one. Whether you’re hosting a Halloween party or just want to bring some spooky joy to your family dessert table, these brownies will impress and delight everyone. I know once you make them, they’ll become a go-to treat for the season!
Print
Graveyard Brownies Recipe
- Prep Time: 10 minutes
- Cook Time: 30 minutes
- Total Time: 40 minutes
- Yield: 12 brownies
- Category: Dessert
- Method: Baking
- Cuisine: American
Description
Create spooky and delicious Graveyard Brownies featuring moist chocolate brownies topped with green buttercream ‘grass’, Milano cookie ‘headstones’ marked with RIP in edible black gel, and candy pumpkins. Perfect for Halloween or themed dessert parties, these brownies are easy to make and delightfully festive.
Ingredients
For the Brownies:
- Prepared brownie batter for an 8” pan (homemade or boxed)
- 12 Milano cookies
- Black decorating gel (edible)
- 12 candy pumpkins
For the Green Buttercream Frosting:
- 1 cup powdered sugar
- 1/4 cup butter (salted or unsalted), softened
- 2 teaspoons milk
- Green food coloring, a few drops
Instructions
- Prepare the pan: Line an 8” baking pan with parchment paper, allowing some overhang on the sides for easy removal of brownies after baking.
- Bake the brownies: Pour the prepared brownie batter into the lined pan and spread into an even layer. Bake according to your brownie recipe’s instructions, typically around 25-30 minutes, until set. Let cool completely before proceeding.
- Cut the brownies: Lift the cooled brownies from the pan using the parchment paper overhang and place them on a flat surface. Cut into 12 rectangular pieces (approximately 4 rows by 3 columns).
- Make the green buttercream frosting: In a bowl, combine powdered sugar, softened butter, milk, and green food coloring. Mix vigorously for about 2 minutes until the frosting is light and fluffy. Adjust thickness by adding more powdered sugar or milk as needed.
- Decorate the headstones: Use the black edible gel pen to write “R-I-P” on each Milano cookie. Optionally, trim the bottom edge of the cookies slightly to resemble shorter gravestones.
- Assemble the graves: Press one decorated Milano cookie into the top of each brownie piece, standing it upright like a gravestone.
- Add frosting and pumpkins: Spoon a small amount of green buttercream near the base of each cookie to mimic grass, then place a candy pumpkin on top of the frosting near the headstone for a festive touch.
Notes
- You can use a homemade chocolate brownie recipe cut in half for an 8×8 inch pan, or double ingredients to fit a 9×13 inch pan and increase toppings accordingly.
- If opting for boxed brownie mix, the Ghirardelli brand is recommended for best flavor.
- Black decorating gel is commonly found near birthday candles in grocery stores or at Walmart.


