
I absolutely adore making these spooky and adorable Ghost Cake Pops Recipe whenever I want a fun, festive dessert that’s both delicious and delightful to look at. Combining the soft crumbly texture of cake with smooth vanilla frosting and the creamy, sweet coating, these little ghostly treats always bring a smile to my face and everyone’s at the party. They are surprisingly simple to whip up, yet they look impressively whimsical, making them a personal favorite for Halloween, gatherings, or just a special sweet moment at home.
Why You’ll Love This Ghost Cake Pops Recipe
What makes this Ghost Cake Pops Recipe stand out for me is the perfect blend of flavors and textures. The tender cake pieces mix with that creamy frosting to create a moist, dough-like base that melts in your mouth. Then, dipping these into the luscious vanilla candy coating adds that irresistible outer shell that’s subtly sweet but not overpowering. Every bite feels like a comforting, nostalgic dessert with a festive twist that’s both playful and satisfying.
I also can’t get over how easy these are to prepare. Using boxed cake mix and store-bought frosting doesn’t mean cutting corners here—instead, it makes the whole process accessible for any skill level. Plus, the creative element of shaping ghost forms and decorating their faces with writing gel really allows me to customize each pop, making it perfect for parties or holiday celebrations. I love that it’s a hands-on activity that also results in a treat that looks picture-perfect on the dessert table.
Ingredients You’ll Need
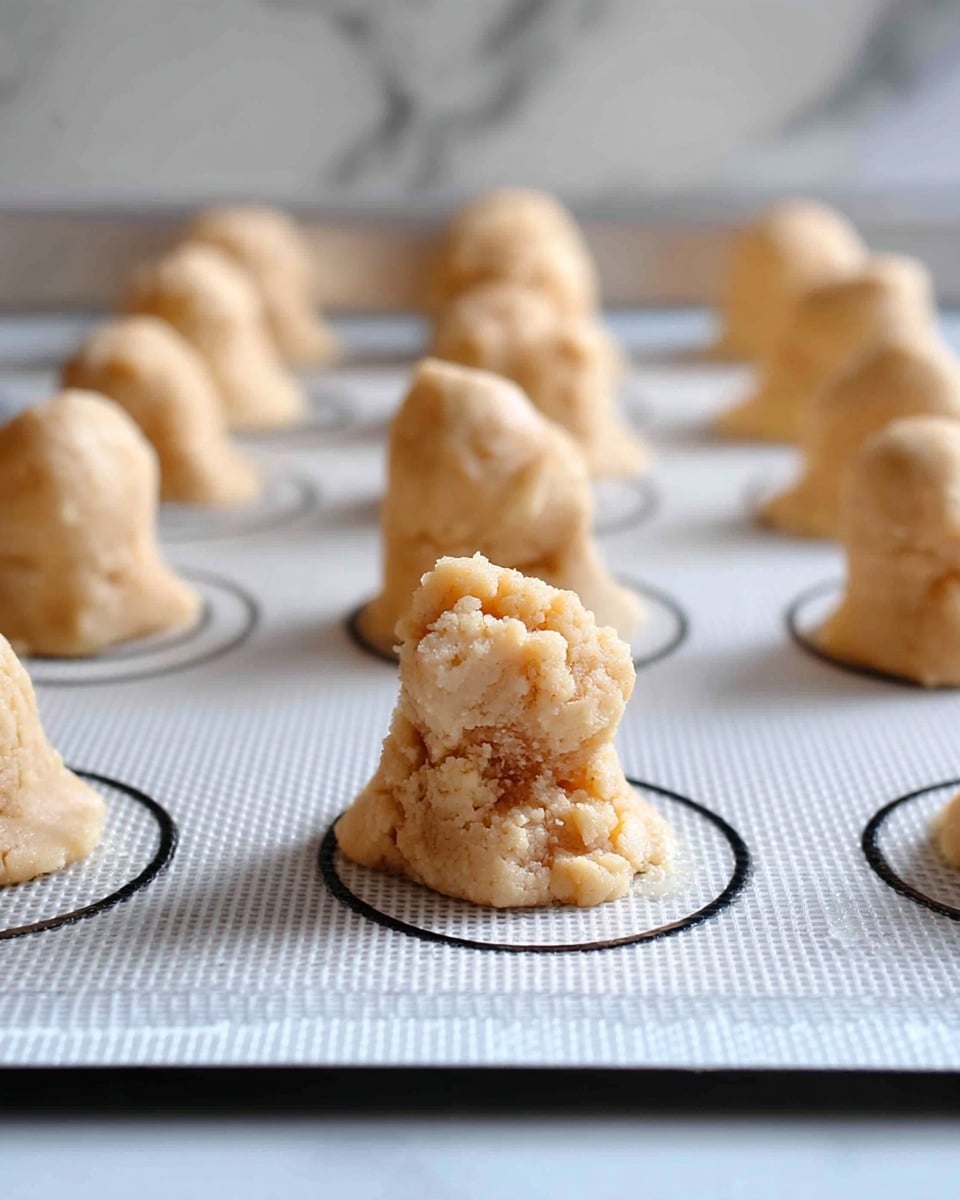
These Ghost Cake Pops ingredients are straightforward, yet crucial to getting the right taste, texture, and spooky look. Each one plays a unique role from moistening, binding, to coating the cake pops beautifully.
- Boxed white cake mix: The base of the cake that’s fluffy and mild, perfect for spooky pops.
- Vegetable oil: Helps keep the cake moist and tender without changing the flavor.
- Eggs: Essential for binding the cake ingredients together.
- Water: Used to mix the cake batter to a perfect consistency.
- Vanilla frosting: Binds the crumbled cake into a dough and adds creamy sweetness.
- Vanilla candy coating: Provides a smooth, glossy white shell and helps shape the ghostly appearance.
- Additional vegetable oil: Thins the candy coating for easier dipping and smoother finish.
- Black writing gel: Used for drawing spooky ghost faces with precision and personality.
Directions
Step 1: Prepare the boxed white cake mix exactly as the instructions on the box say, using the vegetable oil, eggs, and water. Bake it in a 9×13 pan and let it cool completely—this part is critical so the cake won’t crumble too much later.
Step 2: Once cooled, break the cake into small pieces over a large mixing bowl. Use a spatula or your hands to crumble it finely for that perfect texture to hold the frosting.
Step 3: Add about ¾ of the can of vanilla frosting to the crumbled cake. Mix thoroughly with your hands or a spatula until it forms a dense but pliable dough-like mixture. You want it firm enough to shape but not too sticky.
Step 4: Prepare a baking sheet lined with wax paper. Scoop out about 1 ½ tablespoons of the mixture and roll it into an oblong ghost shape using your hands. It’s easier if you lightly spray your hands with non-stick spray. Place each ghost on the wax paper. Don’t stress about perfection—the slightly imperfect shapes add to the ghostly charm!
Step 5: Chill the shaped ghosts in the refrigerator for at least 30 minutes. This helps them firm up so they dip smoothly without falling apart.
Step 6: Meanwhile, melt the vanilla candy coating in a microwave-safe bowl. Heat it for 45 seconds, stir, and then continue melting in 20-second bursts until fully smooth. Stir in 1-2 tablespoons of vegetable oil to thin the coating and make dipping easier.
Step 7: Using a spoon, carefully pour the melted candy coating over each ghost to cover completely. You may need more than one spoonful per ghost. If the coating thickens, just return it to the microwave for another 20 seconds to re-melt.
Step 8: Once coated, use the black writing gel to draw eyes, mouths, or any spooky faces you like on the ghosts. This step is so fun for personalizing your treats!
Step 9: Allow the candy coating to fully set before serving. This can take 30 minutes to an hour at room temperature, or speed it up by chilling them for 20-30 minutes in the fridge.
Servings and Timing
This recipe makes about 32 ghost cake pops, perfect for parties or sharing with friends and family. Prep time takes approximately 10 minutes to mix and shape, plus cooling and chilling time. The cake cooks for about 30 minutes, and then the ghosts require at least 30 minutes chilling before and after coating. Altogether, you’re looking at around 2 hours total time—mostly hands-off during baking and chilling, which gives you plenty of time to enjoy creating the spooky faces!
How to Serve This Ghost Cake Pops Recipe
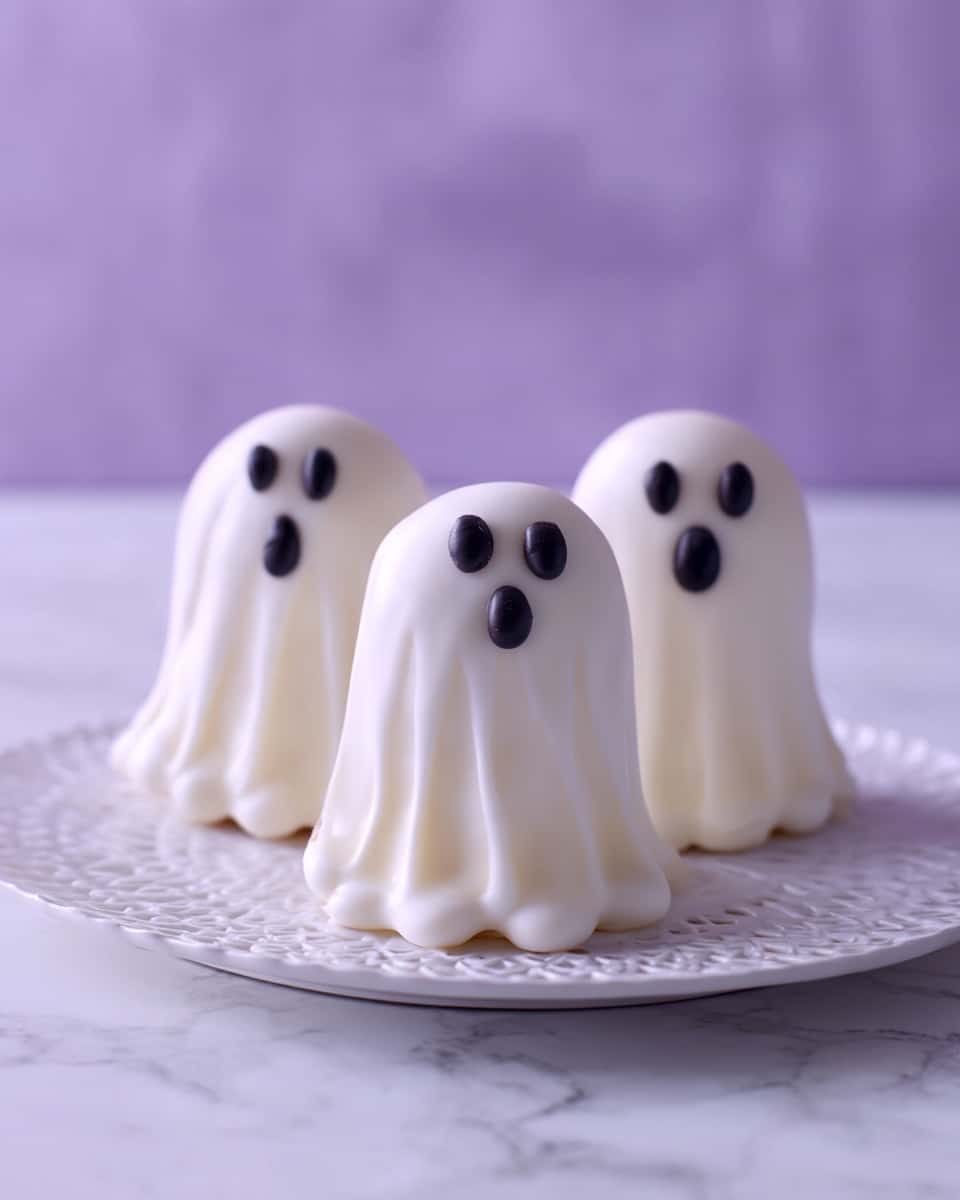
I love serving these Ghost Cake Pops chilled or at room temperature for the perfect balance—chilled is refreshing and keeps the candy coating firm, while room temp softens the vanilla frosting center slightly for a melt-in-your-mouth sensation. They’re fantastic on their own as a grab-and-go dessert, but I like to pair them with a warm cup of spiced apple cider or a rich hot chocolate for an extra cozy experience.
For a party, these cake pops shine on a decorated dessert platter lined with wax paper or a festive Halloween-themed tray. I often scatter some mini marshmallows, candy corn, or even plastic spider rings around them for some extra spooky fun. If you want to elevate the presentation, try arranging them on a tiered stand so their ghostly shapes stand out. The black writing gel faces give me endless creativity—from cute little smiles to scary expressions that always get guests talking.
These cake pops work perfectly for Halloween parties, kids’ playdates, or even a weeknight treat when you want something quick but special. They’re easy for kids to hold and eat, and their bite-size portions mean no guilt over indulging. As an added tip, I find that serving 2 to 3 pops per person makes a satisfying dessert portion without feeling heavy.
Variations
One of my favorite things about this Ghost Cake Pops Recipe is how flexible it is. You can easily swap the white cake mix for chocolate, yellow, or even spice cake to change the flavor profile. Mixing up the frosting to chocolate or cream cheese flavor adds a tasty twist. For a more seasonal touch, try stirring a pinch of cinnamon or pumpkin pie spice into the cake crumble before shaping your ghosts.
If you follow gluten-free or vegan diets, these cake pops can be adapted too! Gluten-free boxed cake mixes work wonderfully here, as long as you use a compatible frosting. For a vegan version, use plant-based cake mixes and substitute eggs with flax eggs; plant-based frostings and dairy-free candy coatings are also available, though melting them may require delicate attention to prevent thickening.
For a different approach, you could experiment with dipping these cake balls in colored candy melts for a fun change in ghost colors, like pale blue or lavender. Additionally, instead of spoon-dipping, if you’re feeling fancy, you can use sticks for cake pops to hold them like lollipops—perfect for kids’ parties. Just remember to insert sticks before chilling for sturdiness!
Storage and Reheating
Storing Leftovers
Once your ghost cake pops have set, I store any leftovers in an airtight container lined with wax paper to prevent sticking. They keep beautifully in the refrigerator for up to 3 to 4 days. This way, they remain fresh and maintain their moist center and crisp candy coating without drying out.
Freezing
I’ve also frozen these cake pops with good results. To freeze, place them on a baking sheet covered with wax paper and freeze until solid, then transfer them to a freezer-safe airtight container or zip-top bag. They keep well frozen for up to 2 months. When you’re ready to enjoy, simply thaw them in the refrigerator overnight to maintain their texture and flavor.
Reheating
Since these are best enjoyed chilled or at room temperature, I recommend avoiding reheating in the microwave or oven as that can melt the candy coating and make the cake pops messy. Instead, bring them to room temperature naturally by leaving them out of the fridge for about 15 minutes before serving. This helps soften the inside slightly and unleashes the rich vanilla flavor without compromising the crisp exterior.
FAQs
Can I use homemade cake instead of boxed cake mix?
Absolutely! If you prefer homemade cake, go for it. Just make sure the cake is fully cooled and crumbly so it can mix well with the frosting. Keep the cake moist but not too dense, and follow the same process to crumble and bind it with the frosting for shaping.
Do I have to use the exact candy coating recommended?
Not at all. Vanilla candy coating works great for a smooth white finish, but you can substitute with almond bark, white chocolate melts, or any dipping chocolate you like. Just be sure to thin the coating with oil if it gets too thick, and melt it carefully to avoid overheating.
Is it possible to add sticks to these cake pops?
Yes! Adding lollipop sticks can make them easier to hold and serve, especially for kids’ parties. You’ll want to insert the sticks right after shaping the cake mixture and chill them with the sticks before dipping. This gives better support and prevents the ghosts from falling apart while coating.
How can I make the ghost faces look neat and professional?
Using a thin-tipped black writing gel or piping bag works best for precision. Practice on parchment paper first if you like, and don’t be afraid to get creative—little imperfections add character! Let the faces dry completely before moving the cake pops to prevent smudging.
Can I make these cake pops in advance for a party?
Definitely! These cake pops hold up well when made a day or two ahead. Keep them refrigerated in an airtight container and decorate the faces the day of the event if you want them really fresh. You can also chill after decorating to set the coating quickly before serving.
Conclusion
I genuinely hope you give this Ghost Cake Pops Recipe a try because it’s such a joyous way to bring a little fun and sweetness into your day or party. These ghosts are easy enough for a weekend baking project but charming enough to impress your guests. From the creamy vanilla coating to the moist cake center and playful faces, they’re a delightful twist on classic cake pops that I know will become one of your go-to festive treats!


