
I am so excited to share my Easy Protein-Packed Pumpkin Cheesecake Bars with Gluten-Free Graham Cracker Crust Recipe with you! This recipe combines the creamy richness of pumpkin cheesecake, the warm spices of fall, and a naturally gluten-free, protein-rich twist that makes it feel both indulgent and nourishing. Every bite is silky smooth with just the right touch of sweetness and spice, all nestled on a crispy, buttery crust made from gluten-free graham crackers. It’s truly one of my favorite seasonal desserts that’s perfect for sharing or keeping all to myself.
Why You’ll Love This Easy Protein-Packed Pumpkin Cheesecake Bars with Gluten-Free Graham Cracker Crust Recipe
What makes this recipe so special to me is its vibrant flavor profile. The pumpkin puree adds that perfect fall sweetness and moisture while the pumpkin pie spices bring depth and warmth that instantly reminds me of cozy autumn days. The cheesecake filling, made creamy and smooth thanks to cottage cheese and eggs, creates a luscious texture that melts in your mouth. Then there’s the crust: buttery, crisp, and gluten-free, it perfectly balances the soft filling without overwhelming it. Every bite feels like a well-rounded hug for your taste buds.
I also love how straightforward and quick it is to prepare, despite feeling like a gourmet dessert. I find that using simple ingredients like gluten-free graham crackers, protein powder, and pantry staples means I can whip this up when inspiration strikes or for last-minute gatherings. It’s a crowd-pleaser that doesn’t require any complicated techniques, just a blender, a food processor, and a little patience for baking and chilling. Whether I’m hosting a Thanksgiving dinner, enjoying a quiet weekend treat, or bringing a dish to a potluck, this recipe is my go-to for something comforting and impressive.
Ingredients You’ll Need
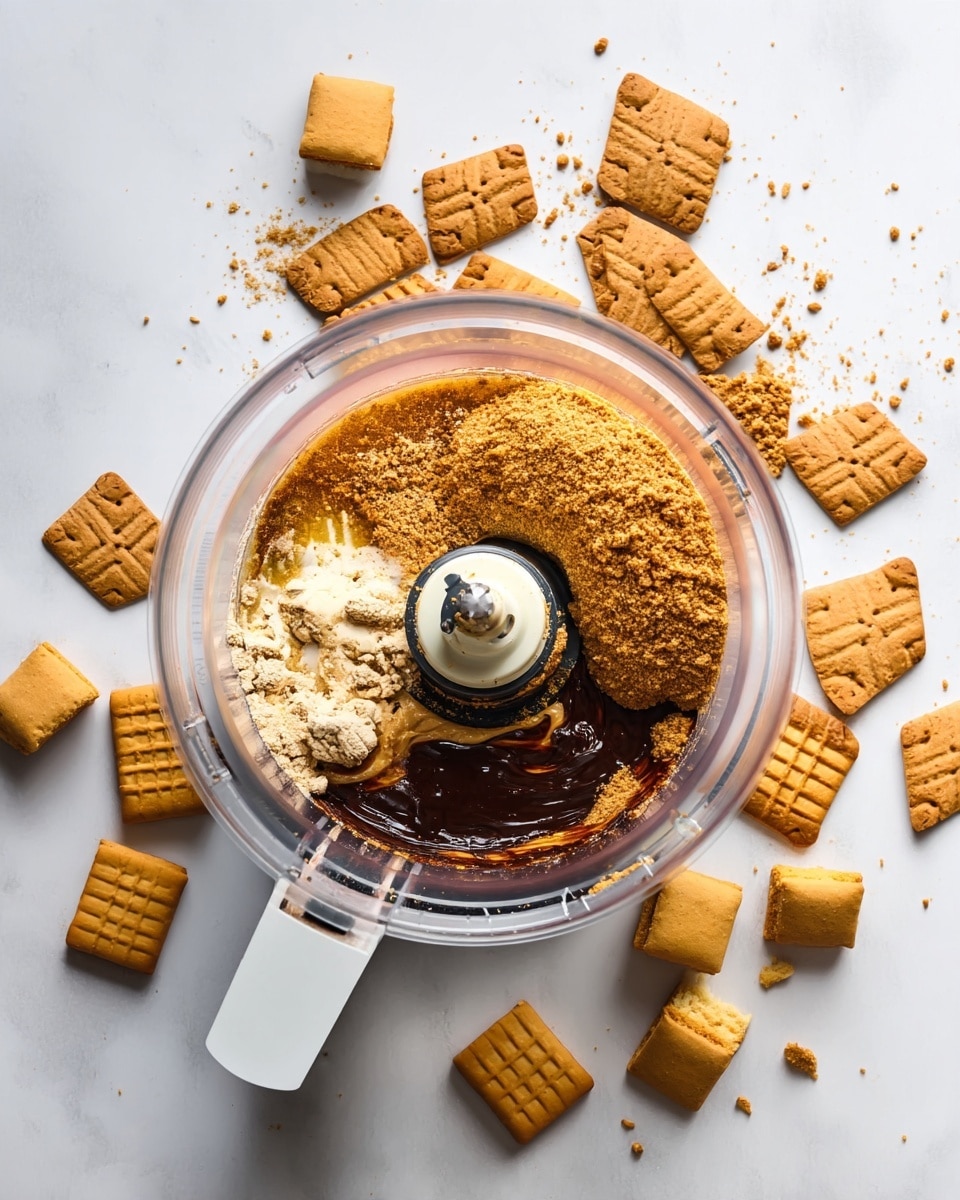
The ingredients for this recipe are wonderfully simple but each plays a crucial role in creating the creamy, spiced, and protein-packed bars. From the crunchy gluten-free crust to the velvety pumpkin filling, you’ll want to gather everything carefully to capture the perfect balance and texture.
- Gluten-free graham crackers: These form the base of your crust, providing essential crunch and sweetness with a gluten-free guarantee.
- Melted butter: Helps bind the crust crumbs together while adding rich, buttery flavor.
- Vanilla protein powder: Adds a nutritious boost and subtle sweetness without overpowering the pumpkin.
- Cottage cheese: Makes the cheesecake filling creamy and adds valuable protein and texture.
- Pumpkin puree: The star ingredient that adds moisture, flavor, and that classic fall color without any added sugars.
- Eggs: Bind the filling and help it set perfectly during baking.
- Maple syrup: Provides natural sweetness and a delicate caramel note to complement the pumpkin.
- Tapioca flour: Acts as a thickener to give the filling structure without gluten.
- Pumpkin pie spice: Infuses the cheesecake with cozy cinnamon, nutmeg, and clove flavors for that quintessential autumn taste.
- Whipped topping (optional): A fluffy finish that adds a light and creamy contrast when serving.
Directions
Step 1: Preheat your oven to 350°F (175°C). Begin by placing the gluten-free graham crackers into a food processor and pulsing them until they resemble fine sand – this crust is the foundation, so texture matters!
Step 2: Add the vanilla protein powder and melted butter to the graham cracker crumbs in the processor. Pulse a few more times until everything is combined evenly. Don’t forget to scrape down the sides of your processor bowl as you go to ensure an even mix.
Step 3: Spray a 9×9-inch square baking pan generously with avocado oil to prevent sticking. Pour the crumb mixture into the pan, then press it firmly down using your hands or the bottom of a round cup until you have a compact, even layer. This crust needs to be packed tightly to hold together after baking. Bake it for 10 minutes, then set aside.
Step 4: Clean your food processor or grab a high-speed blender. Add in the cottage cheese, pumpkin puree, eggs, maple syrup, tapioca flour, and pumpkin pie spice. Blend on high for about 2 minutes until the mixture is completely smooth and creamy – this is key for that luscious cheesecake texture!
Step 5: Pour the creamy pumpkin mixture over the slightly cooled crust. Spread it evenly, then bake for 35 to 40 minutes or until the filling feels firm to the touch and the edges start to pull away slightly from the pan.
Step 6: Remove from the oven and let it cool for 30 minutes at room temperature. Then refrigerate the bars for at least 1 to 2 hours to fully set – patience here really pays off in texture and flavor!
Step 7: Before serving, top the bars with your favorite whipped topping, like Truwhip or homemade whipped cream, for an airy and decadent finish. Slice into nine generous squares and enjoy every creamy, spiced bite.
Servings and Timing
This recipe yields 9 satisfying bars, each packed with protein and flavor. The prep time is impressively quick at around 10 minutes. Baking takes approximately 1 hour, which includes the crust and filling bake times, followed by a crucial chilling period of 1 to 2 hours. Overall, you’re looking at about 3 hours and 10 minutes from start to finish, including cooling and refrigeration – perfect for prepping in advance for a busy day or important celebration.
How to Serve This Easy Protein-Packed Pumpkin Cheesecake Bars with Gluten-Free Graham Cracker Crust Recipe
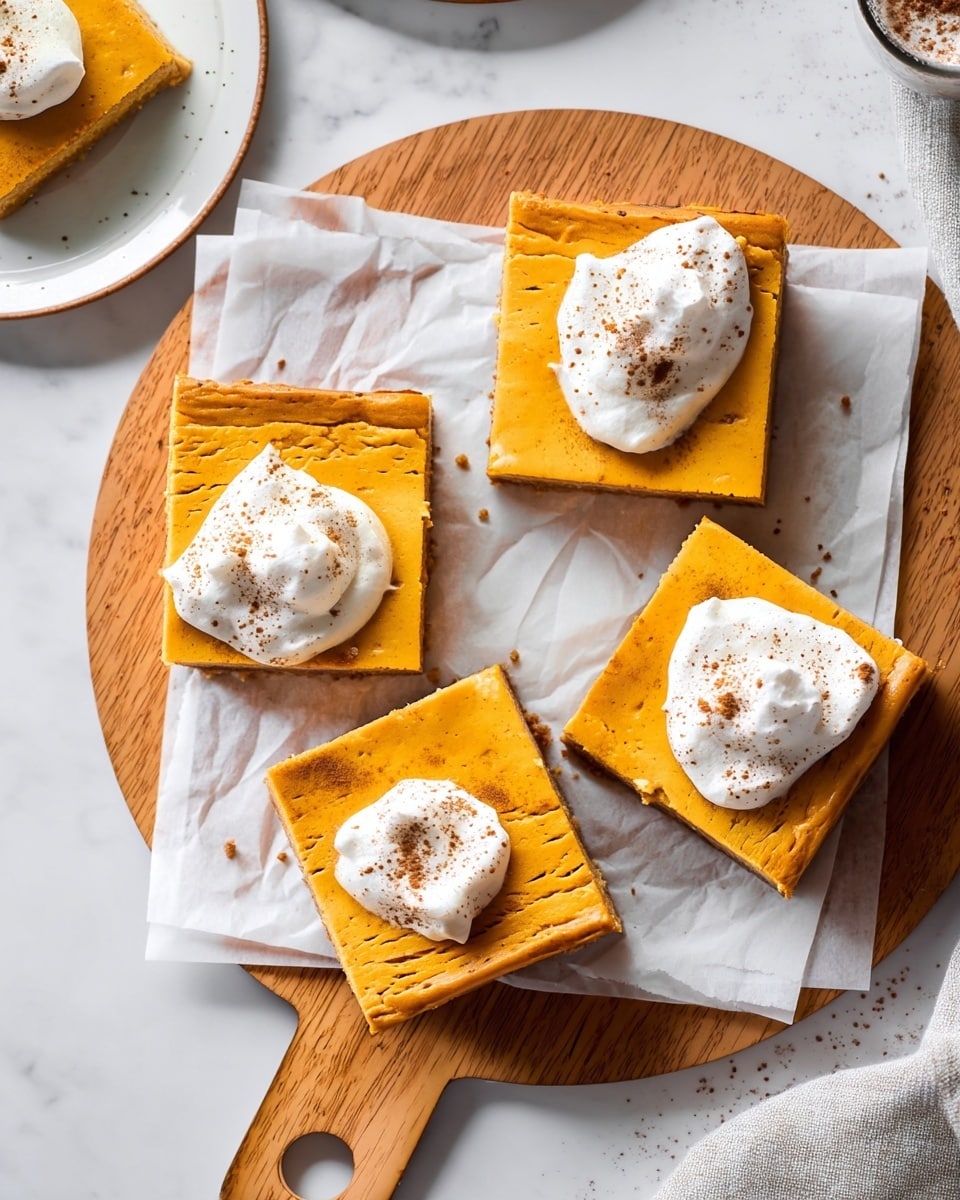
I love serving these pumpkin cheesecake bars chilled straight from the fridge, as the cool, creamy filling tastes incredible against the slightly crisp crust. They make a perfect dessert on their own, but I often add a little whipped cream or even a dusting of cinnamon for an elegant presentation that’s simple yet inviting. For a little extra flair, I sometimes garnish with toasted pepitas or chopped toasted pecans — they add a wonderful crunch and nutty contrast.
These bars are incredibly versatile and complement a variety of beverages. I enjoy pairing them with a warm cup of spiced chai or pumpkin spice latte during the fall season, but they also work beautifully with a glass of lightly sweetened white wine or a crisp apple cider cocktail if you’re serving at an autumn party. For a non-alcoholic option, sparkling water with a splash of cranberry juice and a cinnamon stick is festive and refreshing.
They’re a great choice for everything from cozy family dinners and Thanksgiving feasts to casual potluck gatherings. If I’m serving them at a party, I slice them into smaller squares for easy sharing, but for a weeknight treat, one bar is a perfect sized portion to enjoy without feeling over-indulgent. Room temperature works well if you’re serving immediately, but chilling them really brings out the flavors and enhances the texture.
Variations
I enjoy mixing things up with this recipe sometimes! One of my favorite variations is swapping out cottage cheese for a creamy vegan alternative like silken tofu or blended cashew cream to create a dairy-free version. It requires a bit more blending to get that silky texture, but the results are deliciously satisfying. For those who want to experiment with flavor, adding a teaspoon of espresso powder or a swirl of melted dark chocolate in the filling can transform these bars into a mocha-infused treat!
If you’re not restricted to gluten-free but want a simpler crust, a classic graham cracker crust or even a pecan nut crust works wonderfully. For extra protein boost, I sometimes mix in a tablespoon of collagen peptides or swap the vanilla protein powder for a pumpkin spice flavored protein powder to intensify the autumn vibe. Baking-wise, if you’re short on time, these bars can also be baked in muffin tins for mini pumpkin cheesecake bites, just reduce baking time to about 25 minutes.
Another fun twist is to use different sweeteners. I have tried swapping maple syrup with honey or coconut sugar syrup for a slightly different sweetness and depth of flavor. No matter what swap you choose, this recipe’s flexibility means you can make it your own and still enjoy those creamy, spiced pumpkin vibes.
Storage and Reheating
Storing Leftovers
I always store leftover bars in an airtight container in the refrigerator to keep them fresh for up to 4 days. Because they contain dairy and eggs, proper refrigeration is essential. Using a glass or BPA-free plastic container with a tight seal works best to avoid moisture or odor transfer. For easier portioning later, I cut the bars before storing, so they’re ready to grab and go when I need a quick protein-packed snack.
Freezing
This recipe freezes beautifully, which makes it great for meal prep or holiday make-ahead desserts. I recommend wrapping individual bars tightly in plastic wrap and then placing them in a freezer-safe container or resealable bag. They will keep well frozen for up to 2 months. When you’re ready to enjoy, thaw them overnight in the fridge for the best texture. Avoid thawing at room temperature to prevent the filling from becoming watery.
Reheating
I typically enjoy these cheesecake bars chilled, but if you prefer them warm, you can gently reheat a bar in the microwave for 15 to 30 seconds. Be careful not to overheat, as the filling can lose its creaminess and become rubbery. A better option might be to let them come to room temperature naturally or warm for a few minutes in a 300°F oven before serving to revive a little softness without compromising texture.
FAQs
Can I use canned pumpkin pie filling instead of pumpkin puree?
It’s best to use pure pumpkin puree rather than pumpkin pie filling because the filling contains added sugars and spices that can alter the flavor and texture of your bars. Pure pumpkin gives you full control over the sweetness and spice levels in the cheesecake mixture.
Is the protein powder necessary? Can I leave it out?
While the protein powder adds a nice nutritional boost and a bit of sweetness to the crust, you can omit it if you don’t have any on hand. If skipping it, consider adding a touch more sweetener or an extra tablespoon of gluten-free flour or ground nuts to help the crust bind properly.
Can I make these bars ahead of time?
Absolutely! These pumpkin cheesecake bars actually benefit from some resting time. I often make them the day before I plan to serve so they have enough time to chill and firm up. They keep well refrigerated for several days and can also be frozen for longer storage.
What can I use to thicken the filling besides tapioca flour?
If you don’t have tapioca flour, cornstarch or arrowroot powder can work as a substitute thickeners in equal amounts. They help with the structure of the filling to ensure it sets properly without gluten.
Are these bars suitable for someone with gluten intolerance?
Yes! The crust is made entirely with gluten-free graham crackers and gluten-free flour alternatives, so this recipe is perfect for anyone avoiding gluten. Just be sure to double-check that all your ingredients, especially the protein powder and pie spice blend, are certified gluten-free to avoid any cross-contamination.
Conclusion
I truly hope you give this Easy Protein-Packed Pumpkin Cheesecake Bars with Gluten-Free Graham Cracker Crust Recipe a try soon. It’s a deliciously creamy, spiced, and protein-filled treat that feels special yet is surprisingly simple to make. Whether you’re celebrating fall, hosting the holidays, or just craving something sweet and wholesome, these bars are a beautiful way to enjoy pumpkin season with a healthy twist. Trust me, once you try them, they’ll become one of your favorite go-to desserts too!
Print
Easy Protein-Packed Pumpkin Cheesecake Bars with Gluten-Free Graham Cracker Crust Recipe
- Prep Time: 10 minutes
- Cook Time: 1 hour
- Total Time: 3 hours 10 minutes
- Yield: 9 bars
- Category: Dessert
- Method: Baking
- Cuisine: American
- Diet: Gluten Free
Description
These easy pumpkin cheesecake bars boast a creamy, spiced filling made with protein-packed cottage cheese and pumpkin puree atop a gluten-free graham cracker crust. Baked to perfection, they are an ideal fall dessert or Thanksgiving treat that combines rich autumn flavors with added protein for a guilt-free indulgence.
Ingredients
Crust
- 8 oz gluten free graham crackers (Simple Mills Sweet Thins or Pamela’s)
- 6 oz melted butter
- ½ cup vanilla protein powder (Clean Simple Eats brand recommended)
Filling
- 2 cups Good Culture cottage cheese
- 15 oz canned pumpkin (pure pumpkin, not pumpkin pie filling)
- 2 eggs
- ½ cup maple syrup (add ¼ cup more for extra sweetness if desired)
- 2 tbsp tapioca flour
- 1 tbsp pumpkin pie spice plus 1 tsp for extra flavor
Topping
- Truwhip or homemade whipped cream
Instructions
- Preheat Oven and Prepare Crust: Preheat your oven to 350°F (175°C). Add the gluten-free graham crackers to a food processor and pulse until they resemble fine sand. Add in the vanilla protein powder and melted butter, pulsing a few more times until fully combined. Scrape down the sides as needed.
- Form and Bake Crust: Spray a 9×9 inch baking pan with avocado oil. Transfer the crumb mixture to the pan and press firmly with your hands or the bottom of a round cup to create an even, compact crust layer. Bake the crust for 10 minutes to set.
- Blend Filling: In a high-speed blender (or the cleaned food processor), combine the cottage cheese, pumpkin puree, eggs, maple syrup, tapioca flour, and pumpkin pie spice. Blend on high for about 2 minutes until the mixture is completely smooth and creamy.
- Assemble and Bake Bars: Remove the pre-baked crust from the oven and pour the blended pumpkin cheesecake filling evenly over it. Return the pan to the oven and bake for 35-40 minutes or until the top looks firm and set.
- Cool and Chill: Allow the bars to cool at room temperature for 30 minutes. Then refrigerate for 1-2 hours to fully set and chill before serving.
- Serve: Top each bar with Truwhip or your preferred homemade whipped cream. Slice into 9 bars using a hot knife for clean cuts and enjoy!
Notes
- Nutrition facts apply per 1 bar assuming 9 bars total; whipped topping nutrition is not included.
- Store refrigerated in an airtight container for up to 4 days or freeze for up to 2 months; thaw in the fridge before serving.
- For clean slicing, use a hot knife and wipe it clean between cuts.


