
I absolutely adore sharing this Dhaba Style Chicken Curry Recipe with anyone who craves rich, hearty Indian flavors made effortlessly at home. This curry brings together tender chicken pieces simmered in a perfectly spiced, aromatic gravy that reminds me of those bustling roadside dhabas in India where every bite feels comforting and soulful. The blend of whole and ground spices, mustard oil, and a slow-cooked onion-tomato base makes this dish truly unforgettable for me every time I make it.
Why You’ll Love This Dhaba Style Chicken Curry Recipe
I love this recipe because of its robust flavor profile that strikes a fantastic balance between bold spices and savory warmth. The combination of cumin seeds, bay leaves, cinnamon, cardamom, cloves, and peppercorns creates this wonderful aroma and depth that instantly transports me to an authentic Indian dhaba setting. There is such an incredible harmony of spicy, tangy, and earthy notes that makes each bite simply crave-worthy.
What makes the Dhaba Style Chicken Curry Recipe even more special is how straightforward it is to prepare despite tasting like it took hours of work. Using whole spices along with freshly ground onion, ginger, garlic, and green chili paste really sets it apart from simpler curries. Whether I’m cooking for a large family dinner or prepping a comforting weeknight meal, it’s always a hit. It’s the kind of dish that feels impressive yet comes together without any fuss, which I think makes it truly stand out in my collection.
Ingredients You’ll Need
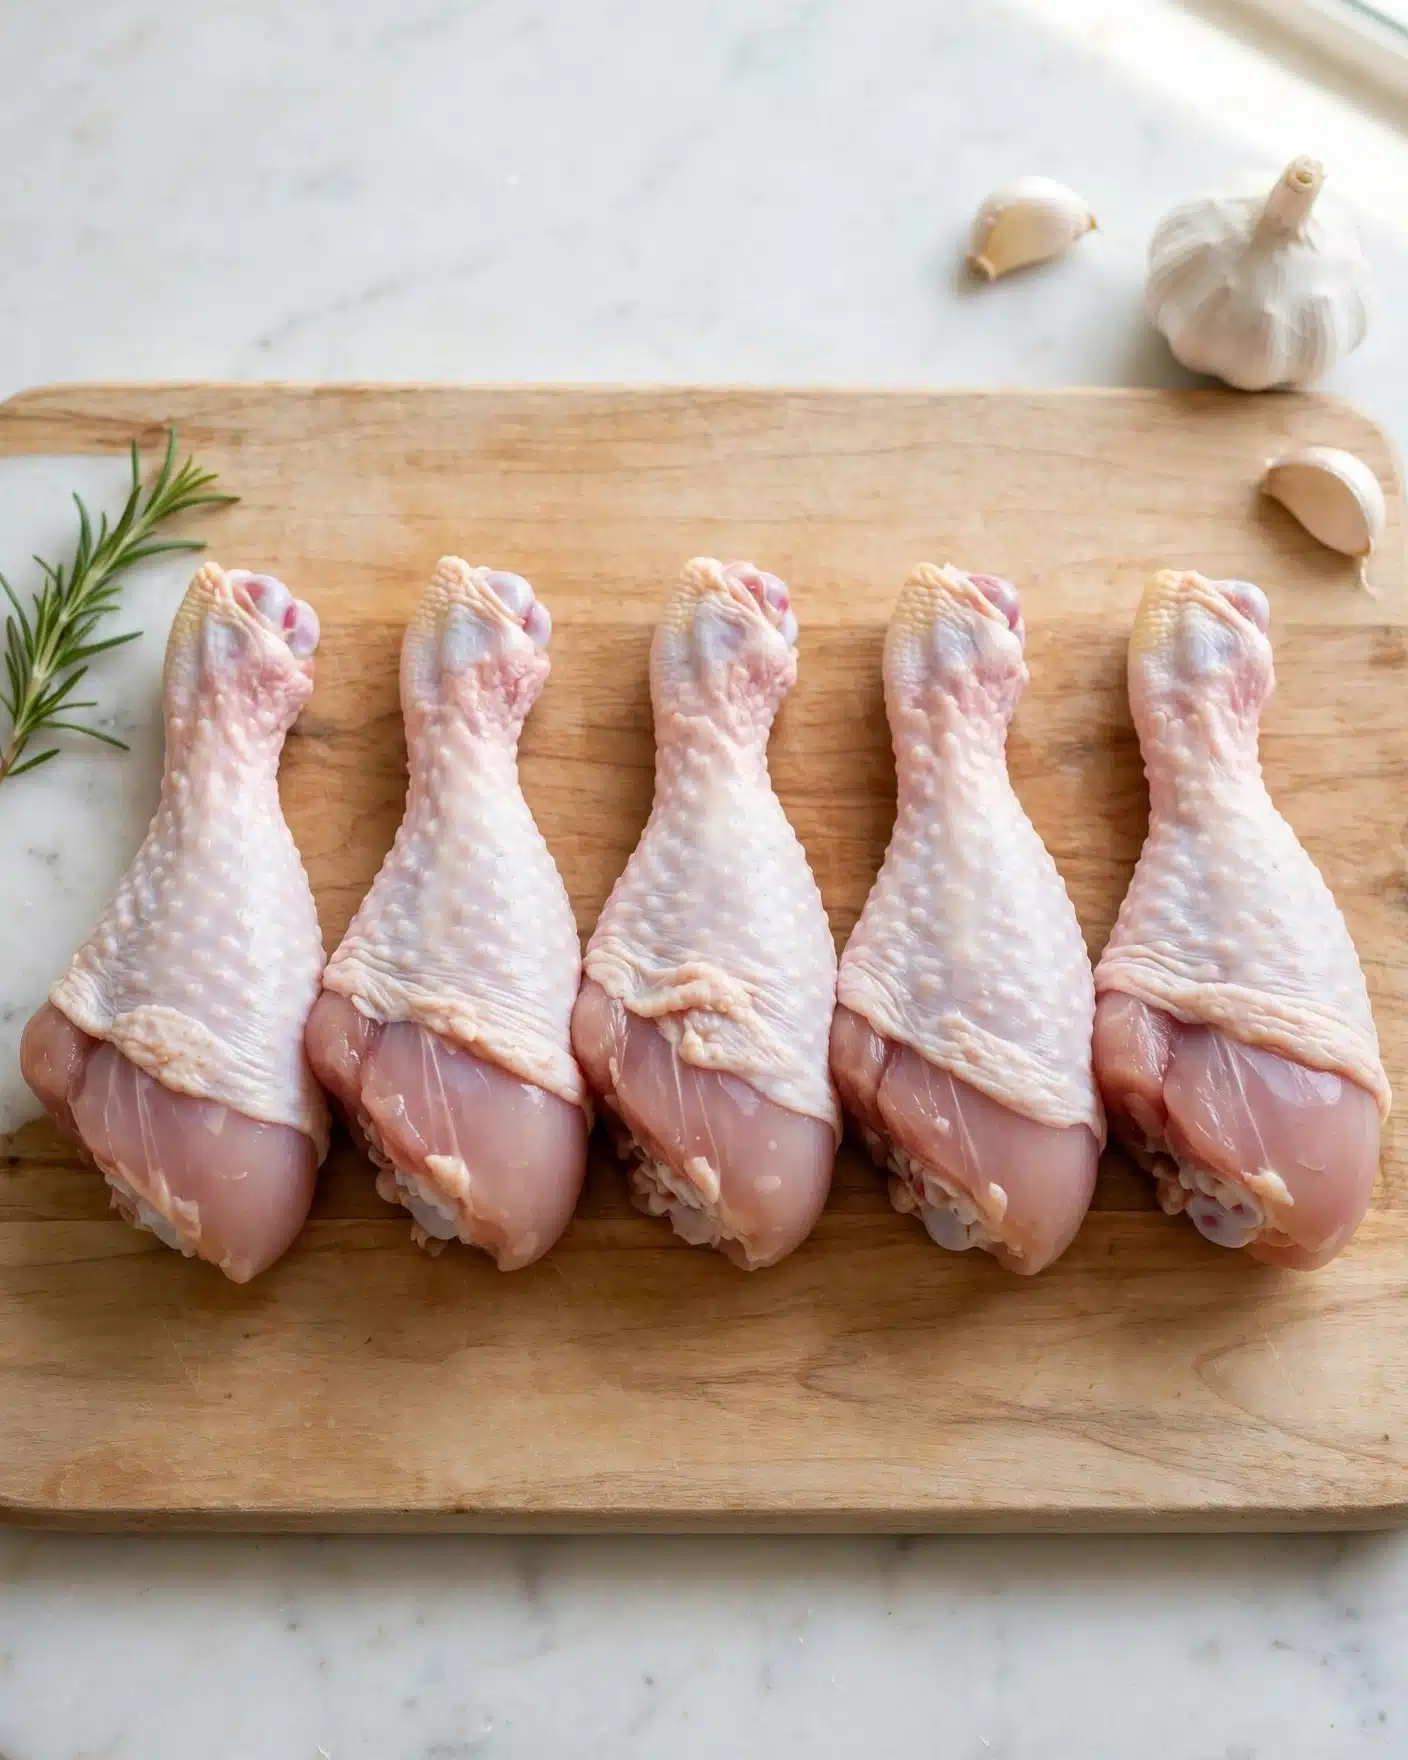
The ingredients for this curry are deceptively simple but essential to capturing that genuine dhaba flavor. Each one plays a specific role, from the flavorful mustard oil that imparts a slight pungency to the warming whole spices that build layers of aroma throughout the cooking. The balance of fresh aromatics like ginger and garlic with slowly cooked onions and ripe tomatoes is what gives the gravy its rich texture and vibrant color.
- 1 kg Chicken (skinless, bone-in medium pieces): The bone-in pieces give more flavor to the curry as they cook.
- 2 tablespoons Ginger Garlic Paste: A classic base for aromatic depth and spiciness.
- 1 Juice of lime: Adds a bright, tangy contrast to the richness.
- 1 tablespoon Salt: Essential for balancing all the flavors.
- 1/4 cup Mustard Oil: Gives the dish its authentic pungent flavor reminiscent of roadside dhabas.
- 4 medium Red Onions: Finely ground to form the rich gravy base.
- 10 cloves Garlic: Added for an extra punch of aroma and flavor.
- 1½ inches Ginger: Fresh and vibrant, paired with garlic for the paste.
- 3 – 4 Green Chilies: Provide balanced heat and freshness.
- 1 tablespoon Cumin Seeds: Tempered at the beginning for nutty aromatic tones.
- 2 Bay leaves: Add subtle earthiness.
- ½ Cinnamon stick: Gives warmth and a slight sweetness.
- 4 – 5 Cardamoms: Add fragrant floral notes.
- 8 – 10 Peppercorns: Bring mild heat and sharpness.
- 4 – 5 Cloves: Impart a deep warming aroma.
- 4 medium Tomatoes (finely chopped): Cook down to create a luscious base.
- ½ teaspoon Turmeric Powder: Adds color and subtle earthiness.
- 1 teaspoon Red Chili Powder: Optional, adjust spice level to taste.
- 2 tablespoons Coriander Powder: Brings a citrusy, nutty flavor.
- 1 teaspoon Garam Masala Powder: Final layer of aromatic complexity.
- 1 teaspoon Meat Masala: Boosts intense meaty spice that pairs well with chicken.
- 1 teaspoon Salt: For seasoning the gravy.
- 1 1/4 cups Water: To create the perfect curry consistency.
- 1 tablespoon Ghee or Oil: Added at tempering for richness.
- 1 tablespoon Butter: Adds silky finish and indulgence.
- 2 Green Chilies (slit lengthwise): For tempering, adds brightness and heat.
- ½ inch Ginger (julienned): Garnishes with added aroma and texture.
- 2 tablespoons Coriander (fresh, chopped): For a fresh, vibrant garnish.
Directions
Step 1: Marinate the chicken pieces with the ginger garlic paste, lime juice, and 1 tablespoon salt. Cover and set aside while you gather the other ingredients and prepare the masala base.
Step 2: Using a chopper or food processor, pulse the onions, ginger, garlic, and green chilies together into a coarse but well-mixed paste. This fresh masala is the backbone of the curry.
Step 3: Heat the mustard oil in a heavy-bottomed pan or pressure cooker until it starts to smoke lightly — this step mellows the pungency. Add cumin seeds and once they splutter, add roughly crushed whole spices (bay leaves, cinnamon, cardamom, peppercorns, cloves). Let them sizzle to release their aroma, about 30 seconds.
Step 4: Add the onion paste to the pan and cook on low heat, stirring occasionally. Keep cooking until the mixture turns a rich golden brown and you see the oil separating from the masala — this usually takes about 20 minutes and is crucial for building depth of flavor.
Step 5: Stir in the chopped tomatoes, salt, turmeric, red chili powder (if using), and coriander powder. Cook until the tomatoes break down completely and the mixture thickens into a paste, roughly 10 minutes.
Step 6: Now add the marinated chicken pieces along with garam masala and meat masala powders. Stir well and roast the chicken for 2-3 minutes on medium heat so each piece gets coated nicely with the spice mixture and starts to turn pink.
Step 7: Pour in 1 ¼ cups water, mix thoroughly, and bring to a boil.
Step 8: If using a pressure cooker: Secure the lid and cook on high heat until the first whistle, then reduce heat and cook for 2 more whistles before turning off the flame. Let pressure release naturally before opening.
Step 9: If using stovetop: Cover and simmer the curry on medium heat for 20-25 minutes, then uncover and cook for an additional 10-15 minutes to reduce and thicken the curry, stirring occasionally.
Step 10: If using Instant Pot: Secure the lid, set vent to sealing, and pressure cook on high for 8 minutes. Manually release the pressure, then simmer the curry uncovered for a few minutes to thicken if needed.
Step 11: In a small pan, heat ghee and butter. Add the slit green chilies and julienned ginger, sauté just until they splutter, then switch off the flame. Pour this tempering over the curry and garnish with fresh coriander leaves.
Step 12: Let the curry rest for 10 to 15 minutes before serving — this helps meld all the flavors together beautifully and makes it even tastier.
Servings and Timing
This Dhaba Style Chicken Curry Recipe serves about 8 generous portions, making it perfect for family gatherings or meal prepping for the week. The prep time takes around 15 minutes, primarily for marinating and chopping, while the cooking time is approximately 30 minutes depending on your method. Altogether, you’re looking at about 45 minutes total, including resting time, which is quite efficient for such a flavorful dish.
How to Serve This Dhaba Style Chicken Curry Recipe
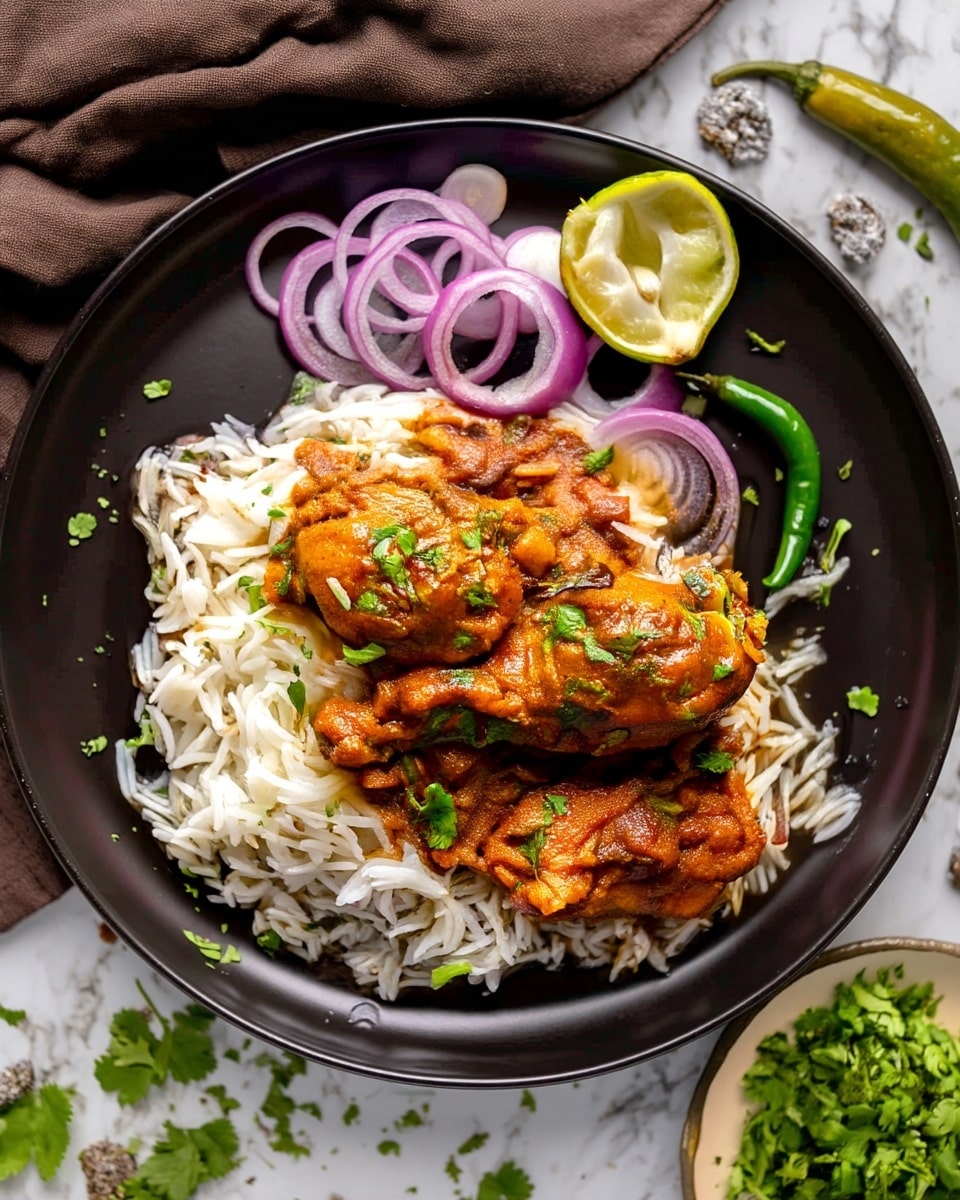
I love serving this curry piping hot, straight from the pot, so the aroma wafts through the room instantly making everyone hungry. My favorite accompaniments are freshly made rotis or hot steamed basmati rice, which soak up the thick, luscious gravy perfectly. You can also serve it with jeera rice or even butter naan for a more indulgent meal.
For garnishing, I recommend a generous sprinkle of fresh coriander leaves to brighten the dish. Adding a few thinly sliced raw onions tossed with lemon juice on the side is a simple way to bring in a crunchy, tangy contrast that complements the curry beautifully. Presentation-wise, a shallow bowl or a wide plate works well — it lets the curry spread out so everyone gets a good sauce-to-chicken ratio.
This dish pairs really well with traditional Indian drinks like lassi or masala chai, but I’ve also found a crisp, chilled beer or a dry white wine with some acidity works wonders to cut through the richness. I usually reserve this curry for family dinners or special weekend meals when I want something hearty and satisfying, but it’s comforting enough to enjoy any day.
Variations
One of the great things about this Dhaba Style Chicken Curry Recipe is how flexible it is to modifications. If you want to make it gluten-free, simply double-check your spice powders for any additives, but otherwise, it’s naturally free of gluten. For a dairy-free version, skip the butter and ghee tempering and use a neutral oil instead — the flavor still shines through beautifully.
If you prefer a vegetarian twist, I’ve experimented by swapping chicken for firm tofu or cauliflower florets, cooking them gently until tender. While it won’t replicate the exact meaty flavor, the robust spices create a delicious curry base that holds well with alternative proteins or vegetables.
For a variation in flavor, you can tweak the green chilies to adjust heat or add a pinch of smoked paprika for a subtle smoky undertone. Some people like adding a splash of cream or coconut milk towards the end to mellow the spices, giving it a richer texture. Cooking methods can vary too; slow cooking the curry in a crockpot brings out more complex flavors, though the stovetop or pressure cooker methods are faster and just as tasty.
Storage and Reheating
Storing Leftovers
I always store leftover chicken curry in airtight glass containers to preserve its aroma and avoid any plastic smells. You can keep it refrigerated for up to 3-4 days. Before sealing, ensure the curry has cooled to room temperature to prevent condensation, which can dilute the sauce.
Freezing
This curry freezes quite well if you want to save portions for later. To freeze, portion it into freezer-safe airtight containers or heavy-duty freezer bags, leaving some space for expansion. It will keep well frozen for up to 2 months. When you’re ready to enjoy it, thaw it overnight in the refrigerator before reheating.
Reheating
The best way to reheat Dhaba Style Chicken Curry Recipe is gently on the stovetop over low to medium heat, stirring occasionally to prevent sticking and to bring back the curry’s original texture. I recommend adding a splash of water if the gravy has thickened too much. Avoid microwaving for long stretches, as it can cause uneven heating and dry out the chicken. After reheating, a quick tempering with fresh butter and green chilies can revive the flavors beautifully.
FAQs
Can I use boneless chicken instead of bone-in pieces?
Absolutely! Boneless chicken can be used if you prefer quicker cooking and easier eating. Just reduce the cooking time to avoid overcooking, as boneless pieces cook faster and can dry out. Bone-in pieces add more depth of flavor but boneless works well too.
What if I don’t have mustard oil? What can I substitute?
If mustard oil isn’t available, you can substitute with vegetable oil or ghee. However, keep in mind the characteristic pungent flavor of mustard oil contributes significantly to the authentic dhaba taste, so while the curry will still be delicious, it won’t have quite the same zing.
Can I make this curry less spicy?
Definitely! To tone down the heat, reduce the number of green chilies or skip the red chili powder completely. You can also remove the seeds from the chilies before adding them to reduce intensity. I usually recommend starting milder and adjusting spice levels to preference.
Is this recipe suitable for meal prepping?
Yes, this Dhaba Style Chicken Curry Recipe is fantastic for meal prepping because it stores and reheats well without losing flavor or texture. It makes multiple servings, so you can portion it out for lunches or dinners throughout the week and always enjoy a satisfying meal.
What’s the best way to get the perfect thick curry consistency?
Getting the curry to the right thickness depends on simmering it uncovered towards the end to reduce excess water. After pressure cooking or simmering, keep the lid off and cook on medium heat for 5-10 minutes, stirring periodically. This helps concentrate the flavors and achieve that signature rich, thick gravy.
Conclusion
I can’t recommend this Dhaba Style Chicken Curry Recipe enough if you want a dish that’s bursting with authentic flavors, easy to make, and perfect for sharing. Every time I make it, I’m reminded how simple ingredients and classic techniques come together to create something so deeply comforting and satisfying. Give it a try—you might just find your new favorite curry for any occasion!
Print
Dhaba Style Chicken Curry Recipe
- Prep Time: 15 minutes
- Cook Time: 30 minutes
- Total Time: 45 minutes
- Yield: 8 servings
- Category: Main Course
- Method: Pressure Cooking
- Cuisine: North Indian
Description
Dhaba Style Chicken Curry is a rich, flavorful North Indian curry known for its robust spices and aromatic tempering, reminiscent of traditional roadside dhaba eateries. Featuring tender chicken pieces cooked in a blend of whole and ground spices, caramelized onion paste, and fresh tomatoes, finished with a fragrant ghee and butter tempering, this recipe delivers authentic homestyle comfort food perfect for serving with rice or rotis.
Ingredients
Chicken and Marinade
- 1 kg Chicken (skinless, bone-in, cut into medium sized curry pieces)
- 2 tablespoons Ginger Garlic Paste
- 1 Juice of lime
- 1 tablespoon Salt
- 1/4 cup Mustard Oil
Spice Base
- 4 medium Red Onions
- 10 cloves Garlic
- 1½ inches Ginger
- 3 – 4 Green Chilies (use Serrano Peppers as replacement)
Whole Spices
- 1 tablespoon Cumin Seeds
- 2 Bay leaves
- ½ Cinnamon stick
- 4 – 5 Cardamoms
- 8 – 10 Peppercorns
- 4 – 5 Cloves
Tomatoes and Powders
- 4 medium Tomatoes (finely chopped)
- ½ teaspoon Turmeric Powder
- 1 teaspoon Red Chili Powder (optional)
- 2 tablespoons Coriander Powder
- 1 teaspoon Garam Masala Powder
- 1 teaspoon Meat Masala
- 1 teaspoon Salt
Liquids and Fats
- 1 1/4 cups Water
- 1 tablespoon Ghee or Oil
- 1 tablespoon Butter
Tempering and Garnish
- 2 Green Chilies (slit lengthwise)
- ½ inch Ginger (julienned)
- 2 tablespoons Coriander leaves (for garnishing)
Instructions
- Marinate Chicken: Combine chicken pieces with ginger garlic paste, lime juice, and salt. Cover and set aside to marinate while preparing other ingredients.
- Prepare Onion Mixture: Chop onions, garlic, ginger, and green chilies coarsely using a chopper or food processor to create a coarse paste.
- Temper Spices: Heat mustard oil in a pressure cooker or heavy bottom pan until hot. Add cumin seeds. Pound bay leaves, cinnamon, cardamoms, peppercorns, and cloves roughly and add them to the hot oil to release their aroma.
- Brown Onion Paste: Add the prepared onion mixture to the oil and cook over low flame, stirring occasionally, until it turns golden brown and oil begins to separate along the sides.
- Cook Tomatoes and Spices: Stir in chopped tomatoes, salt, turmeric powder, red chili powder (if using), and coriander powder. Cook until tomatoes soften and form a thick paste.
- Add Chicken and Masalas: Add marinated chicken pieces and garam masala powder. Roast the chicken for 1-2 minutes to coat them well with the spices. Mix in meat masala and water thoroughly.
- Pressure Cooking: If using a pressure cooker, close the lid and cook on high heat till the first whistle. Then reduce flame and pressure cook for two more whistles. Turn off the heat and allow natural pressure release. For non-whistle pressure cookers, cook on high for 15 minutes and let pressure release naturally.
- Stovetop Method: If using a heavy bottom pan, bring the curry to a boil. Lower heat, cover with lid and cook on medium heat for 20-25 minutes. Remove lid and simmer for 10-15 minutes until the curry thickens.
- Instant Pot Method: Seal the Instant Pot lid with the vent set to sealing. Pressure cook on high for 8 minutes. Manually release pressure and simmer if needed to reduce water and thicken the curry.
- Tempering: In a small pan, heat ghee and butter. Add slit green chilies and julienned ginger. When they start to splutter, turn off the flame and pour this tempering into the cooked curry.
- Garnish and Rest: Stir in chopped coriander leaves and let the curry rest for 10-15 minutes before serving to allow flavors to meld. Serve hot with rotis or steamed rice.
Notes
- Mustard oil adds authentic pungency and flavor but can be substituted with vegetable oil if unavailable.
- The spiciness can be adjusted by controlling the number of green chilies or omitting red chili powder.
- Resting the curry before serving deepens the flavor and improves texture.
- Using bone-in chicken pieces enhances the richness of the gravy.
- Ensure the onion mixture is well caramelized for the signature dhaba flavor.


