
I absolutely love sharing this Best Roasted Turkey We’ve Ever Made Recipe with you because it truly takes the classic roast turkey to a mouthwatering new level. From the first crispy golden bite to the tender, juicy meat infused with fresh herbs and garlic, this turkey delivers flavors and textures that never disappoint. Whether it’s for Thanksgiving, a special family dinner, or any celebratory feast, I always find myself coming back to this recipe as my personal favorite to prepare and enjoy.
Why You’ll Love This Best Roasted Turkey We’ve Ever Made Recipe
What really makes this recipe stand out for me is the exceptional balance of rich, herbaceous flavors and the incredibly crispy skin you get every time. The secret is in the herb turkey butter that I massage under the skin and into every nook and cranny, ensuring that the meat stays moist and bursting with savory garlic, lemon, and fresh herbs. Coupled with the careful roasting technique, you’re rewarded with tender, juicy slices that are impossible to resist.
Beyond the flavor, I love how manageable this recipe is, especially considering the grand results it yields. The steps are straightforward, and while it takes a few hours to roast, the active prep time is quite reasonable. It’s a perfect recipe to make when you want something special without stressing over complicated instructions. I find this turkey shines especially at holidays and family gatherings, where it impresses guests and brings everyone together around the table with smiles and compliments.
Ingredients You’ll Need
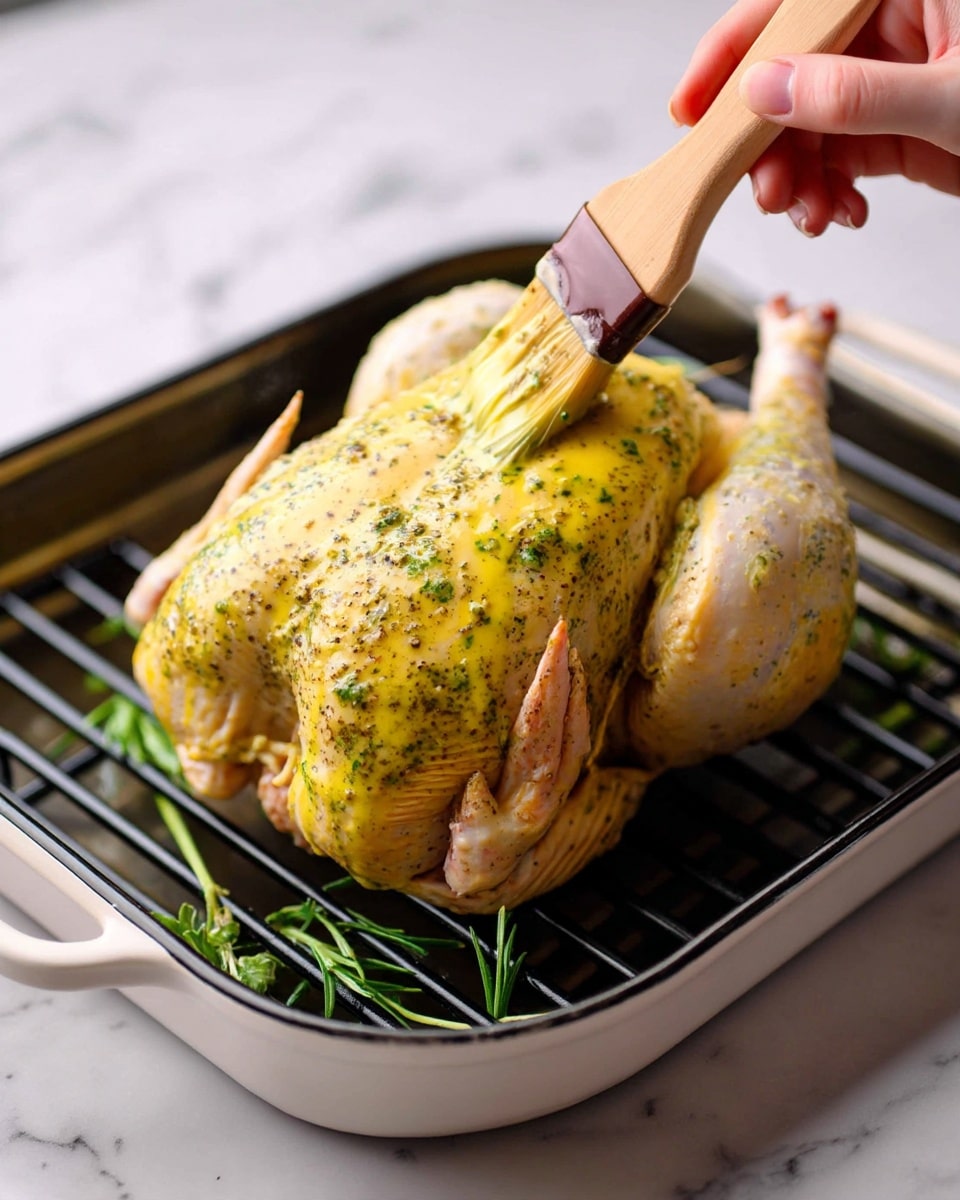
These ingredients are simple yet essential, each contributing a vital element to the overall taste, aroma, and texture of the turkey. Fresh herbs bring brightness, butter ensures the meat stays succulent, and the aromatic vegetables and chicken stock form the flavorful base for roasting and gravy-making.
- Turkey (12 to 20 pounds): Choose a good-quality, well-thawed bird for best results; brining is recommended to maximize juiciness.
- Salted butter (1 pound): The foundation of the herb butter, for rich flavor and moisture.
- Fine sea salt (1 teaspoon): Enhances the natural flavors of the turkey and the butter blend.
- Coarse ground pepper (1 tablespoon): Adds a mild sharpness that balances the richness.
- Worcestershire or Pickapeppa sauce (1 teaspoon): A subtle umami boost to the herb butter.
- Garlic cloves (8 total, smashed): Imparts a warm, savory aroma both in the butter and the roasting pan.
- Lemon zest and juice (1 lemon): Brightens the butter with citrus notes, cutting through the richness.
- Fresh parsley, sage, thyme: These herbs bring herbal freshness that is essential for classic turkey flavor.
- Onion, carrots, celery: Roughly chopped and placed in the pan for aromatic steam and a flavorful roasting bed.
- Chicken stock (2 quarts): Adds moisture and flavor to the roasting environment and is perfect for making gravy.
Directions
Step 1: Preheat your oven to 325°F (160°C) and adjust the racks to fit your turkey comfortably.
Step 2: Prepare the herb turkey butter by pulsing all the butter ingredients in a food processor until smooth and well combined. This step unlocks amazing flavor concentrated in the butter.
Step 3: Melt a quarter of the turkey butter on low heat, then set aside both melted and unmelted portions for later.
Step 4: Arrange the onion, carrots, celery, garlic cloves, thyme sprigs, sage leaves, and chicken stock in the bottom of a large roasting pan, then place a roasting rack on top, suspended above these aromatics.
Step 5: Place your turkey on the rack. Using your fingers or a spoon, carefully create pockets under the skin along the breast and legs. This is where you’ll add the flavorful herb butter.
Step 6: Generously rub the unmelted herb butter under the skin and into the holes near the thighs. Massage it evenly to coat the meat—this step takes some patience but rewards you with incredible flavor and moisture.
Step 7: Flip the turkey breast-side down on the rack and brush melted butter over the back. Then flip it breast-side up and brush the rest of the melted butter on top. Season lightly with salt and pepper to taste.
Step 8: Roast the turkey for about 14 minutes per pound. Every 30 minutes, baste the bird with the flavorful pan juices, adding water if the liquid level gets low. Rotate the pan every hour to ensure even browning and cooking.
Step 9: When the turkey starts to look just slightly lighter than your desired color, tent it loosely with foil. Continue roasting until an internal thermometer inserted in the thickest part of the thigh reads 160°F (71°C). Juices should run clear when you pierce the thigh.
Step 10: Remove the turkey from the oven and let it rest for 30 minutes to 1 hour. I like to keep it warm at 200°F (90°C), lightly covered with foil, to maintain juiciness before carving.
Servings and Timing
This recipe comfortably serves about 14 people when using a 15-pound turkey, making it perfect for large family gatherings or holiday feasts. Prep time takes roughly 30 minutes to prepare the butter, brine (if you choose to brine ahead of time), and set the turkey for roasting. The cook time averages 3 hours and 30 minutes for a 15-pound bird, plus an additional 30 to 60 minutes of resting time. The total time needed is about 4 hours. These times can be adjusted slightly depending on the turkey’s exact weight.
How to Serve This Best Roasted Turkey We’ve Ever Made Recipe
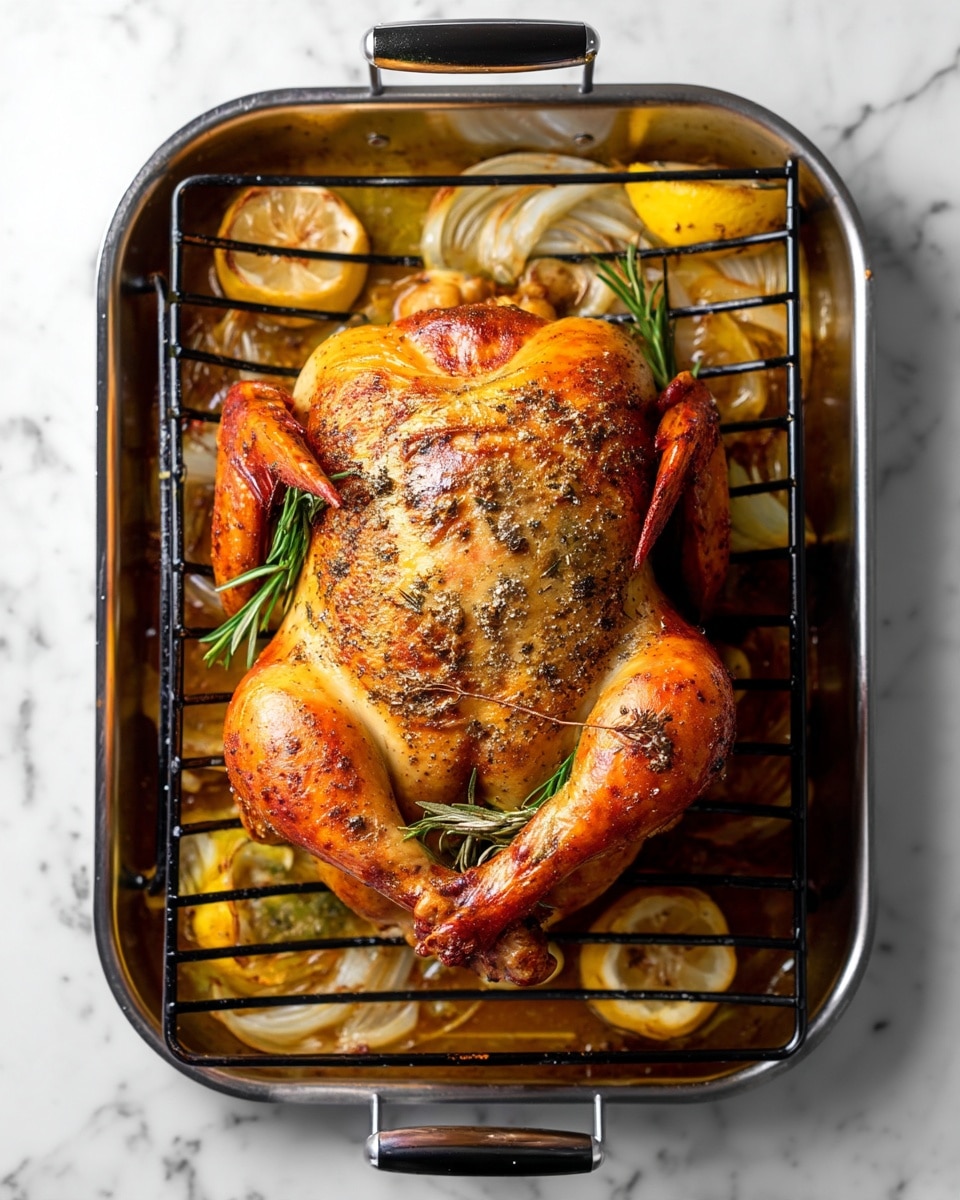
When it comes to serving this turkey, I like to keep the sides classic yet flavorful to complement the rich herb butter and perfectly roasted meat. Creamy mashed potatoes, roasted root vegetables, and a tangy cranberry sauce are some of my favorite accompaniments. The pan drippings make an exceptional gravy that ties everything together—never skip making gravy with this recipe!
For presentation, I love garnishing the platter with fresh herb sprigs and lemon wedges to echo the flavors within the turkey. Carving the bird into thick, juicy slices makes a gorgeous centerpiece and makes it easy for guests to serve themselves. I also recommend keeping the turkey warm but not too hot once carved, so the meat stays tender without drying out.
For drinks, I usually pair this turkey with a medium-bodied white wine like Chardonnay or an elegant Pinot Noir. If you prefer cocktails, a light bourbon-based drink or a sparkling apple cider complements the meal beautifully. This recipe truly shines for big celebrations like Thanksgiving or Christmas, but it’s also a showstopper for any Sunday dinner when you want to treat yourself and your loved ones.
Variations
One of the things I love about this Best Roasted Turkey We’ve Ever Made Recipe is how easy it is to customize based on your preferences or dietary needs. If you want to switch up the herbs, rosemary or marjoram make wonderful alternatives, adding their own unique fragrance and depth. For a little extra zing, you could incorporate a touch of smoked paprika or cayenne pepper into the butter blend.
If you’re cooking for someone on a gluten-free diet, you’ll be happy to know this recipe is naturally gluten-free as long as your Worcestershire sauce or Pickapeppa sauce is certified gluten-free. For vegan or vegetarian versions, you might experiment with roasting a large cauliflower or a mushroom centerpiece using a similar herb butter blend made from plant-based margarine.
For a different cooking method, I’ve sometimes tried spatchcocking the turkey to shorten the cook time and get even more crispy skin. You would adjust the timing and keep a close eye on temperature, but the herb butter technique remains a game changer in flavor and moisture regardless of method.
Storage and Reheating
Storing Leftovers
After your feast, storing leftover turkey properly is key to maintaining its flavor and tenderness. I like to use airtight containers or heavy-duty resealable bags to keep the turkey refrigerated. Store the turkey within two hours of serving and consume leftovers within 3 to 4 days for the best quality. Be sure to keep any gravy or pan juices separate if you plan to reheat them alongside the meat.
Freezing
This roasted turkey freezes very well if you want to save some for another meal. Wrap slices tightly in plastic wrap and then place them in a freezer-safe bag or container. For best results, remove as much air as possible to avoid freezer burn. Properly wrapped turkey can keep in the freezer for up to 3 months. When freezing, I recommend storing gravy separately in a sealed container.
Reheating
When it’s time to reheat your turkey, I prefer oven reheating to preserve moisture and texture. Preheat the oven to 300°F (150°C), place the turkey slices in a covered baking dish with a little broth or gravy, and warm gently for 20 to 30 minutes. Avoid microwaving if possible, as it can dry out the meat and create uneven temperature spots. Adding a bit of moisture locks in juiciness and helps the herb flavors stay fresh.
FAQs
Can I use frozen turkey for this recipe?
Yes, but it’s important to fully thaw the turkey in the refrigerator before starting this recipe, ideally 2 to 3 days in advance depending on size. Proper thawing ensures even cooking and allows the brine to penetrate if you choose to brine your bird.
Is brining necessary for this recipe?
While not absolutely required, I highly recommend brining the turkey beforehand. It’s one of the key steps that make this the Best Roasted Turkey We’ve Ever Made Recipe because it locks in moisture and adds subtle seasoning throughout the meat.
How do I know when the turkey is done?
The best way to check is with an instant-read thermometer in the thickest part of the thigh; it should read 160°F (71°C). Also, the juices running clear when you pierce the thigh with a knife is a good visual cue.
Can I make the herb butter ahead of time?
Absolutely! The herb butter can be made a day or two ahead and stored covered in the fridge. This actually allows the flavors to meld beautifully, making it even more flavorful when you rub it under the skin.
How do I get crispy skin every time?
The air-drying step overnight in the fridge after brining is essential for crispy skin. Plus, rubbing melted herb butter on top before roasting helps create that irresistible golden-brown, crackling crust.
Conclusion
I truly hope you give this Best Roasted Turkey We’ve Ever Made Recipe a try because it combines the flavors, textures, and presentation that can make any get-together feel extra special. There’s something so satisfying about carving into a perfectly roasted bird that’s tender, juicy, and bursting with fresh herbs. Once you make this recipe, I’m confident it will become a cherished favorite at your table, just like it is mine.
Print
Best Roasted Turkey We’ve Ever Made Recipe
- Prep Time: 30 minutes
- Cook Time: 3 hours 30 minutes
- Total Time: 4 hours
- Yield: 14 servings
- Category: Main Course
- Method: Baking
- Cuisine: American
Description
This recipe delivers the best roasted turkey with amazing flavor, tender and juicy meat, and a perfectly crispy golden-brown skin. Ideal for holiday dinners like Thanksgiving, the turkey is brined and air-dried for enhanced taste and texture, then roasted slowly with a flavorful vegetable and herb base. A rich herb butter is massaged under the skin and over the bird to keep it moist and flavorful. Pan drippings can be used to make an excellent gravy, making this recipe a full feast centerpiece.
Ingredients
Turkey
- 1 (12 to 20 pound) turkey, thawed, brined (recommended), and trussed
- 1 large onion, cut into eight wedges
- 2 carrots, roughly chopped
- 2 celery stalks, roughly chopped
- 5 cloves garlic, smashed
- 8 fresh thyme sprigs
- 4 sage leaves
- 2 quarts chicken stock (8 cups or 1.8L)
Herb Turkey Butter
- 1 pound salted butter, softened (460g)
- 1 teaspoon fine sea salt
- 1 tablespoon coarse ground pepper (5g)
- 1 teaspoon Worcestershire sauce or Pickapeper sauce
- 3 cloves garlic, smashed
- 1 lemon, zested and juiced
- ½ cup parsley leaves (14g)
- ¼ cup sage leaves (7g)
- 2 tablespoons fresh thyme leaves (5g)
Instructions
- Preheat the Oven: Set your oven to 325°F (160°C) and adjust the racks so the turkey fits comfortably.
- Make the Herb Butter: Pulse all the herb turkey butter ingredients in a food processor until finely chopped and smooth. Scrape down the sides and pulse a few more times to combine thoroughly.
- Melt Portion of Butter: Place a quarter of the turkey butter in a small saucepan over low heat and gently melt it. Set the melted and remaining unmelted butter aside.
- Prepare Roasting Pan: Arrange the onion, carrot, celery, smashed garlic cloves, thyme sprigs, sage leaves, and chicken stock in the bottom of the roasting pan. Place a roasting rack on top, suspended above the vegetables and stock.
- Prepare the Turkey: Place the turkey breast-side up on the roasting rack. Carefully create pockets between the skin and breast meat using your hands, and make a small hole where the drumsticks meet the thighs.
- Apply Butter Under Skin: Rub the unmelted herb butter generously under the skin pockets and into the holes near the thighs. Massage the butter evenly beneath the skin for maximum flavor. Use almost all the butter depending on the size of the bird. Optionally use a piping bag for cleaner application.
- Butter the Turkey Surface: Flip the turkey breast-side down and brush some melted butter over the back. Then, flip the bird breast-side up and brush the remaining melted butter over the top. Lightly season the entire turkey with salt and pepper.
- Roast the Turkey: Roast for 14 minutes per pound, basting every 30 minutes with the pan drippings. Monitor liquid levels and replenish with water as needed. Rotate the pan every hour for even browning. For a 15-pound turkey, roast for approximately 3½ hours.
- Tent and Check Temperature: When the skin is about two shades lighter than desired, tent the turkey loosely with foil. Continue roasting until an internal temperature of 160°F (71°C) is reached in both the breast and thigh away from the bone. Juices should run clear when pierced.
- Rest the Turkey: Remove the turkey from the oven and let it rest for 30 minutes to 1 hour before carving. Keep warm by placing in an oven set to 200°F (90°C), loosely covered with foil to prevent drying out.
Notes
- If using unsalted butter instead of salted, add an additional teaspoon of fine sea salt to the herb butter mixture.
- Recommended equipment includes a brine bag or large container for brining, large roasting pan with rack, disposable piping bag for butter application, food-grade nitrile gloves for handling butter, a basting/pastry brush, and a turkey baster.
- Brining and air-drying the turkey overnight in the refrigerator are highly recommended for the best flavor and crispy skin.
- Use the pan drippings after roasting to make a delicious homemade gravy.
- Check internal temperature in multiple spots (breast and thighs) to ensure thorough cooking.


