
I absolutely adore baking cookies that remind me of my favorite childhood summer nights, and this Bakery Style S’mores Cookies Recipe hits all the right nostalgic notes. Imagine a giant, soft, chewy cookie packed with the perfect balance of graham crackers, gooey marshmallow fluff, and melty chocolate chips — all wrapped up into one dreamy treat. Every bite feels like sitting around a campfire with friends, but with the convenience of your oven at home. This recipe has quickly become a go-to for me when I want to impress friends or just satisfy my own sweet tooth cravings.
Why You’ll Love This Bakery Style S’mores Cookies Recipe
What excites me most about this Bakery Style S’mores Cookies Recipe is the incredible flavor combination. You get the crunch from honey graham crackers, the rich creaminess of chocolate, and the gooey, sticky sweetness of marshmallow fluff all mingling together in one cookie. It’s a flavor profile that feels perfectly balanced between sweet, slightly caramelized, and indulgent. Every bite delivers that warm campfire vibe with a soft, bakery-style texture that’s irresistibly tender yet substantial.
On top of tasting amazing, I love how approachable this recipe is. While it might have multiple steps, each one is straightforward and fun — making the process feel much more like a cozy kitchen adventure than a complicated baking challenge. Plus, these cookies are big, impressive, and perfect for sharing on special occasions like holiday parties, weekend get-togethers, or just a casual night when you want to treat yourself. I’ve found the recipe stands out because it brings that nostalgic s’mores experience right to your home oven without any campfires needed.
Ingredients You’ll Need
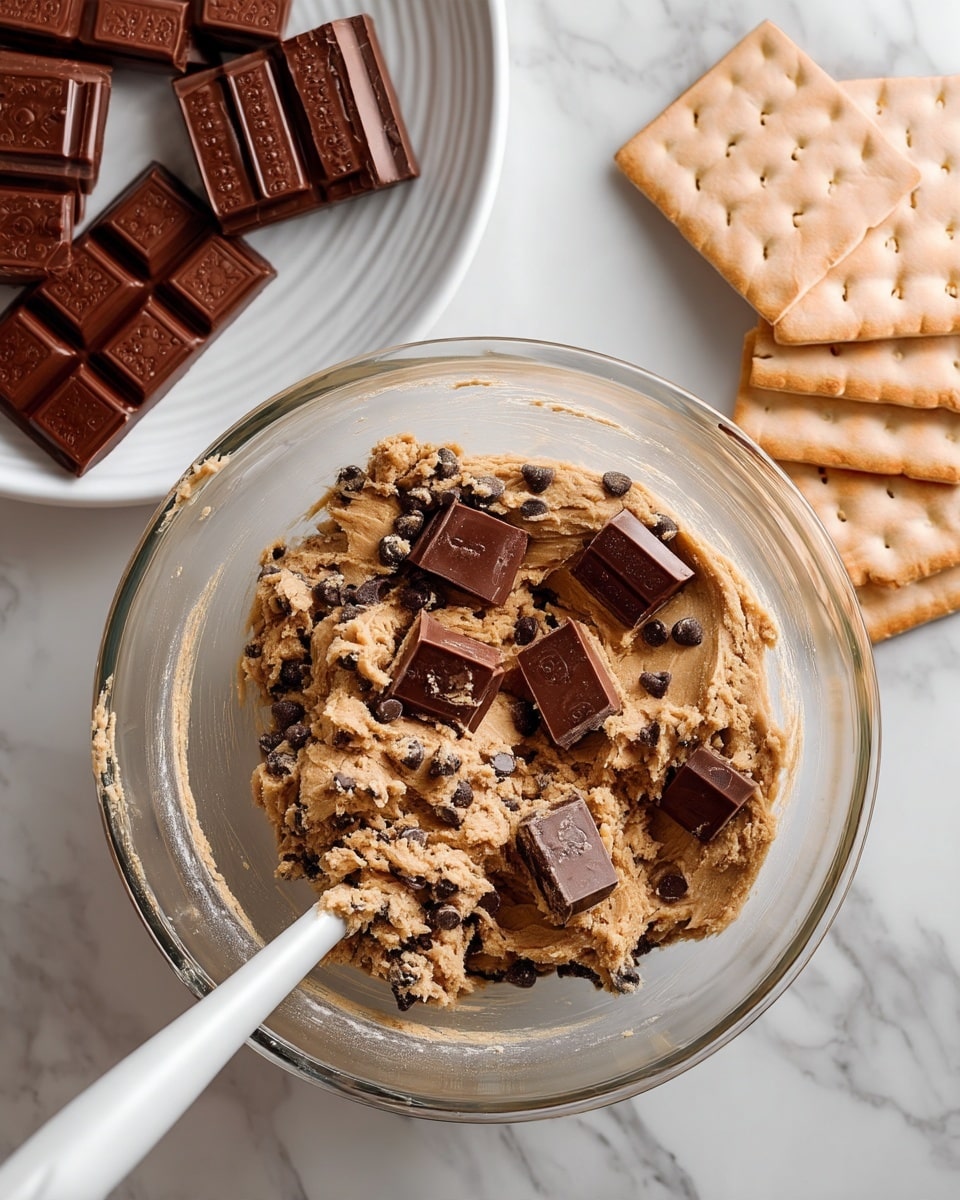
All the ingredients in this recipe are simple staples that come together to create extraordinary flavor and texture. Each one plays a crucial role, whether it’s the silky marshmallow fluff, rich butter, or crunchy graham crackers, making the magic happen in every bite.
- Water: Helps create the sugar syrup that gives the cookie dough an amazing texture and structure.
- Granulated Sugar: Adds crispness and sweetness to balance the gooey marshmallow.
- Light Corn Syrup: Keeps the cookie chewy and tender while enhancing the sweet flavor.
- Egg Whites: Whipped into a meringue to give the dough a light, airy feel.
- Cream of Tartar: Stabilizes the whipped egg whites for the perfect marshmallow fluff texture.
- Salt: Enhances every flavor, preventing the cookie from being overly sweet.
- Vanilla Bean Paste or Extract: Adds depth and warmth to the overall cookie flavor.
- Salted Butter: Provides richness and moisture for a luxurious, soft cookie.
- Dark Brown Sugar: Contributes to the cookie’s tenderness and adds a subtle molasses note.
- Extra Granulated Sugar: Balances the molasses richness and adds body to the dough.
- Large Egg + Egg Yolk: Builds structure and adds extra moisture.
- All-Purpose Flour: Forms the base of the cookie, yielding a chewy but sturdy bite.
- Cornstarch: Adds softness and a delicate crumb to the cookie texture.
- Baking Powder and Baking Soda: Work together for a light rise and tender crumb.
- Crushed Honey Graham Crackers: Bring crunch and authentic s’mores flavor.
- Milk Chocolate Chips + Mini Semi-Sweet Chocolate Chips: Melt into luscious pockets of chocolate throughout.
- Marshmallow Fluff: The gooey heart of the cookie, providing that classic sticky-sweet s’mores sensation.
- Milk Chocolate Bars (optional for topping): Adds an extra chocolatey touch and beautiful finish.
Directions
Step 1: In a medium saucepan, combine the water, granulated sugar, and light corn syrup. Heat over medium heat while stirring occasionally until the syrup reaches 240 degrees Fahrenheit on a candy thermometer. This syrup forms the base of the fluffy marshmallow.
Step 2: While the syrup heats, in the bowl of a stand mixer fitted with the whisk attachment, begin whipping the egg whites until they become foamy. Then add the salt and cream of tartar, and continue whipping until soft peaks form.
Step 3: Once the syrup hits 240 degrees, carefully remove it from the heat and, with the mixer running on low speed, slowly pour the hot syrup into the whipped egg whites in a thin, steady stream.
Step 4: Increase the mixer speed and whip the mixture until stiff peaks form and the bowl becomes cool to the touch. Add the vanilla bean paste and mix just until combined. Place the marshmallow fluff in the fridge in an airtight container to help firm it up as you prepare the cookie dough.
Step 5: Switch to the paddle attachment on your mixer. Cream the room temperature butter with both sugars for about 5 minutes, stopping to scrape down the edges as needed. This process is key to a light, fluffy dough.
Step 6: Add the whole egg, extra egg yolk, and vanilla extract to the butter mixture. Beat for another 3 minutes until the dough thickens and becomes paler in color.
Step 7: In a separate bowl, whisk together the flour, cornstarch, baking powder, baking soda, and salt until combined.
Step 8: Gradually add the dry ingredients into the mixer bowl and mix until just combined. The dough should still have some streaks of flour; this avoids overmixing and keeps the cookies tender.
Step 9: Fold in the crushed honey graham crackers along with both the milk chocolate chips and mini semi-sweet chocolate chips, distributing them evenly throughout the dough.
Step 10: Using a large cookie scoop (about 2.5 oz), scoop two portions per cookie for a 5-ounce cookie. Chill the dough for 20 to 30 minutes until firm enough to handle.
Step 11: Press each dough ball flat in your hand and make a shallow well with your thumb in the center. Using a tablespoon scoop, fill the well with marshmallow fluff, then carefully fold the dough up and around the fluffy center, leaving some fluff peeking out on top.
Step 12: Sprinkle extra graham cracker crumbs and bits of milk chocolate over the tops of the cookies, then chill them for at least one hour or up to overnight to help them hold their shape during baking.
Step 13: Preheat your oven to 350 degrees Fahrenheit and line a baking sheet with parchment paper.
Step 14: Place three cookies at a time on the baking sheet, leaving plenty of room between them since these cookies spread quite a bit.
Step 15: Bake for 12 minutes. The centers will look slightly underbaked but will firm up as the cookies cool.
Step 16: Right after removing the cookies from the oven, use a large round cookie cutter to swirl around the hot cookies gently, giving them a perfectly round, bakery-style shape.
Step 17: Let the cookies cool on the baking sheet for at least 10 minutes before transferring them to a wire rack to cool completely.
Servings and Timing
This recipe makes approximately 13 generously sized cookies—perfect for sharing or keeping a few for yourself! The prep time is around 30 minutes, which includes mixing and chilling the dough initially. Baking takes about 12 minutes per batch, plus at least 1 hour of chilling after shaping the dough for the best results. Overall, you can expect a total time commitment of approximately 2 hours when accounting for chilling, baking, and cooling. Trust me, every minute is worth the delicious payoff!
How to Serve This Bakery Style S’mores Cookies Recipe
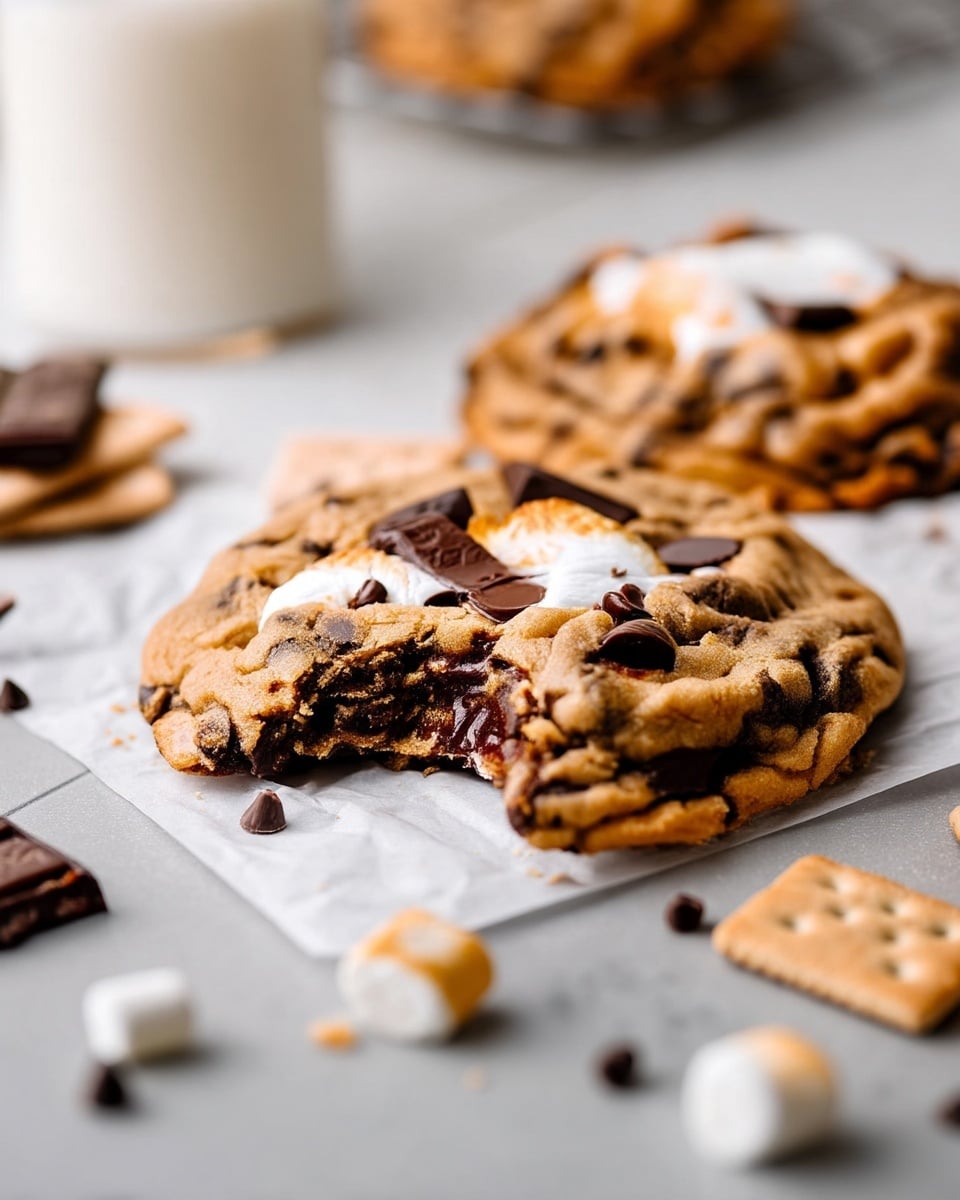
When serving these oversized bakery style s’mores cookies, I love to emphasize the gooey center by serving them slightly warm—just enough to make the marshmallow fluff ooze but not so hot that it melts away completely. You can rewarm them for a few seconds in the microwave if they’ve been refrigerated. Plating them on a rustic wooden board with a sprinkle of crushed graham crackers adds a charming homemade feel.
For a special presentation, try drizzling some melted chocolate over the top or offering a side of vanilla bean ice cream to create a dessert reminiscent of a s’mores sundae. I’ve also found that a light dusting of powdered sugar can add a subtle elegance without overpowering the cookie’s beautiful textures and flavors. These cookies pair wonderfully with cold milk, hot coffee, or even a rich hot chocolate for an extra indulgent treat.
These cookies are my go-to for casual family gatherings, birthday parties, or when I want to bring a unique twist to a holiday dessert table. They fill the room with a warm, inviting aroma and make any occasion feel cozy and festive. Plus, their size means you don’t need to serve a ton—one cookie is definitely enough to satisfy just about anyone!
Variations
One of my favorite things about this Bakery Style S’mores Cookies Recipe is how easy it is to customize. If you need to accommodate dietary preferences, swapping in gluten-free all-purpose flour blends can yield fantastic results without losing that tender texture. For a vegan adaptation, try using a plant-based butter substitute, aquafaba for the egg whites, and a vegan marshmallow fluff alternative—though I recommend some trial runs to get the texture just right.
If you want to switch up the flavor profile, experiment with white chocolate chips or butterscotch chips in place of milk chocolate. You could also add some chopped nuts like toasted pecans or almonds to inject extra crunch and a toasty note. Another fun twist is to sprinkle a little sea salt on top before baking for a perfect sweet-salty balance.
For a different cooking method, I’ve even tried lightly grilling these cookies over indirect heat on a barbecue with foil beneath to catch melty bits. It’s a unique way to infuse a faint smoky aroma reminiscent of actual campfires, which pairs beautifully with the s’mores ingredients.
Storage and Reheating
Storing Leftovers
Leftover cookies store wonderfully in an airtight container at room temperature for up to 3 days. I prefer to separate layers with parchment or wax paper to prevent them from sticking or losing their appealing texture. If your kitchen is warm, refrigerating them is fine, though the cookies may firm up significantly.
Freezing
You can absolutely freeze these s’mores cookies if you want to save some for later. After fully cooling, wrap each cookie tightly in plastic wrap and place them in a freezer-safe container or zip-top bag, separated by parchment paper. They freeze well for up to 3 months and thaw beautifully at room temperature or in the fridge overnight.
Reheating
To enjoy the cookies at their best, gently reheat them in a microwave for 10 to 15 seconds or warm them in a 300 degree Fahrenheit oven for 5 minutes. Avoid overheating, which can cause the marshmallow fluff to become overly sticky or the cookie to dry out. A brief reheat refreshes that gooey texture and melts chocolate chips just right.
FAQs
Can I use regular marshmallows instead of marshmallow fluff?
While marshmallow fluff is ideal for achieving that creamy, spreadable center, you can use mini marshmallows as a substitute by melting them slightly and folding them into the dough or placing them in the cookie center before baking. Keep in mind the texture and melting behavior will differ, but it will still yield tasty results.
Why do I need to chill the dough before baking?
Chilling the dough firms it up, which helps keep the cookies from spreading too much during baking. It also allows the flavors to meld better, resulting in a richer, more balanced taste. For these large s’mores cookies, chilling is especially important to maintain shape and keep that marshmallow filling intact.
How can I ensure the marshmallow center stays gooey?
It’s all about the timing and oven temperature. Baking at 350 degrees Fahrenheit for 12 minutes and removing the cookies while the center still looks slightly underbaked ensures the marshmallow fluff stays soft and gooey as the cookies cool. Overbaking can dry out the marshmallow and cookie interior.
Can I make this recipe gluten-free?
Yes! Substitute the all-purpose flour with a high-quality, 1-to-1 gluten-free baking flour blend that includes xanthan gum for structure. The cookie texture might be a hint different but still delicious. Be sure to avoid graham crackers with gluten or find a gluten-free cracker alternative to maintain the s’mores flavor.
Are these cookies suitable for freezing and thawing later?
Absolutely. These cookies freeze very well when properly wrapped, and thawing them slowly overnight helps preserve their soft texture. Just reheat briefly before serving to revive their gooey centers and melty chocolate chips.
Conclusion
Making this Bakery Style S’mores Cookies Recipe has been such a joyful experience every time I bake them. Their enormous size, perfect chewiness, and irresistible gooey marshmallow centers make them a standout treat that everyone will ask for again. Whether you’re baking for a party or indulging a sweet craving, this recipe is sure to bring warmth, comfort, and a little taste of campfire magic right to your kitchen. I encourage you to try it out—you won’t regret turning your home into a mini bakery with these unforgettable cookies!
Print
Bakery Style S’mores Cookies Recipe
- Prep Time: 30 minutes
- Cook Time: 12 minutes
- Total Time: 2 hours
- Yield: 13 large cookies
- Category: Dessert
- Method: Baking
- Cuisine: American
Description
These Bakery Style S’mores Cookies combine the nostalgic flavors of s’mores with a rich, bakery-quality texture. Featuring a gooey marshmallow fluff center surrounded by a buttery chocolate chip cookie dough studded with crushed honey graham crackers and both milk and semi-sweet chocolate chips, these cookies deliver a perfect balance of crunch, chew, and melty sweetness. The marshmallow fluff is hand-encased inside each cookie for a surprise gooey center, making every bite irresistible. Ideal for dessert lovers looking to recreate the classic campfire treat in cookie form.
Ingredients
Syrup & Meringue
- 1/4 cup Water
- 3/4 cup Granulated Sugar
- 3/4 cup Light Corn Syrup
- 3 Egg Whites
- 1/2 teaspoon Cream of Tartar
- 1/4 teaspoon Salt
- 2 teaspoons Vanilla Bean Paste (or regular vanilla extract)
Cookie Dough
- 1 cup (227g) Salted Butter, at room temperature
- 3/4 cup (180g) Dark Brown Sugar
- 1/4 cup (60g) Granulated Sugar
- 1 Large Egg + 1 Egg Yolk
- 2 1/4 cups (285g) All Purpose Flour
- 1 tablespoon Cornstarch
- 1/2 teaspoon Baking Powder
- 1/4 teaspoon Baking Soda
- 1/2 teaspoon Salt
- 2 teaspoons Pure Vanilla Extract
- 1/2 cup (55g) Crushed Honey Graham Crackers
- 1 cup (160g) Milk Chocolate Chips (+ extra for topping)
- 1 cup (160g) Mini Semi-Sweet Chocolate Chips (+ extra for topping)
Filling & Topping
- 1/2 cup Marshmallow Fluff (homemade or store bought)
- 2 Bars Milk Chocolate for topping cookies (optional)
Instructions
- Prepare syrup: In a medium saucepan, combine the sugar, water, and corn syrup. Heat the mixture over medium heat, stirring occasionally, until the syrup reaches 240°F (soft ball stage) using a candy thermometer, then remove from heat.
- Whip egg whites: Meanwhile, in the bowl of a stand mixer fitted with a whisk attachment, whip the egg whites until foamy. Add salt and cream of tartar and continue whipping until soft peaks form.
- Combine syrup and egg whites: With the mixer on low speed, slowly pour the hot syrup into the whipped egg whites in a thin stream. Once combined, increase the speed and whip until stiff peaks form and the meringue is glossy.
- Add vanilla to meringue: Fold in the vanilla bean paste until fully incorporated.
- Chill marshmallow fluff: Transfer the marshmallow fluff to an airtight container and refrigerate it to make it easier to handle later.
- Cream butter and sugars: In the bowl of a stand mixer with the paddle attachment, cream the salted butter, dark brown sugar, and granulated sugar together for 5 minutes, scraping the bowl down as needed, until light and fluffy.
- Add eggs and vanilla: Mix in the whole egg, egg yolk, and pure vanilla extract for about 3 minutes until the mixture is thick and creamy.
- Mix dry ingredients: In a separate bowl, whisk together the all-purpose flour, cornstarch, baking powder, baking soda, and salt until evenly combined.
- Combine dry and wet ingredients: Gradually add the dry ingredients to the creamed butter mixture and mix just until combined, leaving a few streaks of flour to avoid overmixing.
- Fold in add-ins: Gently fold in the milk chocolate chips, mini semi-sweet chocolate chips, and crushed honey graham crackers to the dough.
- Scoop dough: Using a large cookie scoop (about 2.5 oz per scoop), portion out the cookie dough, using two scoops per cookie to make approximately 5 oz cookies.
- Chill dough: Chill the formed dough balls in the refrigerator for 20-30 minutes until firm enough to handle.
- Fill cookies with marshmallow fluff: Flatten each chilled dough ball in your hand and use your thumb to make a small well in the center. Scoop about 1 tablespoon of refrigerated marshmallow fluff into the well. Fold the dough around the fluff completely, leaving some fluff peeking out on top.
- Add toppings: Sprinkle extra crushed graham cracker crumbs and place a chunk of milk chocolate on top of each cookie.
- Chill assembled cookies: Refrigerate the filled and topped cookies for at least one hour up to overnight to firm up.
- Preheat oven: Preheat the oven to 350°F (175°C) and line a cookie sheet or baking tray with parchment paper.
- Bake cookies: Arrange 3 cookies on the sheet at a time with enough space between them as they will spread significantly during baking. Bake for 12 minutes. The centers may look slightly underbaked but will set upon cooling.
- Shape cookies: Immediately after removing from the oven, use a large round cookie cutter to swirl around the edges of the hot cookies for a clean, perfectly round shape.
- Cool cookies: Allow the cookies to cool on the baking sheet for at least 10 minutes before transferring to a cooling rack to cool completely.
Notes
- Use a candy thermometer to ensure the syrup reaches exactly 240°F for proper meringue texture.
- Chill the marshmallow fluff before filling to make it easier to handle and to prevent melting into the dough.
- Do not overmix the dough once the flour is added to avoid tough cookies.
- Because these cookies are quite large, bake only a few at a time to allow proper spreading and even baking.
- If desired, add extra chocolate chunks on top after filling for a more visually appealing cookie.
- Store baked cookies in an airtight container at room temperature for up to 3 days or freeze for longer storage.


