
I absolutely adore these Apple Hand Pies with Cinnamon Apple Filling and Vanilla Glaze Recipe because they combine all the cozy flavors of fall in one delightful, handheld treat. The tender, flaky crust hugs a warmly spiced apple filling, while the sweet vanilla glaze adds a perfect finishing touch. Whenever I make these, I feel like I’m sharing a special moment with loved ones, whether it’s a casual family afternoon or a festive holiday gathering, and I can’t wait for you to experience that same joy.
Why You’ll Love This Apple Hand Pies with Cinnamon Apple Filling and Vanilla Glaze Recipe
This recipe is one of those magical dishes that is both comforting and exciting all at once. For me, the flavor profile is the star: the combination of crisp Granny Smith and sweet Honeycrisp apples, softened just right with cinnamon’s warm spice and a hint of lemon balancing the sweetness, creates a filling that is perfectly tender yet full of character. Wrapped in buttery, flaky pie crust that browns to golden perfection, every bite feels like a little celebration of classic American dessert flavors.
I also love how accessible this recipe is, even if you’re new to baking. The process is straightforward—I find the steps clear and simple, especially the part about cooking the apple filling ahead of time to avoid a soggy crust, which can be a pitfall in fruit pies. The vanilla glaze, which just takes minutes to whip up, adds a lovely touch of sweetness and makes these hand pies look impressive yet easy. I often bring them to parties or weekend brunches because they travel well and are just so fun to enjoy without any fuss.
Ingredients You’ll Need
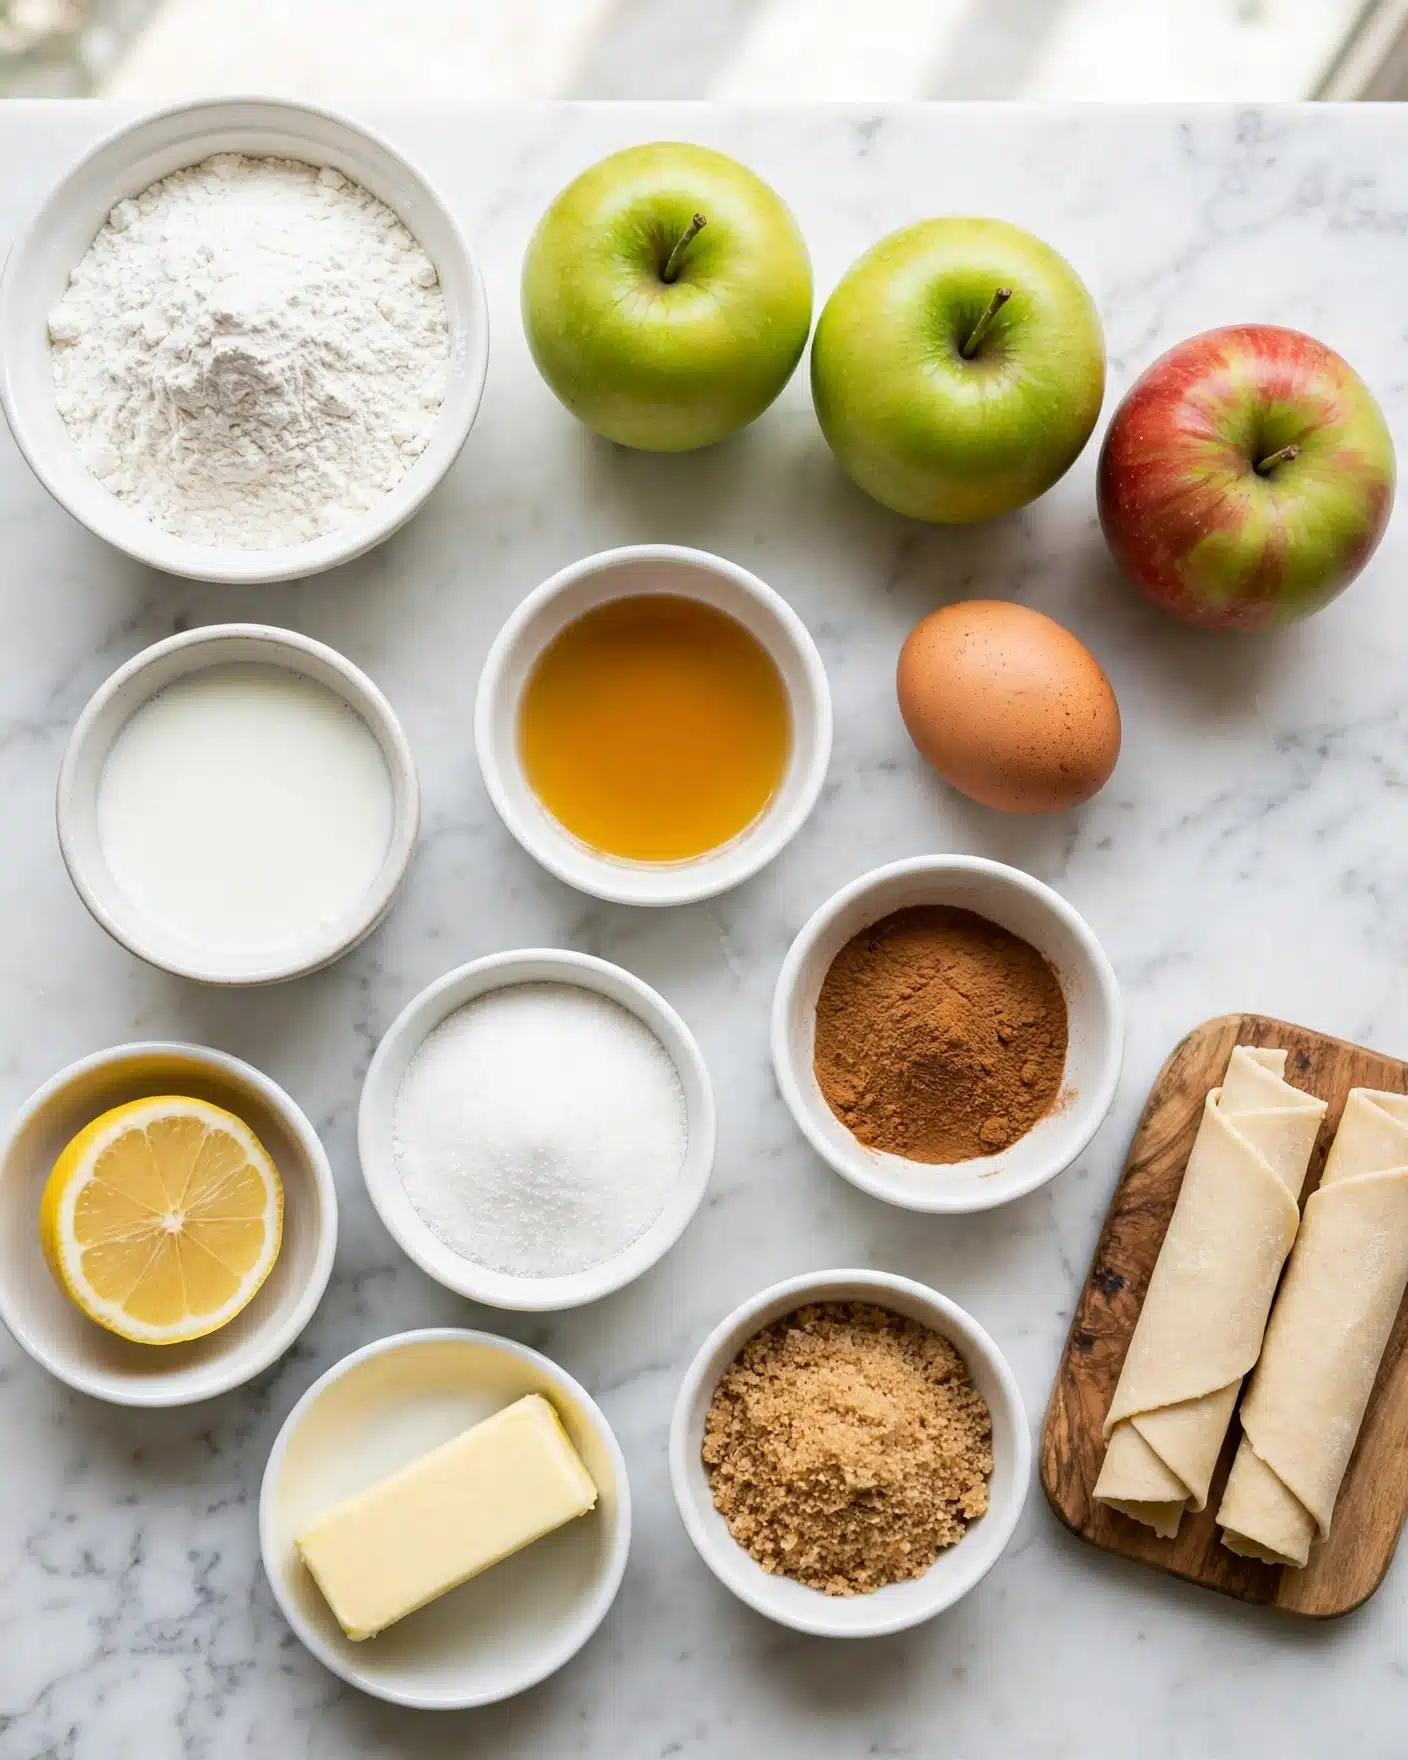
The ingredients for this Apple Hand Pies with Cinnamon Apple Filling and Vanilla Glaze Recipe are wonderfully simple but absolutely essential for creating that perfect balance of flavor, texture, and color. Each component plays a key role, from the type of apples to the glaze ingredients.
- Granny Smith apples: Their tartness adds a lovely contrast and keeps the filling bright and fresh.
- Honeycrisp apple: Sweet and juicy, it balances the tartness and softens nicely in the filling.
- Granulated sugar: Sweetens without overpowering and helps the apples caramelize slightly.
- Brown sugar: Adds depth with its molasses notes and complements the cinnamon.
- Ground cinnamon: Brings that warm, classic spice that makes the filling irresistible.
- Lemon juice: Keeps the apples vibrant and prevents browning.
- Butter: Adds richness and helps meld the flavors together.
- Kosher salt: Enhances all the flavors and balances the sweetness.
- Refrigerated pie crust rounds: Convenient and flaky, they make the assembly easy and consistent.
- Large egg: Used for brushing, it gives the crust a beautiful golden sheen.
- Powdered sugar: The base for the smooth vanilla glaze.
- Milk: Helps achieve the perfect glaze consistency.
- Vanilla extract: Adds a sweet, floral note to the glaze that complements the filling perfectly.
Directions
Step 1: Melt the butter in a medium saucepan set over medium heat.
Step 2: Add the diced Granny Smith and Honeycrisp apples, granulated sugar, brown sugar, ground cinnamon, lemon juice, and a pinch of kosher salt. Cook this mixture for 5 to 7 minutes, stirring occasionally. You want the apples softened but still holding their shape, so watch carefully—they should be tender but not mushy.
Step 3: Remove the saucepan from the heat and let the apple filling cool completely. This step is crucial; assembling while warm can make it tough to seal the pies properly.
Step 4: Preheat your oven to 400°F and line a baking sheet with parchment paper for easy cleanup.
Step 5: Unroll your refrigerated pie crusts and use a round cutter or the rim of a glass to cut out circles about 4 to 5 inches in diameter. This size is perfect for a handheld treat.
Step 6: Spoon a modest amount of the cooled apple filling onto the center of half of the dough circles, leaving a clean margin around the edges to seal.
Step 7: Top each filled circle with another dough circle. Press around the edges gently, then crimp with a fork to seal completely and keep the filling from leaking during baking.
Step 8: Brush the tops of the hand pies with the beaten egg. Don’t forget to cut two small slits in the top of each pie so steam can escape and the crust stays crisp.
Step 9: Place the pies on your lined baking sheet and bake for 20 to 25 minutes until they turn a beautiful golden brown.
Step 10: Once baked, remove from the oven and allow them to cool about 10 minutes on a wire rack.
Step 11: Meanwhile, whisk together the powdered sugar, 1 tablespoon of milk, and vanilla extract to make your glaze. Add more milk as needed until it’s thick enough to drizzle but not too runny.
Step 12: Drizzle the vanilla glaze over the warm hand pies and let it set a few minutes before serving. That finishing touch is truly the cherry on top!
Servings and Timing
This Apple Hand Pies with Cinnamon Apple Filling and Vanilla Glaze Recipe makes 12 individual hand pies—perfect for sharing or keeping a stash for yourself! Prep time is about 15 minutes, cooking the filling and baking the pies will take around 25 minutes, and then you’ll want to allow at least 10 minutes for them to cool before glazing. In total, expect about 50 minutes from start to finish—a manageable and rewarding project!
How to Serve This Apple Hand Pies with Cinnamon Apple Filling and Vanilla Glaze Recipe
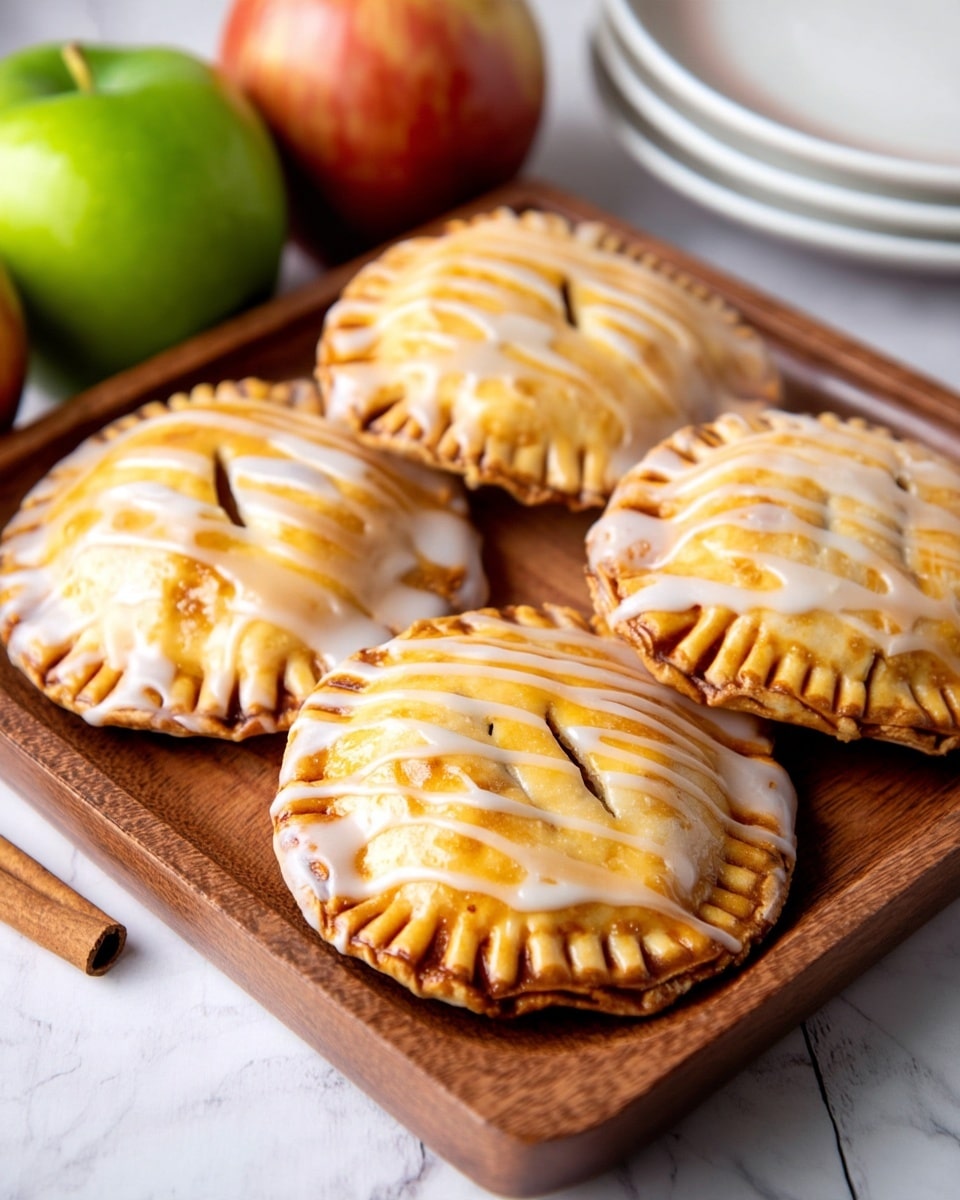
When it comes to serving these apple hand pies, I find there’s so much versatility. Warm or at room temperature, they make an inviting addition to any dessert table. I love pairing them with a dollop of freshly whipped cream or a scoop of vanilla ice cream to enhance the warm cinnamon flavors. If I’m serving them during brunch, they go beautifully alongside a hot cup of coffee or chai tea, which complements the spices perfectly.
For a pretty presentation, I often arrange the hand pies on a rustic wooden board or a bright ceramic platter. I sometimes sprinkle a little extra cinnamon or powdered sugar on top of the glaze for added flair. When guests are over, I like offering apple cider (served hot or chilled) or even a crisp white wine like a Riesling to bring out the fruity notes of the filling.
These pies are a wonderful choice for family dinners, holiday celebrations, or casual get-togethers. Because they’re handheld, they’re easy to serve buffet style, and their size makes them great for portion control. Serving them warm really brings out the best in the flaky crust and soft filling, but if you happen to have leftovers, they’re enjoyable even after chilling, giving you flexibility throughout the day.
Variations
One of the things I love about this Apple Hand Pies with Cinnamon Apple Filling and Vanilla Glaze Recipe is how easy it is to customize depending on your tastes or dietary needs. If you want to switch up the fruit, adding diced pears or cranberries to the apple filling creates a wonderful seasonal twist that I find delightful and unexpected. For a spicier kick, a pinch of nutmeg or ground cloves can deepen the autumnal flavor.
If you’re after a gluten-free version, I recommend using gluten-free pie crusts available at many grocery stores—they work well, although the texture may be slightly different. For a vegan version, simply swap the butter with coconut oil or vegan margarine, and use a plant-based milk for your glaze. Instead of brushing with egg, you can use a mixture of maple syrup and plant milk for that beautiful golden finish.
For a quicker method, you might try baking these hand pies on a cookie sheet stone or an ungreased cast iron skillet, which can help achieve a crisper crust. Alternatively, if you want to skip the oven, I’ve experimented with air frying and found it yields a lovely flaky crust in less time—just keep the temperature around 350°F and watch closely to avoid burning.
Storage and Reheating
Storing Leftovers
I always store leftover hand pies in an airtight container in the refrigerator. They keep well for up to 3 days, and I make sure the container is sealed tightly to maintain the crust’s texture. If you’re planning to eat them within a day, you can also leave them covered at room temperature, but beyond that, refrigeration is best to keep the filling fresh.
Freezing
These hand pies freeze beautifully! To freeze, I wrap each pie individually in plastic wrap, then place them in a freezer-safe bag or container. They’ll keep well for up to 2 months this way. When you’re ready to enjoy them, just thaw overnight in the fridge or at room temperature for a couple of hours before reheating.
Reheating
The best way to reheat apple hand pies is in a conventional oven set to about 350°F for 10 to 15 minutes. This method helps restore the crispness of the crust and warms the filling evenly without making the pastry soggy. I avoid microwaving because it tends to produce a soggy crust, which really detracts from the experience. If you’re short on time, a toaster oven works well to crisp things back up similarly to a full-size oven.
FAQs
Can I use other types of apples for this recipe?
Absolutely! While Granny Smith and Honeycrisp provide a great balance of tartness and sweetness, you can substitute with Fuji, Pink Lady, or Gala apples. Just keep in mind that firmer apples hold their shape better during cooking.
Do I have to cook the apple filling before making the pies?
Yes, I recommend cooking the filling first so the apples soften and the mixture thickens, which prevents the crust from becoming soggy. Raw filling will release too much moisture during baking.
Can I make the hand pies ahead of time?
Definitely! You can assemble the pies, freeze them raw, and then bake straight from the freezer, adding a few extra minutes to the baking time. This makes for convenient make-ahead treats.
What if my glaze is too runny or too thick?
If the glaze is too runny, add more powdered sugar a teaspoon at a time to thicken it. If it’s too thick, add milk very gradually until you reach a drizzle-friendly consistency.
How do I know when the hand pies are fully baked?
Look for a golden-brown crust all over and slightly puffed appearance. The vents on top should release steam, and the pies will feel firm when gently pressed. If they’re pale, give them a few more minutes of baking.
Conclusion
I hope you’re as excited as I am for you to try this Apple Hand Pies with Cinnamon Apple Filling and Vanilla Glaze Recipe! There’s something so cozy and satisfying about these little pies that makes every bite feel like a warm hug. Whether you’re sharing with family, impressing guests, or simply treating yourself, they never fail to bring a smile. Give them a go—you might just find your new favorite dessert!
Print
Apple Hand Pies with Cinnamon Apple Filling and Vanilla Glaze Recipe
- Prep Time: 15 minutes
- Cook Time: 25 minutes
- Total Time: 50 minutes
- Yield: 12 hand pies
- Category: Dessert
- Method: Baking
- Cuisine: American
Description
These apple hand pies feature a tender cinnamon-spiced apple filling wrapped in flaky pie crust, baked to golden perfection and finished with a simple vanilla glaze. The filling is precooked to soften the apples and ensure a thick, non-soggy filling that pairs beautifully with the crisp pastry for a classic American dessert.
Ingredients
For the Apple Filling
- 2 small Granny Smith apples, peeled, cored, and diced
- 1 medium Honeycrisp apple, peeled, cored, and diced
- 3 tablespoons granulated sugar
- 1 tablespoon brown sugar
- 1 teaspoon ground cinnamon
- 1 tablespoon lemon juice
- 1 tablespoon butter
- 1 pinch kosher salt
For the Hand Pies
- 4 refrigerated pie crust rounds
- 1 large egg, beaten
For the Glaze
- 1 cup powdered sugar
- 1–2 tablespoons milk
- ¼ teaspoon vanilla extract
Instructions
- Prepare the Apple Filling: Melt the butter in a medium saucepan over medium heat. Add diced Granny Smith and Honeycrisp apples, granulated sugar, brown sugar, cinnamon, lemon juice, and kosher salt. Cook for 5-7 minutes, stirring occasionally, until apples soften slightly but retain their shape. Remove from heat and allow to cool.
- Preheat Oven and Prepare Baking Sheet: Preheat the oven to 400°F (204°C). Line a baking sheet with parchment paper.
- Cut Pie Crust Circles: Unroll pie crusts and cut out 4-5 inch diameter circles using a round cutter or glass rim.
- Assemble Hand Pies: Place a spoonful of cooled apple filling in the center of half the dough circles, leaving borders clean for sealing. Top each filled circle with another dough circle. Press edges together and crimp firmly with a fork to seal.
- Egg Wash and Vent: Brush the tops with beaten egg and cut two small slits on each pie to allow steam to escape during baking.
- Bake the Pies: Transfer pies to the lined baking sheet and bake for 20-25 minutes or until golden brown.
- Cool the Pies: Remove from oven and cool on a wire rack for about 10 minutes.
- Make the Glaze: Whisk powdered sugar, 1 tablespoon milk, and vanilla extract in a small bowl. Add more milk as needed to achieve a thick drizzling consistency.
- Glaze and Serve: Drizzle the glaze over cooled pies and allow it to set before serving.
Notes
- Dice apples about ¼ inch for even cooking and easy filling inside pies.
- Allow apple filling to cool completely before assembling to avoid soggy dough and difficulty sealing.
- Do not overfill pies; leave about ½ inch of dough border for pressing and crimping securely.
- Start glaze with 1 tablespoon milk and add more only as needed to keep the glaze thick enough to drizzle.
- Store cooled hand pies in an airtight container in the refrigerator for up to 3 days for best freshness.


