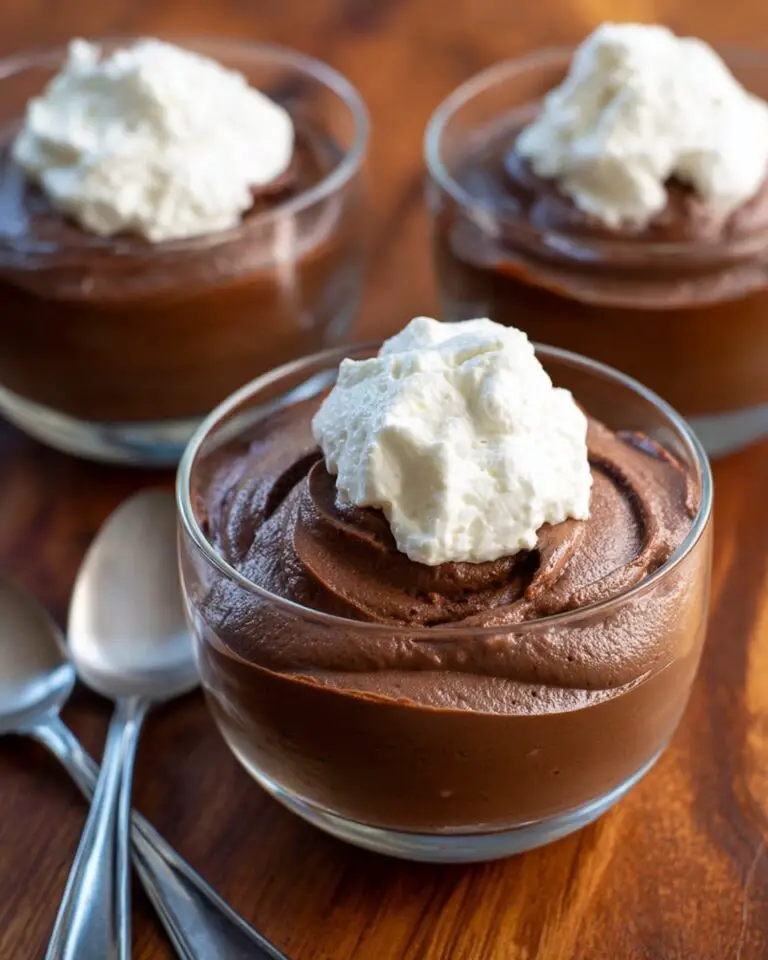
I absolutely adore sharing this Red White and Blue Patriotic Poke Cake Recipe with friends and family. It combines the vibrant flavors of fresh strawberries and blueberries with a light, moist cake punctuated by luscious gelatin-filled pockets, all topped with a dreamy whipped cream. Every bite bursts with festive colors and delightful textures that make it a true showstopper. I love how simple ingredients come together to create a dessert that’s perfect for celebrating special occasions or simply brightening up any day.
Why You’ll Love This Red White and Blue Patriotic Poke Cake Recipe
What really draws me to this Red White and Blue Patriotic Poke Cake Recipe is the flavor balance and its playful texture. The cake is buttery and tender with just a hint of lemon zest that lifts the whole dessert. Then, you’ve got those juicy, tart berries packed into each little hole, which makes every bite fun and flavorful. It’s like eating a fruity surprise that’s creamy, sweet, and fresh all at once. I love how the whipped cream topping adds a cloud-like softness that perfectly complements the fruity fillings without overpowering them.
From a practical standpoint, this recipe is incredibly approachable. Despite the fancy look, it uses straightforward ingredients and simple techniques that anyone can follow. I especially appreciate that you can prep it ahead of time—the cake needs to chill for several hours so the gelatin fillings set beautifully, which makes it a perfect make-ahead dessert for holidays or parties. It truly stands out because it’s visually stunning, has a great mix of flavors and textures, and brings the classic red, white, and blue theme to life in such a delicious way.
Ingredients You’ll Need

The ingredients list is straightforward but essential, and each one plays a critical role in the texture, flavor, or festive color of this cake. From the creaminess of butter and buttermilk to the vibrant fresh berries, every element adds something special that makes this poke cake so irresistible.
- Butter: Using cold butter for the batter and soft butter for greasing ensures a moist crumb and prevents sticking.
- Sugar: Sweetens the batter and berries, balancing the tartness of the fruit.
- Lemon Zest: Adds a bright citrus aroma that lifts the entire dessert.
- Eggs: Provide structure and richness to the cake.
- Vanilla Extract: Enhances the cake’s flavor and the whipped cream topping.
- Baking Powder and Baking Soda: Give the cake its lightness and rise.
- Salt: Balances sweetness and enhances overall flavor.
- Flour: I love using all-purpose or whole wheat pastry flour for just the right texture.
- Buttermilk: Adds moisture and a slight tang to deepen flavor.
- Water: Helps dissolve gelatin and adjust textures in fillings.
- Unflavored Gelatin: Essential for setting the strawberry and blueberry fillings beautifully inside the cake.
- Strawberries and Blueberries: The star ingredients that create the patriotic colors and fresh fruity flavors.
- Lemon Juice: Enhances the brightness of the berry fillings.
- Heavy Whipping Cream: The base for the silky, sweet whipped topping.
Directions
Step 1: Preheat your oven to 350 degrees F. Butter a 9 by 13-inch pan and line it with parchment paper. Don’t forget to butter the parchment paper as well to ensure the cake doesn’t stick.
Step 2: In a large bowl, cream together the cold butter, sugar, and lemon zest until the mixture is light and fluffy. This will create a great base for your cake batter.
Step 3: Beat in the eggs one at a time, making sure to scrape down the sides of the bowl after each addition. This helps ensure everything is fully incorporated and the batter stays airy.
Step 4: Mix in the vanilla extract, baking powder, baking soda, and salt until everything is well combined.
Step 5: Alternately add the flour and buttermilk to the batter, mixing just until combined to avoid overworking the gluten, which could make the cake tough.
Step 6: Pour the batter into your prepared pan and bake for 35 to 40 minutes. You’ll know it’s done when a toothpick inserted into the center comes out clean.
Step 7: Let the cake cool for about 20 minutes. Then, using the handle of a wooden cooking utensil, poke holes all over the surface about 1/4 inch wide and deep. These will be filled with the berry gelatin mixtures.
Step 8: In a small bowl, mix water and unflavored gelatin, and let it bloom for 5 minutes. This activates the gelatin so it sets properly.
Step 9: Puree 2 cups of strawberries in a blender or food processor until smooth.
Step 10: In a medium saucepan, combine the pureed strawberries, sugar, and lemon juice. Bring to a boil, then remove from heat. Stir in the bloomed gelatin mixture and toss in the remaining 1 cup of diced strawberries. Set aside.
Step 11: Repeat the gelatin blooming process with water and gelatin in a small bowl for the blueberry filling.
Step 12: Puree 2 cups of blueberries and add them to a saucepan along with the remaining whole blueberries, sugar, and lemon juice. Cook on the stove until the juice darkens and thickens, about 3 to 4 minutes. Remove from heat, stir in the bloomed gelatin, and let cool for 5 minutes.
Step 13: Alternate spooning the strawberry filling and the blueberry filling into the holes in the cake. I like to work gently to keep the colors distinct, but a little swirling is okay to create a pretty marbled effect.
Step 14: Cover the cake and refrigerate for at least 8 hours or overnight to allow the gelatin fillings to set perfectly inside those pockets.
Step 15: When you’re ready to serve, whip the heavy cream with sugar and vanilla extract until medium peaks form. Taste and add more sugar if you like it sweeter.
Step 16: Spread the whipped cream generously over the top of the set cake.
Step 17: Garnish with additional strawberries and blueberries arranged to mimic an American flag or simply decorate each serving with a strawberry half and a few whole blueberries for a festive touch.
Servings and Timing
This recipe yields about 16 generous servings, making it ideal for a crowd at family gatherings or holiday celebrations. Prep time runs roughly 30 minutes, with about 40 minutes of baking. The most important timing consideration is chilling the cake for at least 8 hours to let the gelatin fillings set properly, so plan accordingly. Altogether, it’s about 9 hours and 20 minutes from start to finish, mostly hands-off during the chill time.
How to Serve This Red White and Blue Patriotic Poke Cake Recipe

When I serve this cake, I love to let its festive colors shine on their own, so I usually keep side dishes simple. Fresh fruit salads or a light lemon sorbet complement the berry flavors beautifully without competing. If you want to get fancy, serving alongside a slightly tart vanilla custard adds extra elegance and richness to the plate.
Presentation means a lot to me, especially with patriotic-themed desserts. I often garnish the whole cake to look like the American flag using sliced strawberries for the stripes and whole blueberries for the stars. It’s not only delicious but also makes a stunning centerpiece. Individual servings look adorable with a strawberry half perched on top and a few blueberries scattered around the plate. Using clear or white plates works best to let the red, white, and blue pop visually.
For beverages, a crisp sparkling rosé or a light fruity white wine pairs wonderfully with the cake’s flavors. For non-alcoholic options, sparkling water with a splash of cranberry juice or a homemade lemonade brightens the meal and keeps the patriotic theme going strong. I prefer serving this cake chilled—it keeps the gelatin fillings firm and the whipped cream fluffy, making every bite refreshing and satisfying. This cake fits perfectly for summer holidays like the Fourth of July, Memorial Day, or Labor Day, but honestly I enjoy it any time I want to impress guests with a colorful, flavorful dessert.
Variations
If you want to customize this Red White and Blue Patriotic Poke Cake Recipe, there are lots of delicious options. For a lighter twist, I sometimes swap buttermilk for a mix of yogurt and milk, which adds tang without extra fat. If fresh berries are hard to find, frozen ones work too—just thaw and drain off excess liquid to avoid sogginess. You can also experiment with other berries like raspberries in place of strawberries for a slightly different flavor profile while keeping that beautiful color contrast.
For those who need dietary modifications, I’ve successfully made this cake gluten-free by using a quality gluten-free flour blend and ensuring gluten-free baking powder. Vegan adaptations are a bit trickier because of the eggs and gelatin, but I’ve experimented using flax eggs and agar-agar for setting the fillings, which yields surprisingly good results with a bit more attention to texture.
Flavor-wise, I recommend trying other accents like orange zest instead of lemon for a sweeter citrus note or adding a splash of almond extract to the whipped cream for extra depth. If you prefer a different cooking method, I’ve even made smaller individual poke cakes in muffin tins for a fun twist, adjusting baking time accordingly. The versatility of this recipe is part of what makes it a favorite in my kitchen.
Storage and Reheating
Storing Leftovers
I always recommend storing leftover poke cake in an airtight container in the refrigerator. Since the cake contains gelatin-based fruit fillings and whipped cream, keeping it chilled is essential to maintain its texture and freshness. Properly covered, the cake stays delicious for up to 3 days. I find a glass or plastic container with a tight lid works best to prevent any fridge odors from affecting the delicate flavors.
Freezing
Because of the whipped cream topping and gelatin fillings, freezing this poke cake isn’t ideal. Freezing can alter the texture of the gelatin and cause separation or watery fillings once thawed. If you do want to freeze it, I suggest removing the whipped cream topping first and storing the cake and fruit layer wrapped tightly in plastic wrap and foil for up to a month. Thaw the cake overnight in the fridge before adding fresh whipped cream and serving.
Reheating
This poke cake is best enjoyed chilled or at room temperature, so reheating isn’t something I usually recommend. Warming it could cause the gelatin fillings to melt and the whipped cream to deflate, ruining the texture. If you want it slightly less cold, just take it out of the fridge 15 to 20 minutes before serving to bring it closer to room temperature without compromising its beautiful set.
FAQs
Can I make this poke cake in advance?
Absolutely! In fact, I recommend preparing it the day before you plan to serve it. The 8-hour chilling period is crucial for the gelatin fillings to set properly, so making it ahead ensures perfect texture and flavor.
What can I substitute if I don’t have buttermilk?
You can easily make a buttermilk substitute by adding 1 tablespoon of lemon juice or white vinegar to 1 1/2 cups of milk. Let it sit for 5 minutes before using. This maintains the slight tang and acidity that buttermilk adds to the cake.
Can I use other fruits for the poke filling?
Yes! While strawberries and blueberries create the classic patriotic colors, you can experiment with raspberries, blackberries, or even cherries for different red and blue hues. Just be mindful of cooking times and gelatin quantities to ensure proper setting.
Is there a way to make this cake less sweet?
Definitely. You can adjust the sugar levels in the batter, berry fillings, and whipped cream to suit your taste. Using less sugar will let the natural tartness of the berries shine through. I like to start with less sugar and then add more if needed after tasting the whipped cream.
How do I prevent the colors from mixing too much in the poke holes?
When filling the holes, spoon the strawberry and blueberry fillings carefully and alternate between them. A little swirling creates a pretty effect, but avoid overmixing. I also like to work slowly and gently press the filling into each hole to keep them distinct and visually striking.
Conclusion
I truly hope you give this Red White and Blue Patriotic Poke Cake Recipe a try because it brings such joy to any celebration with its vibrant colors and delightful flavors. It’s a dessert that’s as fun to make as it is delicious to eat, and I’m confident it will become one of your favorite ways to showcase seasonal berries in style. Happy baking and enjoy every beautiful, tasty bite!
Print
Red White and Blue Patriotic Poke Cake Recipe
- Prep Time: 30 minutes
- Cook Time: 40 minutes
- Total Time: 9 hours 20 minutes
- Yield: 16 servings
- Category: Dessert
- Method: Baking
- Cuisine: American
- Diet: Vegetarian
Description
This Red, White, and Blue Patriotic Poke Cake is a festive and visually striking dessert perfect for celebrations like Independence Day. A moist vanilla cake is baked, then poked with holes to be filled with luscious strawberry and blueberry gelatin and fruit mixtures. Topped with fluffy whipped cream and fresh berries, this cake cleverly showcases the colors of the American flag in every bite.
Ingredients
Cake
- 3/4 cup Cold Butter, plus soft butter for greasing pan
- 1 2/3 cup Sugar
- 1 teaspoon Lemon Zest
- 3 whole Eggs
- 1 tablespoon Vanilla Extract
- 2 teaspoons Baking Powder
- 1/2 teaspoon Baking Soda
- 1/2 teaspoon Salt
- 2 1/4 cup All-Purpose or Whole Wheat Pastry Flour
- 1 1/2 cups Buttermilk
- 1/3 cup Water
Strawberry Gelatin Filling
- 1 package Unflavored Gelatin
- 3 cups Strawberries, finely diced
- 3 tablespoons Sugar
- 1 tablespoon Lemon Juice
- 1/3 cup Water
Blueberry Gelatin Filling
- 1 package Unflavored Gelatin
- 3 cups Blueberries
- 3 tablespoons Sugar
- 1 tablespoon Lemon Juice
- 1/3 cup Water
Whipped Cream Topping
- 1 1/4 cup Heavy Whipping Cream
- 2 tablespoons Sugar
- 1/2 teaspoon Vanilla Extract
Garnish
- Additional Strawberries
- Additional Blueberries
Instructions
- Preheat and prepare pan: Preheat the oven to 350°F. Butter a 9″x13″ baking pan and line it with parchment paper. Butter the parchment paper well, then set aside.
- Cream butter mixture: In a mixing bowl, cream together the cold butter, sugar, and lemon zest until fluffy and well combined.
- Add eggs: Beat in the eggs one at a time, scraping down the sides of the bowl after each addition, until the mixture is light and fluffy.
- Add flavorings and leaveners: Stir in the vanilla extract, baking powder, baking soda, and salt until evenly mixed.
- Add dry and wet ingredients: Alternate adding the flour and buttermilk to the batter, mixing until just combined. Add the 1/3 cup water and gently mix through.
- Bake the cake: Pour the batter into the prepared pan and bake for 35-40 minutes or until a toothpick inserted in the center comes out clean.
- Cool and poke holes: Let the cake cool for 20 minutes. Then, with a 1/4 inch wooden cooking handle, poke holes all over the cake.
- Make strawberry gelatin: In a small bowl, mix the water with one package of unflavored gelatin to bloom for 5 minutes.
- Puree strawberries: Puree 2 cups of the strawberries in a blender or food processor until smooth.
- Cook strawberry mixture: Heat the pureed strawberries with sugar and lemon juice in a medium saucepan to a boil. Remove from heat, stir in the bloomed gelatin and remaining diced strawberries. Set aside.
- Make blueberry gelatin: Bloom the second package of unflavored gelatin in a small bowl with water for 5 minutes.
- Puree blueberries: Puree 2 cups of blueberries in a blender or food processor.
- Cook blueberry mixture: Bring the blueberry puree, whole blueberries, sugar, and lemon juice to a boil in a medium saucepan. Cook for 3-4 minutes until the juice darkens. Remove from heat and stir in the bloomed gelatin until fully combined. Set aside to cool for 5 minutes.
- Fill cake holes: Alternate spooning strawberry and blueberry fillings into the holes in the cake, gently working the fillings into the holes without over mixing to keep colors distinct.
- Chill cake: Refrigerate the cake for 8 hours or overnight until the gelatin fillings are fully set.
- Prepare whipped topping: Beat the heavy whipping cream, sugar, and vanilla extract until medium peaks form. Taste and add more sugar as desired.
- Top cake: Spread the whipped cream evenly over the top of the chilled cake.
- Garnish: Decorate with additional strawberries and blueberries arranged to resemble an American flag or serve individual slices garnished with a half strawberry and a few blueberries.
Notes
- Make sure to cool the cake before poking holes to avoid breaking the cake.
- For best color separation, do not over mix strawberry and blueberry fillings after adding to the holes.
- The cake can be prepared a day in advance to allow flavors to meld and gelatin to fully set.
- Use cold butter and room temperature eggs for optimal cake texture.
- If whole wheat pastry flour is used, the cake will have a slightly nuttier flavor and denser texture.
- Chilling time is important to allow gelatin fillings to firm up properly.
- Whipped cream can be sweetened more or less based on personal preference.