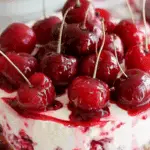
I love this no bake cherry cheesecake because it combines creamy cheesecake, juicy cherry filling, and a crunchy graham cracker crust—all without needing an oven. It’s a no-fuss dessert that’s perfect for summer gatherings or when I want a cool, delicious treat quickly.
Why You’ll Love This Recipe
I’m drawn to this recipe because:
-
It delivers a delightful trio of flavors: fluffy cheesecake, sweet cherry, and crisp crust all layered together
-
The individual portions mean I don’t have to worry about wasting leftovers—I can enjoy guilt-free seconds
-
It’s incredibly versatile—I can swap the fruit, zest the filling, or change the cookie crust for a fresh twist
ingredients
(Here’s a tip: Check out the full list of ingredients and measurements in the recipe card below.)
Cherry Filling
-
2 cups cherries (fresh or frozen), pitted and halved
-
½ cup water
-
2 tablespoons fresh lemon juice
-
½ cup granulated sugar
-
1 tablespoon cornstarch
Cheesecake Layer
-
1 cup heavy whipping cream
-
¾ cup powdered sugar, divided
-
8 ounces cream cheese (1 block), room temperature
-
1 teaspoon vanilla extract
-
5 full-sized graham crackers, crushed
directions
-
Prepare the cherry filling: I start by washing, pitting, and halving the cherries. I combine water and lemon juice in a saucepan over medium heat. In a small bowl, I whisk together sugar and cornstarch, then stir it into the saucepan and cook for 1–2 minutes. I add the cherries and cook gently until the mixture thickens. I let it cool completely—sometimes I speed things up by placing it in the fridge.
-
Make the cheesecake layer: I chill my mixing bowl and beaters for about 5–10 minutes. I whip the heavy cream until it starts to thicken, then slowly add ¼ cup powdered sugar and beat it to stiff peaks. I set it aside in the fridge. In the same bowl, I beat the cream cheese until smooth, then add the remaining ½ cup powdered sugar and vanilla, mixing until creamy. I gently fold in the whipped cream until it’s fully incorporated.
-
Assemble: I spoon a layer of crushed graham crackers into each jar or dish. Then I add a layer of cheesecake filling, followed by a layer of cherry topping. I repeat with another cheesecake layer and top with more cherry filling. Just before serving, I sprinkle a bit of the crushed crackers on top. These can be served immediately or chilled for up to 4 hours.
Servings and timing
-
Servings: Makes 4 individual portions
-
Prep time: About 12 minutes
-
Cook time: 5 minutes (for the cherry filling)
-
Total time: Approximately 50 minutes (including chilling)
Variations
-
I like adding lemon or orange zest to the cheesecake layer for a bright citrus note
-
Sometimes I switch up the crust by using crushed Oreos or Biscoff cookies instead of graham crackers
-
For a different flavor, I swap the cherry topping with strawberry, blueberry, or raspberry compote
-
When serving a crowd, I layer the dessert in a trifle bowl instead of individual jars
storage/reheating
-
Refrigerator: I store the assembled desserts in the fridge for up to one day. If I’m prepping ahead, I keep the components separate—the cherry topping can last up to a week in an airtight container, and the cheesecake layer stays fresh for a day or two
-
Freezer: I don’t freeze this dessert since the texture can change
-
Reheating: Not needed—this dessert is meant to be enjoyed cold
FAQs
What makes this cheesecake no bake instead of baked?
I don’t bake the crust or the filling. It sets by chilling in the refrigerator, giving a light and creamy texture.
Why did my cheesecake filling turn out too soft?
If the whipped cream wasn’t beaten to stiff peaks or the cream cheese wasn’t fully softened, the filling can turn out runny. I make sure everything is properly prepared and give it enough chill time.
How far in advance can I prepare this?
I can prepare the cherry topping up to a week ahead and the cheesecake filling the day before. I usually assemble them the day I plan to serve.
Can I freeze this cheesecake?
I don’t recommend freezing it. The texture of the cream cheese and whipped cream can change after thawing.
Can I double the recipe?
Absolutely. I double the cheesecake and cherry topping ingredients and either make more individual servings or layer it in a large dish for a party.
Conclusion
This no bake cherry cheesecake hits the ideal balance of flavors, textures, and ease. I love how customizable and fridge‑friendly it is—perfect for summer when I don’t want to turn on the oven. Whether I serve it in jars or a larger dish, it’s always a hit, and the leftover cherry filling is a bonus treat.
Print
No Bake Cherry Cheesecake
- Prep Time: 12 minutes
- Cook Time: 5 minutes
- Total Time: 50 minutes
- Yield: 4 servings
- Category: Dessert
- Method: No Bake
- Cuisine: American
- Diet: Vegetarian
Description
This no bake cherry cheesecake combines a creamy, fluffy cheesecake layer with a juicy cherry filling and a crunchy graham cracker crust. It’s an easy, oven-free dessert perfect for summer gatherings or quick indulgent treats.
Ingredients
- 2 cups cherries (fresh or frozen), pitted and halved
- ½ cup water
- 2 tablespoons fresh lemon juice
- ½ cup granulated sugar
- 1 tablespoon cornstarch
- 1 cup heavy whipping cream
- ¾ cup powdered sugar, divided
- 8 ounces cream cheese (1 block), room temperature
- 1 teaspoon vanilla extract
- 5 full-sized graham crackers, crushed
Instructions
- Prepare the cherry filling: Wash, pit, and halve the cherries. Combine water and lemon juice in a saucepan over medium heat. Whisk together sugar and cornstarch, then stir into the liquid and cook 1–2 minutes. Add cherries and continue cooking gently until thickened. Cool completely.
- Make the cheesecake layer: Chill the mixing bowl and beaters for 5–10 minutes. Whip cream until it just begins to thicken, then slowly add ¼ cup powdered sugar and beat to stiff peaks. Refrigerate. In the same bowl, beat cream cheese until smooth, then add the remaining ½ cup powdered sugar and vanilla until creamy. Gently fold in whipped cream until fully combined.
- Assemble: Spoon a layer of graham cracker crumbs into each jar or dish. Pipe or spoon a layer of cheesecake mixture, then a layer of cooled cherry filling. Repeat cheesecake layer, and top with more cherry filling and crushed crumbs just before serving. Serve immediately or chill up to 4 hours.
Notes
- Chill cheesecake and cherry filling ahead to save time on the day of serving.
- Don’t assemble too far in advance to keep the crust crisp.
- Can be adapted with different fruits or crusts for variety.
- Use fully softened cream cheese and cold whipping cream for best texture.
Nutrition
- Serving Size: 1 jar
- Calories: 380
- Sugar: 32g
- Sodium: 110mg
- Fat: 25g
- Saturated Fat: 15g
- Unsaturated Fat: 8g
- Trans Fat: 0g
- Carbohydrates: 35g
- Fiber: 2g
- Protein: 4g
- Cholesterol: 60mg

